
Subscribe to Our Youtube Channel
Related Manuals for KYMCO Xciting 500i


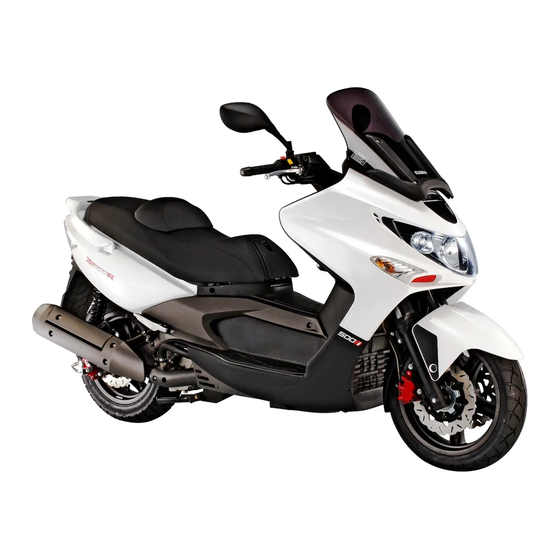
Summary of Contents for KYMCO Xciting 500i
- Page 1 TECHNICAL TRAINING MATERIALS TECHNICAL TRAINING MATERIALS Xciting Series Xciting Series...
- Page 2 Specification Xciting 500i P.1/51...
- Page 3 KEIHIN SYSTEM P.2/51...
- Page 4 XCITING 300i/500i FI PARTS LOCATION ECU---300i ROLL Sensor ※500i ECU is located under the front cover O2 sensor P.3/51...
- Page 5 FUEL PUMP AISV MAP SENSOR IGNITION COIL INJECTOR P.4/51...
- Page 6 SELF-DIAGNOSTIC PROCEDURE Turn the ignition switch “ON” without start the engine , The CELP lamp will light for two second then off. It shows the lamp work normal. PEOPLE S Check Engine Lamp XCITING Check Engine Lamp (CELP) (CELP) P.5/51...
- Page 7 SELF-DIAGNOSIS CELP FAILURE CODES P.6/51...
- Page 8 DTC LIST FOR KEIHIN P.7/51...
- Page 9 P.8/51...
- Page 10 FAILURE CODES CLEARED 1. Turn the key to the ON position and wait for ten seconds. 2. Fully open the throttle and wait for ten seconds. 3. Release the throttle. 4. The indicator will blink twice (0.5 second) quickly. NOTE: The self-diagnosis could not be reset if there’s still trouble in Fi system. Throttle opened fully 10 s...
-
Page 11: Tps/Isc Reset
TPS/ISC RESET 1. Turn the key to the OFF position. 2. Fully open the throttle . 3. Turn the key to the ON position. 4. Release the throttle after waiting for 8 seconds. 5. Turn the key to the OFF position. 6. - Page 12 KYMCO Fi Diagnostic tool Model No. ECU Version DTC Inspect LEA7 DATA Analyze CO Adjust UP Button Down Button Power indicator Enter or Exit DTC indicator(Failure codes) P.11/51...
- Page 13 RECHECK TPS/ISC WITH Fi DIAGNOSTIC TOOL 1. Turn to page 02 on Fi diagnostic tool 2. Release the throttle 3. Refer to standard specifications as below, “ Throttle position ” : 1% below “ Throttle position sensor output voltage ” : 0.5 ± 0.10 Volt. P.12/51...
- Page 14 RECHECK TPS/ISC WITH Fi DIAGNOSTIC TOOL 1. Fully open the throttle. 2. Refer to standard specifications as below, “Throttle position (TP) ”: 94% over “Throttle position sensor output voltage ”: >3.78 Volt. P.13/51...
- Page 15 Fi DIAGNOSTIC TOOL CONNECTION 1. Upward the side stand 2. Turn the engine stop switch to the “RUN” position Upward side stand Diagnostic Tool Connector P.14/51...
-
Page 16: Dtc Inspection
DTC inspection P.15/51... - Page 17 P.16/51...
- Page 18 P.17/51...
- Page 19 DTC cleared P.18/51...
-
Page 20: Data Analysis
Data Analysis P.19/51... - Page 21 P.20/51...
- Page 22 The (TPS) and (ISC) have to reset, when the throttle body MAP, TPS, ISC or ECU has been reinstalled . Remove the screw, then remove the ISC and set plate. ISC/Set Plate Install the ISC and set plate onto the throttle body(Apply oil to new O-ring).
- Page 23 REMOVAL / INSTALLATION Remove the screw of the MAP. Carefully install the MAP into the hole of throttle body after using the engine oil onto the O-ring. INSPECTION O-ring P.22/51...
- Page 24 INSPECTION P.23/51...
-
Page 25: Throttle Body Cleaning
THROTTLE BODY CLEANING 1. Remove the throttle body. 2. Use the carburetor cleaner to clean the throttle body’s butterfly valve. 3. Waiting for ten minutes. 4. Blow the throttle body with a air gun. 5. Install the throttle body. P.24/51... -
Page 26: Fuel Pump Relay
FUEL PUMP RELAY INSPECTION P.25/51... - Page 27 FUEL PUMP REMOVAL / INSTALLATION Hose band REMOVAL Disconnect the fuel pump connector and fuel hose from fuel pump. Remove the six screws, then remove the fuel pump and O-ring. Fuel pump connector Screw INSTALLATION Place a new O-ring onto fuel tank. Be careful not damage the fuel pump wire and make sure of the connector rearward.
- Page 28 FUEL OUTPUT PRESSURE INSPECTION 1. Turn the key to the OFF position. 2. Use the fuel hose clamp. 3. Disconnect the fuel hose from the fuel injector. 4. Connect the fuel pressure gauge. 5. Turn the key to the ON position. Standard:3.0 Bar 5.
-
Page 29: Fuel Injector
FUEL INJECTOR REMOVAL 1. Disconnect the connector from the fuel injector. 2. Remove the bolt of the fuel injector. 3. Take out of the fuel pipe and fuel injector from the Inlet pipe. 4. Remove the fuel injector from the fuel pipe Connector Bolt Caution... -
Page 30: Installation
FUEL INJECTOR REMOVAL / INSTALLATION Groove INSTALLATION 1. Apply the engine oil to a new O-ring. 2. Install the fuel injector into the fuel pipe. 3. Ensure the tab of the fuel injector inserted into the groove of the fuel pipe. 4. - Page 31 FUEL INJECTOR CLEANING Battery Problem: 1. Fuel Injector cannot output the fuel. 2. The Injector injection time (ms) is shorter or longer. Fuel Injector Standard: < 1.6ms Analysis: Injector block (With some carbons). Troubleshooting: 1. Use the specified injector cleaner. 2.
-
Page 32: Tilt Switch
TILT SWITCH INSPECTION P.31/51... -
Page 33: Water Temperature Sensor
WATER TEMPERATURE SENSOR RESISTANCE P.32/51... - Page 34 SENSOR P.33/51...
- Page 35 Specification for Keihin EMS Parts Item Photo Tool Specification 1. Check the label 2. Check if the connector is loosen 1. 39200-LDF2-8000 (ECU) 3. Check if the voltage is within 5V±0.1V 4. Check the MAP version 1610K-LDF2-8000 According to the diagnosis report (IDLE AIR BYPASS VALVE /ISC) 3 MAP SENSOR 13.332kpaABS(1V) ~ 119.990kpaABS(4.2V)
- Page 36 XCITING 500Ri ABS P.35/51...
- Page 37 Anti-Lock Brake System(ABS) Indicator Light Anti-Lock Brake System(ABS) Indicator Light • Meter instruments(For models equipped with ABS) • The ABS indicator light in the meter position .This light will comes on when the ignition switch is turned on and goes off shortly after the vehicle starts moving.it stays off. •...
- Page 38 • ABS is designed to help prevent the wheels from locking up when the brakes are applied hard while running straight. The ABS automatically regulates brake force. Intermittently gaining gripping force and braking force helps prevent wheel lock-up and allows stable steering control while stopping.
- Page 39 • The computers intergrade in the ABS compare vehicle speed with wheel speed. Since non- recommended tires can affect wheel speed, they may confuse,Which can extend distance. •※CAUTION •Use of non- recommended tires may cause malfunctioning of ABS and lead to extended braking distance.The rider could have an accident as a result.
- Page 40 ABS Parts Location ABS Parts Location 1. Front Wheel speed Sensor 2. Front Wheel speed Sensor Rotor 3. Rear Wheel speed Sensor 4. Rear Wheel speed Sensor Rotor 5. ABS Indicator Light 6. ABS Hydraulic Unit 7. ABS diagnosis tool Connector (Near battery position) P.39/51...
-
Page 41: Diagnostic Procedure
DIAGNOSTIC PROCEDURE 1.Connect the KYMCO Fi Diagnostic tool 2.Put the side stand and engine stop switch is at “RUN” position. 3.Connect the diagnostic tool connector Diagnostic tool connector P.40/51... - Page 42 Fi Diagnostic Tool Vehicle’s Model (R&D Drawing NO.) ECU Version DTC Inspect DATA Analyze Adjust UP Button Down Button Power Enter or Exit (Failure codes) P.41/51...
- Page 43 <Picture 1> <Picture 3> <Picture 2> P.42/51...
- Page 44 <Picture 6> <Picture 4> <Picture 7> <Picture 5> <Picture 8> P.43/51...
- Page 45 <Picture 9> <Picture 11> <Picture 12> <Picture 10> P.44/51...
- Page 46 <Picture 13> <Picture 15> The adjust is without function KYMCO Diagnosis 01 Fr Speed 5 km/hr Re Speed 5 km/hr Battery Volt 12.6V <Picture 14> Battery volt: 9.6~16.7V keep function P.45/51...
- Page 47 Wheel Speed Sensor Removal And Installation Remove the screw for front wheel Remove the screw for rear wheel Disconnect the connector Disconnect the connector for front wheel for rear wheel Standard clearance between Sensor and Rotor: 0.8 ~ 1.0mm P.46/51...
- Page 48 ABS ECU& Hydraulic Unit Warning I f remove the ABS ECU screws cause to Hydraulic Unit parts damage the ECU or Kymco do not guarantee the parts. P.47/51...
- Page 49 NOTE : D o n o t d r a i n b r a k e o i l w h e n replacing the new Hydraulic Unit. Because brake oil is fully inside. TORQUE: (1) Oil bolts *4: 35.0N.m (3.5kgf.m) (2) Nut *2 : 8.0N.m (0.8 kgf.m) P.48/51...
- Page 50 WHEEL SPEED SENSOR INSPECTION Front wheel speed Rear wheel speed sensors Standard: 3500~6500 P.49/51...
- Page 51 FI Diagnostic Software For PC Version Ver 2.18 Double click to change the serial port. To close this basic display. To change language Connect ECU to begin diagnosis P.50/51...
-
Page 52: Function Introduction
Function Introduction Command message Throttle Position Start to diagnosis ECU version Change port Exit software RPM condition Failure code list Automatically detect and show the model photo Failure item Showing failure part location photo automatically Vehicle running condition signal showing Show how to figure out the failure code and possible defect cause P.51/51...
Need help?
Do you have a question about the Xciting 500i and is the answer not in the manual?
Questions and answers