
Subscribe to Our Youtube Channel
Related Manuals for NeoRe TG TX Series


Summary of Contents for NeoRe TG TX Series
- Page 1 Installation manual NeoRé TG TX Heat pump air-water NeoRé TG TX NeoRé 8 TG TX NeoRé TG TX NeoRé TG TX NeoRé 8 TG TX HP NeoRé TG TX HP NeoRé TG TX HP NeoRé 6 TG TX HP All rights and changes reserved. Last update - .
-
Page 2: Table Of Contents
Contents Introduction Safety instructions Safety warning ............Safety precautions . - Page 3 Cooling - range of working temperatures ........8.
-
Page 4: Introduction
. Introduction Installation manual extends User manual by more informations. This manual is designed primarily for construction com- panies and heating engineers, which realise installation of outdoor and indoor unit of NeoRé heat pump and connect it to the heating system. Second part of this manual is designed for service organisations and engineers. -
Page 5: Safety Instructions
. Safety instructions Safety warning Read the manual carefully before installing, putting into operation or maintaining the device. Adherence to the described procedures for the installation and operation of the device is important for long-term and trouble-free operation. Faults and defects caused by non-compliance with the safety instructions, installation procedures and operating rules will not be taken into account, not even damage or destruction of other related equipment. -
Page 6: Legal Conditions
In case of fire, disconnect the device from the mains and extinguish with a snow or powder fire extinguisher. In the event of a heating water leak, turn off all circuit breakers located on the indoor unit and contact your service organization. -
Page 7: Storage And Transport Conditions
Storage and transport conditions Indoor unit NeoRé IUTX 6- Environment dust-free, non-aggressive Temperature range to 45°C Relative humidity Outdoor unit OU GMx or OU GPx Environment dust-free, non-aggressive Temperature range to 45°C Relative humidity The outdoor unit must be stored and transported in a vertical position in the original packaging and properly se- cured. -
Page 8: Table Of Technical Parameters
Table of technical parameters Figure . : Table of technical parameters... -
Page 9: Installation Manual
. Installation manual The heat pump may only be installed in accordance with the safety instructions, see chapter Safety instructions (p. ). Working conditions The heat pump can be used as a heat source for • heating • water heating •... -
Page 10: Cooling Circuit
Technical parameters of el. connections nominal voltage V; +/- %; maximum power according to table of technical parameters grid type TN-CS according to ČSN EN ingress protection I according to ČSN EN 6 outdoor unit ingress protection indoor unit ingress protection (with / without cover) Table . - Page 11 If the inside of water tank will be damaged in cause of exceeding the parameters of water, there is no claiming warranty from the manufacturer. If the water does not meet parameters, it is needed to connect a mechanical filter to cold water inlet and install convient water threatment.
-
Page 12: Preparation Of Space For The Outdoor Unit
Preparation of space for the outdoor unit When choosing an area for the outdoor unit, it is necessary to consider current legislation and choose the location so that the day-time or night-time noise limits on the site boundaries are not exceeded. Ambient materials (wall, bushes, solid area, green area, etc.) significantly affect propagation of noise. - Page 13 Dimensions dependent by outdoor unit type Outdoor unit dimension A NeoRé , 8, TGx, NeoRé 6 TGx HP NeoRé 8, TGx HP Table . : Console pitch depending on outdoor unit type (x = TX or MINI) Images . and . (p. ) show the way space can be prepared for installation of the outdoor unit.
- Page 14 Figure . : Outline drawing for the outdoor unit - front view - passage through the wall into the interior; - drainage pit; - concrete masonry; - drainage hose; - outdoor unit; 6 - console with anti-corrosive finish - bracket for console mounting...
-
Page 15: Fitting The Outdoor Unit
Fitting the outdoor unit Before fitting the outdoor unit, it is necessary to check whether the console, on which the unit is to be mounted, is well anchored. Under no circumstances should the outdoor unit be fitted unless the console is securely anchored. The outdoor unit must be fitted with a minimum of two workers. -
Page 16: Indoor Unit Mounting
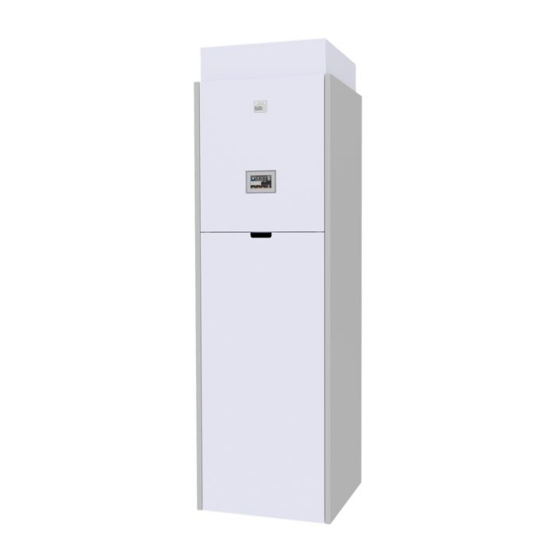
Indoor unit mounting The device must be installed by a professional company authorized by the manufacturer. Do not attempt to install the device yourself. This can damage the equipment or cause personal injury. After selecting the appropriate space for the indoor unit, you can proceed with the installation. To do this, a pair of wheels at the rear of the chassis and for precise stabilization in the horizontal position then use the adjusting screws in the front. -
Page 17: Units Connection
.6 Units connection Several connections must be made between the indoor and the outdoor units without which the heat pump as a whole will not be able to operate. It is necessary to prepare the piping for the refrigerant circuit where the heating medium is transferred. Then it is neces- sary to prepare the power supply cable for the indoor unit, the power supply cable for the outdoor unit, the indoor / outdoor communication cable, the outdoor temperature sensor cable and optionally the indoor temperature sensor. - Page 18 Type Liquid refrigerant Refrigerant gas NeoRé TG / " (6, mm) / " ( , mm) NeoRé 8, , , 6TG (HP) /8" ( , /8" ( ,88 mm) Table . : Refrigerant pipe diameter, wall thickness mm refrigerant is an A L class flammable gas. refrigerant is very low flammable and difficult to ignite.
- Page 19 The refrigerant piping that is laid in a convenient manner should be connected to the indoor and outdoor units. It is important to check the pipe ends for cleanliness before starting the connection. If the ends of the refrigerant piping are not clean or there is even a suspicion there might be dirt inside the pipeline, the pipeline must be replaced with a new one.
- Page 20 Distance in meters Coefficient k= , 8 k= , k= , k= ,8 Table . : Nominal power loss coefficient depending on the length of the refrigerant piping Pipe diameter Diameter of hem A Overlap B 6, mm ( / ") , mm - , mm , mm ( / ")
-
Page 21: Cable Connections
Cable connections The main supply for the entire device is routed to the indoor unit. The outdoor unit is powered from the indoor unit, where it has a separate protection. All supplying and interconnecting cables used must be solid and made of copper. A x mm cable must be used to power the indoor unit, which must be routed separately from the switchboard where it must be separately fused. -
Page 22: Cable Connecting
Cable connecting Terminals X : L -L are designated for connecting the main power cable x mm . The outdoor unit is powered from the indoor unit from the XOU terminals and is connected by a x . mm cable for three-phase outdoor unit, or by a x mm cable (for NeoRé... - Page 23 The diagram in the figure .8 (p. ) shows how the heater cartridge, control relay and mixing valve are connected. The relay connection method is applicable for the XOBAZ, XOAKU, XB . and XB . outputs. The mixing valve is controlled by - V and serves to mix the heating water of the second circuit.
-
Page 24: Connection Of The Heat Pump To The Heating System
Connection of the heat pump to the heating system There are four outlets (optionally the fifth for hot water circulation) on the upper panel of the heat pump indoor unit. Two outlets for connecting the heating water circuit, one for the cold water inlet from the water supply system and one for the hot water outlet from the DHW tank. -
Page 29: Connection Methods For: . . . . . . . . . . . . . . . . . . . . . . . . . . . . . . . . . . . . . . . . . . . . .8 Unauthorized Connections To The Heating System
Connection methods for: Circulation pumps Pumps without power control are used as circulation pumps in the system and therefore, they are controlled only by power supply. Zero and protective conductors are connected to PE and N bridges. The phase conductor is connected to the terminal according to the location of the pump in the system. - Page 30 .8 Unauthorized connections to the heating system Figure . : Unauthorized connections to the heating system...
-
Page 31: Commissioning
. Commissioning Commissioning of the heating system Before starting the circulating pump, the circuit must be filled with water. Water should be filled to a basic pressure of – . bar. From a water column height of m, the basic pressure increases by . bar per metre of height. The maximum water column height is 8 m. -
Page 32: Shutdown
. Shutdown Attention! When shutting down the system completely, the heating system and the heat pump can be damaged or completely destroyed in winter due to freezing. Short-term shutdown If you need to turn off the heat pump briefly, press H/C and/or DHW so that the orange indicator in the upper right corner of the button turns grey. -
Page 33: Faults And Status Messages
6. Faults and status messages Error code structure A fault code consists of four digits. The first two digits indicate critical errors. These are faults that cause the heat pump to stop running. The other two digits indicate the status of the connected temperature sensors. Faults of temperature sensors do not affect the operation of the heat pump. -
Page 34: Faults And Troubleshooting
rd digit - No fault - Faulty outdoor temperature sensor – the sensor is disconnected - Faulty outdoor temperature sensor – the sensor is short-circuited - Faulty building temperature sensor – the sensor is disconnected - Faulty building temperature sensor – the sensor is short-circuited - Faulty DHW temperature sensor –... - Page 35 The heat pump user interface in the States and faults lists the last ten fault states (codes) of the heat pump. Complete operating data is accessible via the heat pump’s web interface. The controller has the Fault autoreset function. Thanks to this function, the heat pump can resume operation after a critical fault has been removed, e.g.
-
Page 36: Status Messages
Fault xxx Low water pressure. If the heating system pressure is lower than .8 bar, the device stops operating in order to avoid damage to the circulating pump. The usual cause is leaking heating water. There may also be damage to the expansion vessel or air leak from its bag. To remove the fault, increase the water pressure in the heating system to . -
Page 37: Protective Functions
is heated continuously to the temperature set by the weather compensation curve for an outdoor temperature of + °C. To correct this, contact a service organization. Status xx x and xx x This status means that the indoor temperature sensor is disconnected or faulty. The indoor temperature sensor is not a standard part of the heat pump installation and it is therefore possible that this status will be displayed permanently. - Page 38 These are protective mechanisms that take care of the safety of the heat pump and protect it from damage or destruction. The following overview lists and explains these safety functions. This list primarily aims to explain the behaviour of the heat pump to the end user or to aid a service organization. In no case it encourages making changes to the product itself or in the service offer.
- Page 39 Water pressure monitoring – heating/cooling water pressure The loss of pressure in the heating system is a serious problem, so when the pressure in the heating system drops below the set value, the entire system stops. The critical pressure value can be set in the service settings under Minimum water pressure . This protection is linked to the autoreset function.
-
Page 40: Service Organization
Both parameters can be set in the service settings as Restart and Restart Threshold. Cooling water temperature deficit Protection against low water temperature during cooling, when the cooling water temperature drops below the set limit. The limit temperature for shutting down the outdoor unit and cooling is set as the cooling water temperature minus the cooling water temperature deficit. -
Page 41: Maintenance Of The Device And Components
. Maintenance of the device and components Thanks to its design, the heat pump is easy to maintain. Basic maintenance is to be performed by a service organization during regular annual inspection. During this inspection, the service organization shall check all important parts of the heat pump, especially the operation of the refrigerant circuit. -
Page 42: Maintenance Of The Indoor Unit
Maintenance of the indoor unit The indoor unit requires only minimum maintenance. The device does not contain components that require maintenance by the user. Use only a damp cloth to clean its surface. Take extra care when the device is in operation and powered. We recommend performing maintenance on the indoor unit outside the heating/cooling season in the non-powered state. -
Page 43: Magnesium Anode Rod
Magnesium anode rod The service life of magnesium anode protection cannot be precisely determined, because it depends on the quality of the water entering the vessel. Therefore, the protection must be visually checked every six months after commissioning. If a large part of the magnesium anode rod is depleted, replace it with a new one. To replace the Mg anode, partially drain the vessel so that the water level in the vessel is below the level of the anode protection. -
Page 44: Maintenance Plan
Maintenance plan Check of operation, errors and statuses Clean up heating water filter and check water flow Check expansion tank pressure Check safety valve operation Check, desludge DHW tank Check, replacement of DHW tank anode rod - enamel tank Check, replacement of DHW tank anode rod - stainless steel tank Check, DHW tank ACES - stainless steel tank Check of circulator function Check the outdoor unit exchanger... -
Page 45: Design Documentation
8. Design documentation Connection of the heat pump to the heating system Designing The impact of the quality of the heating system design is as important as the influence of the quality of water or ma- terials used. Insufficient heat transfer fluid flow leads to an increase in condensation temperature and thus a significant deterioration in COP. - Page 46 view has an adverse effect, decreases the temperature capacity of water, increases compression work and causes cavitation noise. Oxygen and carbon dioxide are corrosive and need to be removed from water. Most of the dissolved gases can be removed from the heating system by deaerating. However, it is not possible to remove gases from the circulating water completely.
- Page 47 welding and soldering. • if possible, use softened water (max. .6 N ), drinking water without treatment is also applicable • dispense suitable non-foaming degreasing agent for removing grease and oils according to the instructions for use in the filling water (cold or warm water alone does not remove oil and grease) •...
-
Page 48: Hydraulic Circuit
• first heat up by slow start of the heat pump performance • deaerate as described above • conduct operational tests to the extent agreed between the investor and the implementer 6) Operation of the heating system - As a rule, the first season of operation is linked with the heating test and fine-tuning of the whole system. - Page 49 If a non-return valve must be used in a hydraulic circuit without a storage tank, it is possible that the unit will report insufficient flow at low pump speed. It is then necessary to increase the minimum possible speed of the circulation pump according to the situation.
-
Page 50: Heating - Range Of Working Temperatures
Heating - range of working temperatures The NeoRé heat pump can operate only within the output water temperature range according to the graph 8. - Working range of output water temperature. The heating system must be designed according to these requirements. The working temperature range must also be taken into account when heating an unheated building (especially in the case of newly completed buildings in winter) and during floor drying. -
Page 51: Floor Drying Program
8. . Floor drying program Floor drying screen (Fig. 8. ) is divided into two parts, the left for adjusting and the right for control. Five time periods can be selected in the table on the left of the screen, while the output water temperature and time range for which the temperature is to be maintained, can be selected for each period. - Page 52 Cooling - range of working temperatures The NeoRé heat pump can only be operated in cooling mode if there is no water condensation on any element of the cooling system. It is therefore only suitable for large area cooling systems such as cooling ceilings, etc. The flooring system can also be used for cooling, but a very limited cooling capacity of such a system is to be expected.
- Page 53 Acoustic parameters The following tables show the acoustic performance values of each outdoor unit type in standard mode and in night attenuation mode (second table). Furthermore, the acoustic pressure values for both modes in the model environment and at varying distances from the outdoor unit are listed. Figure 8.
- Page 54 . Technical data Electrical wiring diagram of the indoor unit Figure . : Electrical wiring diagram of the indoor unit...
- Page 55 Hydraulic wiring diagram of the indoor unit Figure . : Hydraulic wiring diagram of the indoor unit...
- Page 56 Structural BOM Figure . : Structural BOM...
- Page 57 Dimensions Figure . : Dimensions...
- Page 58 Removing the cover Figure . : Removing the cover...
- Page 59 . Manufacturer contact MANUFACTURER NEOTA CZ s.r.o. Štefánikova Brno, Czech Republic Company ID No. VAT ID No. CZ ESTABLISHMENT NEOTA CZ s.r.o. Jankovice Holešov, Czech Republic Phone: + E-mail: support@neota.cz facebook.com/tepelnacerpadlaneore Documents for download All product documentation is also available online at www.neota.cz/en/downloads in PDF format. Online manuals For quick access to manuals from you cellphone you can use QR codes.
Need help?
Do you have a question about the TG TX Series and is the answer not in the manual?
Questions and answers