Table of Contents
Advertisement
Advertisement
Table of Contents

Related Manuals for Metalfire AVENUE Series

Summary of Contents for Metalfire AVENUE Series
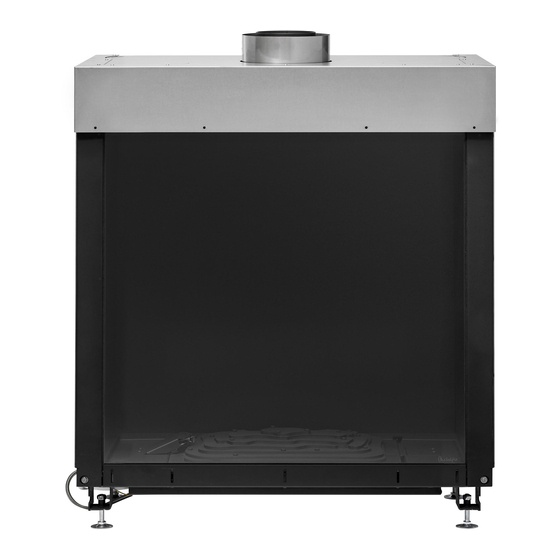
- Page 1 AVENUE SERIES AVENUE MF 600-75 GHE AVENUE MF 700-60 GHE AVENUE MF 800-75 GHE AVENUE MF 900-60 GHE AVENUE MF 1050-40 GHE AVENUE MF 1050-60 GHE AVENUE MF 1050-75 GHE AVENUE MF 1300-40 GHE AVENUE MF 1300-60 GHE AVENUE MF 1600-40 GHE...
- Page 2 AVENUE_GHE_EN_07...
-
Page 3: Table Of Contents
5.2.2 Positioning the fireplace ........................16 5.2.3 Installing fireplace with standard Metalfire surround ................ 17 5.2.4 Installing the fireplace without Metalfire+ frame underneath ............20 Flue configuration ............................. 25 5.3.1 Concentric flue system components ....................25 5.3.2 Configuration ............................. 26 Convection system ........................... - Page 4 Error analysis ..............................99 Examples of error messages: ........................99 Registering the remote control again: ..................... 100 Possible error messages........................101 Fault reset............................... 102 Guarantee clause ............................103 Guarantee period ............................ 103 Exclusion ..............................103 Proviso ..............................103 AVENUE_GHE_EN_07...
-
Page 5: Introduction
2 Introduction We thank you for your confidence in the Metalfire fireplace that you have purchased. Our products guarantee many years of heating comfort. Read these installation and use instructions carefully before starting the installation. Afterwards, you hand them to the customer. -
Page 6: Safety
Do not use the appliance if the glass in the door is cracked or broken. If the glass or the door are defective, a recognized Metalfire dealer must replace them immediately. These gas fireplaces radiate significant levels of heat. The entire outside of the fireplace becomes extremely hot (the metalwork, door, glass, surface and surround, etc.). -
Page 7: Technical Specifications
4 Technical specifications 4.1 Fireplace specifications Type AVENUE MF 600-75 GHE - AVENUE MF 700-60 GHE C11,C31,C91 C12,C32,C42,C52,C82 Nominal Supply Load Burner Consump Category Cat. Gas type Heat Injectors Efficiency concentration pressure Qn (Hi) pressure tion Efficiency output mbar mbar m³/h Ø... - Page 8 Type AVENUE MF 800-75 GHE - AVENUE MF 900-60 GHE C11,C31,C91 C12,C32,C42,C52,C82 Nominal Supply Load Burner Consump Category Cat. Gas type Heat Injectors Efficiency concentration pressure Qn (Hi) pressure tion Efficiency output mbar mbar m³/h Ø 9.75 18.6 1.02 84.5 Class 1 Class 5 Ø...
- Page 9 Type AVENUE MF 1050-60 GHE - AVENUE MF 1050-75 GHE - AVENUE MF 1300-60 GHE C11,C31,C91 C12,C32,C42,C52,C82 Nominal Supply Load Burner Consump Category Cat. Gas type Heat Injectors Efficiency concentration pressure Qn (Hi) pressure tion Efficiency output mbar mbar m³/h Ø...
- Page 10 Type AVENUE MF 1050-40 GHE C11,C31,C91 C12,C32,C42,C52,C82 Nominal Supply Load Burner Consump Category Cat. Gas type Heat Injectors Efficiency concentration pressure Qn (Hi) pressure tion Efficiency output mbar mbar m³/h ø1,8 18,8 0,99 84,8 Class 1 ø1,8 I2E+ ø1,8 23,7 1,05 83,5 Class 1...
- Page 11 Type AVENUE MF 1300-40 GHE C11,C31,C91 C12,C32,C42,C52,C82 Nominal Supply Load Burner Consump Category Cat. Gas type Heat Injectors Efficiency concentration pressure Qn (Hi) pressure tion Efficiency output mbar mbar m³/h Ø 10.22 8.37 18.8 1.082 Class 1 Ø I2E+ Ø 9.91 8.20 23.6...
- Page 12 Type AVENUE MF 1600-40 GHE C11,C31,C91 C12,C32,C42,C52,C82 Nominal Supply Load Burner Consump Category Cat. Gas type Heat Injectors Efficiency concentration pressure Qn (Hi) pressure tion Efficiency output mbar mbar m³/h ø 2,1 11,5 18,7 1,22 74,3 Class 2 ø 2,1 I2E+ ø...
- Page 13 Overview of countries I2ELL I2E+ I3B/P I3B/P G20/G25 - G30 30 G30 50 G30/G31- 20mbar 25mbar 20 mbar 20mbar 20/25 mbar mbar mbar 28-30/37 mbar √ √ √ √ √ √ √ √ √ √ √ √ √ √ √ √...
-
Page 14: Gas And Electricity Connection
Both connections must always be accessible for service purposes. gas flexible connectors ISO 7 R1/2” + electric cable 4.3 Conversion to another gas type. Adjustments to convert the fireplace for use with a different gas type may only be performed by the manufacturers, namely Metalfire. AVENUE_GHE_EN_07... -
Page 15: Installation Instructions And Positioning
There must be a minimum distance of 100 mm between the fireplace and the sidewalls. Metalfire offers a set of 15 mm insulation boards made of calcium silicate and cement for every type of fireplace, which can be installed directly on the fireplace. -
Page 16: Positioning The Fireplace
5.2.2 Positioning the fireplace The fireplace is supplied with 4 adjustable support feet. The height of the support feet can be adjusted from the inside of the fireplace as well as from the outside. If the highest position of the support feet is not sufficient, a supporting structure must be built on which the fire can be placed. -
Page 17: Installing Fireplace With Standard Metalfire Surround
There must be a minimum distance of 100 mm between the fireplace and the sidewalls. Metalfire offers a set of 15 mm insulation boards made of calcium silicate and cement for every type of fireplace, which can be installed directly on the fireplace. - Page 18 There must be a minimum distance of 100 mm between the fireplace and the sidewalls. Metalfire offers a set of 15 mm insulation boards made of calcium silicate and cement for every type of fireplace, which can be installed directly on the fireplace.
- Page 19 The option must always be available to supply room air through the grates at the bottom of the sidewalls, and to keep the gas and electricity connection accessible. Hot air outlet into the room Flue pipe Flexible connectors for convection air Fireplace surround Optional frame on the...
-
Page 20: Installing The Fireplace Without Metalfire+ Frame Underneath
5.2.4 Installing the fireplace without Metalfire+ frame underneath If the fireplace is not finished with a full Metalfire+ frame, the support brackets provided must be used for the model with the door, the corner model and the triangular model. This is necessary to ensure that the door or the glass is always dismantled correctly. - Page 21 5.2.4.1 Front of fireplace with door option For the finish without the Metalfire+ frame, the side and top must be aligned with the inside of the fixed frame on the appliance. A 20-mm gap is required underneath to allow the door to open.
- Page 22 5.2.4.2 Front of fireplace with glass insert The top of the finish may be slightly lower than the galvanised cover plate. Aligned with the seal groove Position the top of the finish in line with the top of the appliance’s seal groove. No spacers are required at the bottom of the fireplace front with glass insert;...
- Page 23 5.2.4.3 Corner and triangular fireplace The top of the fireplace must be finished 5 mm higher than the inside of the fireplace. There must be a gap of 5 mm at the bottom to allow the glass to be removed or replaced. The top of the finish can be aligned with the top of the glass profile and the inside edge of the fireplace.
- Page 24 The wall finish on the sides and front is aligned with the glass support frames. AVENUE_GHE_EN_07...
-
Page 25: Flue Configuration
5.3 Flue configuration 5.3.1 Concentric flue system components Only ‘Eontop Metaloterm’ concentric flues (US system) may be used to connect to the fireplaces. A space of at least 50 mm must be kept free between the outside of the flue and the wall or ceiling. The outer pipe casing can reach temperatures of up to 140 °C. -
Page 26: Configuration
5.3.2 Configuration 5.3.2.1 Wall duct 5.3.2.1.1 Avenue 600-75 / Avenue 700-60 Maximum horizontal configuration for Ø130/200 for natural gas G20/G25 and LPG G30/G31 The baffle is not used in the highlighted area There must always be a minimum length of 1 metre vertically above the fireplace before a 90° bend may be used. Using the baffle The baffle is not used in the highlighted area. - Page 27 Ø100/150 Maximum horizontal configuration for only for natural gas G20/G25 (Not for LPG!) The baffle is not used in the highlighted area. There must always be a minimum of a 1 metre length of flue vertically above the fireplace before a 90° bend may be used.
- Page 28 5.3.2.1.2 Avenue 800-75 / Avenue 1050-75 / Avenue 900-60 / Avenue 1050-60 / Avenue 1300-60 Maximum horizontal configuration for Ø130/200 for natural gas G20/G25 and LPG G30/G31 The baffle is not used in the highlighted area There must always be a minimum length of 1 metre vertically above the fireplace before a 90° bend may be used. Using the baffle The baffle is not used in the highlighted area.
- Page 29 Ø100/150 Maximum horizontal configuration for only for natural gas G20/G25 (Not for LPG!) The baffle is not used in the highlighted area. There must always be a minimum of a 1 metre length of flue vertically above the fireplace before a 90° bend may be used.
- Page 30 5.3.2.1.3 Avenue 1050-40 Maximum horizontal configuration for Ø130/200 for natural gas G20/G25 and LPG G30/G31 The baffle is not used in the highlighted area There must always be a minimum length of 1 metre vertically above the fireplace before a 90° bend may be used. Using the baffle The baffle is not used in the highlighted area.
- Page 31 Ø100/150 Maximum horizontal configuration for only for natural gas G20/G25 (Not for LPG!) The baffle is not used in the highlighted area. There must always be a minimum of a 1 metre length of flue vertically above the fireplace before a 90° bend may be used.
- Page 32 5.3.2.1.4 Avenue 1300-40 Maximum horizontal configuration for Ø130/200 for natural gas G20/G25 The baffle is not used in the highlighted area There must always be a minimum length of 1 metre vertically above the fireplace before a 90° bend may be used. Using the baffle The baffle is not used in the highlighted area.
- Page 33 5.3.2.1.5 Avenue 1600-40 Maximum horizontal configuration for Ø130/200 for natural gas G20/G25 The baffle is not used in the highlighted area There must always be a minimum length of 1 metre vertically above the fireplace before a 90° bend may be used. Using the baffle The baffle is not used in the highlighted area.
- Page 34 5.3.2.2 Roof duct Ø100/150 Configuration for natural gas G20/25 and LPG G30/G31 Fireplace type Min. vertical (V) Max. vertical (V) Baffle Avenue MF 600-75 GHE 1 metre + vertical 12 m insert into appliance outlet Avenue MF 700-60 GHE 1 metre + vertical 12 m insert into appliance outlet...
- Page 35 5.3.2.3 Roof duct through existing chimney Ø100/150 Configuration for natural gas G20/25 and LPG G30/G31 Chimney 150(min) Flue pipe Ø100. Fireplace type Min. vertical (V) Max. vertical (V) Baffle 1 metre + vertical outlet Avenue MF 600-75 GHE 12 m insert into appliance 1 metre + vertical outlet Avenue MF 700-60 GHE...
- Page 36 5.3.2.4 Sloping roof duct/wall duct 5.3.2.4.1 Avenue 600-75 / Avenue 700-60 Ø130/200 Configuration for natural gas G20/G25 and LPG G30/G31 See Section 5.3.2.1 Wall Duct Ø130/200 For each additional 90° bend, add 1 metre of vertical flue or remove 1 metre from the horizontal flue. For each additional 45°...
- Page 37 Ø100/150 Configuration for only for natural gas G20/G25 (Not for LPG!) See Section 5.3.2.1 Wall Duct Ø100/150 For each additional 90° bend, add 1 metre of vertical flue or remove 1 metre horizontally. For each additional 45° bend or less, add 0.5 metre of vertical flue or remove 0.5 metre of horizontal flue. The baffle is removed from the appliance in this configuration.
- Page 38 5.3.2.4.2 Avenue 800-75 / Avenue 1050-75 / Avenue 900-60 / Avenue 1050-60 / Avenue 1300-60 Ø130/200 Configuration for natural gas G20/G25 and LPG G30/G31 See Section 5.3.2.1 Wall Duct Ø130/200 For each additional 90° bend, add 1 metre of vertical flue or remove 1 metre from the horizontal flue.
- Page 39 Ø100/150 Configuration for only for natural gas G20/G25 (Not for LPG!) See Section 5.3.2.1 Wall Duct Ø100/150 For each additional 90° bend, add 1 metre of vertical flue or remove 1 metre horizontally. For each additional 45° bend or less, add 0.5 metre of vertical flue or remove 0.5 metre of horizontal flue. The baffle is removed from the appliance in this configuration.
- Page 40 5.3.2.4.3 Avenue 1050-40 Ø130/200 Configuration for natural gas G20/G25 See Section 5.3.2.1 Wall Duct Ø130/200 For each additional 90° bend, add 1 metre of vertical flue or remove 1 metre from the horizontal flue. For each additional 45° bend or less, add 0.5 metre of vertical flue or remove 0.5 metre of horizontal flue. The baffle is removed from the appliance in this configuration.
- Page 41 Ø100/150 Configuration for only for natural gas G20/G25 (Not for LPG!) See Section 5.3.2.1 Wall Duct Ø100/150 For each additional 90° bend, add 1 metre of vertical flue or remove 1 metre horizontally. For each additional 45° bend or less, add 0.5 metre of vertical flue or remove 0.5 metre of horizontal flue. The baffle is removed from the appliance in this configuration.
- Page 42 5.3.2.4.4 Avenue 1300-40 Ø130/200 Configuration for natural gas G20/G25 See Section 5.3.2.1 Wall Duct Ø130/200 For each additional 90° bend, add 1 metre of vertical flue or remove 1 metre from the horizontal flue. For each additional 45° bend or less, add 0.5 metre of vertical flue or remove 0.5 metre of horizontal flue. The baffle is removed from the appliance in this configuration.
- Page 43 5.3.2.4.5 Avenue 1600-40 Ø130/200 Configuration for natural gas G20/G25 See Section 5.3.2.1 Wall Duct Ø130/200 For each additional 90° bend, add 1 metre of vertical flue or remove 1 metre from the horizontal flue. For each additional 45° bend or less, add 0.5 metre of vertical flue or remove 0.5 metre of horizontal flue. The baffle is removed from the appliance in this configuration.
-
Page 44: Convection System
A suction opening must be provided for the supply of room air at the bottom in the sidewalls of the appliance’s surround or on the front side of the surround or add-on frame. Metalfire supplies ‘AIRBOX’ inlet grates or modified frame designs for this. -
Page 45: Gas And Electricity Connection
5.5 Gas and electricity connection The fireplace must be connected to the gas type specified on the rating plate on the appliance. All control components with electrical connections and the ISO7-R1/2” gas connection are in a separate box that is connected to the fireplace via flexible gas hoses. As standard practice, this is connected to the left-hand side of the fireplace. -
Page 46: Gas Control Components
5.6 Gas control components 5.6.1 Honeywell ESYS – black remote control 5.6.1.1 Control components 1. Receiver DFGT-03MC01 2. Electronic burner unit S4965C3037B 3. Gas valve VK4100 4. Remote control AVENUE_GHE_EN_07... - Page 47 1 2 3 4 6 7 8 Connection possibility for domotics (house automation system) APS-CHECK Extra contact if optional exhaust fan is used Feedback contact if optional exhaust fan is used OPTION Under construction VALVE/EXHAUST Start signal for exhaust fan, if used GAS VALVE Connection 2nd gas valve AVENUE_GHE_EN_07...
- Page 48 5.6.1.2 General connection diagram: AVENUE_GHE_EN_07...
- Page 49 Connection possibility for domotics (house automation system) APS-CHECK Extra contact if optional exhaust fan is used Feedback contact if optional exhaust fan is used OPTION Under construction VALVE/EXHAUST Start signal for exhaust fan, if used GAS VALVE Connection 2nd gas valve AVENUE_GHE_EN_07...
- Page 50 Connection diagram with flue gas fan 5.6.1.3 EFC 21 control for flue gas fan A: Fuse B: Internal control pressure difference switch C: Output to fan motor G: Supply voltage 230V 50Hz H: Input On/Off signal from the fireplace electronics (FAN) I: Release signal to the fireplace electronics (pressure switch) Connection possibility for domotics (house automation system)
- Page 51 5.6.1.4 Connection of the home automation system to the receiver Two external connection terminals are provided for this: blue terminal 1 and 2. When these terminals receive the appropriate signals, the fire can be controlled by a home automation system. Once the fire is being controlled by the home automation system, it is no longer permitted to use the remote control supplied.
-
Page 52: Opening And Closing The Fireplace
5.7 Opening and closing the fireplace 5.7.1 Front of fireplace with door option Opening the door The door structure consists of a metal frame in which a ceramic pane of glass is fitted. At the bottom of the door frame, there are hinges that allow the door to open to 53°. At the top of the door there is a pushbutton latch. - Page 53 5.7.1.1 Removing the door Once the door is open, it can be placed in the slot above by lifting it from underneath. Now the two bottom hinge bolts can be loosened using a 12 mm spanner. AVENUE_GHE_EN_07...
- Page 54 The door can then be removed To put the door back, follow the same steps in the reverse order. AVENUE_GHE_EN_07...
-
Page 55: Front Of Fireplace With Glass Insert
5.7.2 Front of fireplace with glass insert 5.7.2.1 Removing the glass Place the supplied suction cup in the middle of the glass. Make sure that the suction cup is properly attached. At the top of the fireplace, there is a lever concealed in the convection opening. The side closures will be shifted if the lever is moved in an anticlockwise direction. - Page 56 The glass can then be taken out of the fireplace. 5.7.2.2 Putting the glass back To put the glass back in the fireplace, follow the same steps in the reverse order When putting the glass back, make sure that the glass is in the middle of the seal. This will ensure that the fireplace is properly sealed.
-
Page 57: Corner And Triangular Fireplace
5.7.3 Corner and triangular fireplace 5.7.3.1 Removing the front glass Place the supplied suction cups in the middle of the glass. Make sure that the suction cup is properly attached. There are closures for the glass concealed in the convection openings in the top of the fireplace. Once the supplied suction cups have been attached to the glass, these closures can be unlatched by pushing them upwards. - Page 58 To remove the glass from the appliance, the glass must first be tilted slightly forwards at the top, and then lifted enough so that it is released from the seal joint underneath. Now the glass can be tilted forwards at the bottom and removed from the fireplace. AVENUE_GHE_EN_07...
- Page 59 5.7.3.2 Replacing the side glass To replace the side glass, the front pane, the rear wall lining, the bottom plate, and the silicone plugs must first be removed. After that, use an 8 mm spanner to remove all the M5 flange nuts that are holding the clamping frame for the side glass in place Once the clamping frame has been removed, the side glass can also be removed and replaced from the inside.
-
Page 60: Installing The Cast Iron Reeded Panels
Right rear corner 5.9 Dismantling the burner unit 5.9.1 Avenue series height 60 and 75 To dismantle the burner unit in the fireplace, the door first has to be removed, or the front glass must be taken out (see Section 5.6). - Page 61 Now unscrew the pilot flame and fold it to the side so that the compression fittings on the burner unit can be accessed. Undo the compression fittings using a size 17 and 19 spanner size. The burner can be removed from the appliance after the four screws at the bottom of the burner have been unscrewed.
-
Page 62: Avenue Series Height 40
5.9.2 Avenue series height 40 To dismantle the burner unit in the fireplace, the door first has to be removed, or the front glass must be taken out (see Section 5.6). After that, carefully remove the logs and vermiculite granules. - Page 63 Unscrew the oxypilot. The oxypilot is mounted on a support plate on the burner and fixed with 2 screws of M4 The oxypilot protectionplate is fixed with 2 screws of M4 on the burner. AVENUE_GHE_EN_07...
- Page 64 If oxypilot is unscrewed, unscrew the 4 screws M5 of the burner. Brander Burner AVENUE_GHE_EN_07...
-
Page 65: Dismantling The Baffle
5.10 Dismantling the baffle The baffle is fitted in appliance. Depending on the flue pipe configuration (see Section 5.3), it may be necessary to remove the baffle. The baffle is in the top of the appliance. It rests on two brackets. There are two bolts that hold the baffle in place at the front. -
Page 66: Positioning The Diaphragm In The Fireplace
5.11 Positioning the diaphragm in the fireplace A diaphragm may have to be installed in the fireplace on flue gas outlet to ensure that the flue pipe configuration functions properly (see Section 5.3). To be able to install the diaphragm, the door or the glass insert and the baffle must first be removed. Now the appropriate diaphragm can be installed. -
Page 67: Activating The Remote Control
This registration takes place automatically if the power to both devices is switched on within 5 minutes of each other. The remote control is bounded with the fireplace by Metalfire+. If this procedure must be reinitialized, follow instructions on chapter 8.2. -
Page 68: Checking The Flue Gas Discharge And Air Supply
5.13 Checking the flue gas discharge and air supply. The correct operation of the concentric flue system must be checked. The flue for the flue gases must be checked before the basic fireplace test is started. The draught in the flue can be checked by using a gas pipette. -
Page 69: Placing The Ceramic Logs
5.15 Placing the ceramic logs Ensure that nothing ends up on or in the pilot flame, and between the ignition and thermocouple pins when positioning the wooden logs and vermiculite granules. Make sure that no material ends up on the door seal or seal groove when putting the vermiculite granules into the fireplace. -
Page 70: Smoke Style Logs
5.15.1 Smoke style logs 5.15.1.1 Avenue MF 600-75 GHE et Avenue MF 700-60 GHE AVENUE_GHE_EN_07... - Page 71 AVENUE_GHE_EN_07...
- Page 72 AVENUE_GHE_EN_07...
- Page 73 AVENUE_GHE_EN_07...
- Page 74 5.15.1.2 Avenue MF 800-75 GHE, Avenue MF 900-60 GHE, Avenue MF 1050-60 GHE, Avenue MF 1050-75 GHE and Avenue MF 1300-60 GHE AVENUE_GHE_EN_07...
- Page 75 AVENUE_GHE_EN_07...
- Page 76 AVENUE_GHE_EN_07...
- Page 77 AVENUE_GHE_EN_07...
- Page 78 5.15.1.3 Avenue MF 1050-40 GHE AVENUE_GHE_EN_07...
- Page 79 AVENUE_GHE_EN_07...
- Page 80 5.15.1.4 Avenue MF 1300-40 GHE AVENUE_GHE_EN_07...
- Page 81 5.15.1.5 Avenue MF 1600-40 GHE AVENUE_GHE_EN_07...
- Page 82 AVENUE_GHE_EN_07...
- Page 83 AVENUE_GHE_EN_07...
-
Page 84: Smoke Style Deluxe Logs Avenue Mf 600-75 Ghe Et Avenue Mf 700-60 Ghe
5.15.2 Smoke style DELUXE logs Avenue MF 600-75 GHE et Avenue MF 700-60 GHE AVENUE_GHE_EN_07... - Page 85 AVENUE_GHE_EN_07...
- Page 86 AVENUE_GHE_EN_07...
- Page 87 AVENUE_GHE_EN_07...
-
Page 88: Small Stones
5.16 Small stones Avenue MF 1050-40 GHE 1S, Avenue MF 1300-40 GHE 1S and Avenue MF 1600-40 GHE 1S No small stones shall be put in the pilot flame and between the ignition electrodes and ionization pins. The supplied stones must be divided evenly across the burner and the secondary air supply grate. On the burner surface, one layer of stones must be applied, divided evenly. -
Page 89: Operating Instructions
Do not use the appliance if the glass in the door is cracked or broken. If defective, the glass must be replaced immediately by a competent Metalfire installer. These gas fireplaces radiate significant levels of heat. The entire outside of the fireplace becomes extremely hot (the metalwork, glass in the door, surface and surround). -
Page 90: Screen And Buttons
6.2.2 Screen and buttons Screen Manual operation Closed (left) or open fireplace type (right) Atmospheric fireplace is switched on Atmospheric fireplace can be ignited Failure of atmospheric fireplace can be reset (right) Burner off/setting lower (left), burner on/setting higher ignited) An action is in progress (e.g. -
Page 91: User Menu
6.2.3 User menu The user menu can be used to choose between Ecowave, manual flame height control or manual temperature control. The clock can also be set using this menu. To activate the Ecowave menu, press the menu button once while on the standard screen. The following screen then appears: Two symbols appear: double arrow:... -
Page 92: Controlling The Fire
6.2.4 Controlling the fire. Activate the display by pressing one of the four keys. The following display then appears. 6.2.4.1 Manual flame height control You light the fire by simultaneously pressing both arrow keys. Once the pilot flame has been detected, the main burner can be activated by pressing the arrow key twice. - Page 93 Igniting and turning off the second burner unit The Avenue series is equipped with a second burner unit. When the fireplace is first turned on, both burners are You can turn the second burner off by holding down the menu button and then pressing the downward arrow key.
-
Page 94: Installation Menu
6.2.5 Installation menu Select the installation menu as follows: • If selected, leave the User menu • Then keep key pressed for ten seconds In the Installation Menu the following choices can be made: • 10- or 24-hours time representation •... - Page 95 6.2.5.3 Day time periods (II, IV of VI) Press key a few times until one of the displays below is shown. Select the required day time periods (II, IV or VI) by pressing key Wait a few seconds or press key to leave the menu 6.2.5.4 Behaviour Choice Wave...
-
Page 96: Replacing The Batteries
Replacing the batteries The batteries need to be replaced if the ‘ ’ battery symbol flashes on the screen. Replacing the batteries is done as follows: Remove the battery cover on the back of the remote control by sliding it downwards a few millimetres (see Figure 1) and then lifting it up. -
Page 97: Maintenance
7 Maintenance 7.1 Cleaning the glass Always switch off the appliance and allow it to cool down completely before starting to clean the glass. A deposit may form over time on the inside of the glass. Wiping the glass must be done carefully: use enough liquid, avoid pressure (no squeaking), be careful when removing the dirt. -
Page 98: Annual Maintenance
7.2 Annual maintenance The fireplace and the flue must be cleaned on an annual basis. The annual maintenance of the fireplace must be performed by a recognised fitter. The gas supply must be shut off and the electricity must be disconnected before performing the inspection and cleaning the inside of the fireplace. -
Page 99: Error Analysis
8 Error analysis The fireplace control works using two-way communication between the RF remote control and the receiver. As a result, error messages may be displayed on the remote control screen. 8.1 Examples of error messages: Communication failure between the RF remote control and the fireplace. The triangular symbol flashes. -
Page 100: Registering The Remote Control Again
8.2 Registering the remote control again: Unplug power supply of fireplace Hold the menu button down for 10 seconds until the clock flashes in the upper left corner. Then press the menu button briefly once more. The screen display as shown in the figure on the left will appear Re-plug power supply of fireplace Press both arrow keys at the same time The registration will begin and the screen display as shown in the figure on... -
Page 101: Possible Error Messages
8.3 Possible error messages. Error Error type Error description code No fault / power-up This indicates no fault situation. The value is set to zero in case of a power-up of the DFGT ESYS communication failure The communication with the ESYS electronic burner unit fails Check wiring Internal temparture to high The internal temperature of the DFGT is too high... -
Page 102: Fault Reset
Check if error can be reset. If error comes back, there is no ignition current detected. Pilot flame or electronic burner unit are defect. The fan control EFC21 can’t reach the underpressure in the APS related error chimney. This is the cause of the shutdown of the fireplace. Check fan function with EFC21. -
Page 103: Guarantee Clause
Using non-original Metalfire parts and electrical and electronic parts that are not approved by Metalfire. 9.3 Proviso Metalfire N.V. reserves the right to modify its appliances, and amend its brochures, installation manuals and user manuals at any time and without prior notice.
Need help?
Do you have a question about the AVENUE Series and is the answer not in the manual?
Questions and answers