
Related Manuals for ECHO Robotics TM-2000


Summary of Contents for ECHO Robotics TM-2000
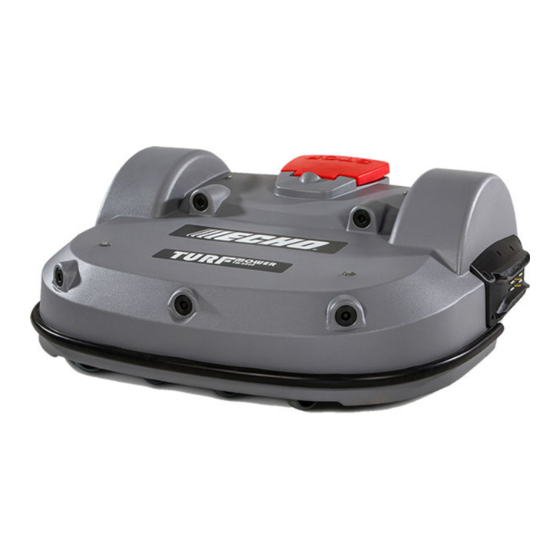
- Page 1 Robotic Mower Technical Manual TM-2000 P/N 99922205383 VERSION 1.3 03/23/2020 ENGLISH ©2020 ECHO Incorporated. All Rights Reserved...
-
Page 2: Table Of Contents
ABLE OF ONTENTS Table of Contents Chapter: 1 Safety Information ......2 Safety Symbols . - Page 3 ABLE OF ONTENTS Chapter: 9 Error Messages ....... 41 Chapter: 10 Maintenance .
- Page 4 The robot has been designed to high safety standards. Risk is always possible. Read and understand all safety informa- tion. Genuine ECHO Robotics parts are available only from an authorized ECHO Robotics Dealer. Always supply a model and serial number when purchasing parts and assemblies. Only use and authorized ECHO Robotics Dealer for service proce- dures.
-
Page 5: Safety Information
AFETY NFORMATION AFETY YMBOLS 1 Safety Information 1.1 Safety Symbols Throughout this manual and on the product itself, you Safety and Information Label will find safety alerts and helpful, informational messages preceded by symbols or key words. The Caution: The robot can be dangerous if misused. following is an explanation of those symbols and key words and what they mean to you. -
Page 6: Charging And Turning The Robot On
HARGING AND URNING THE OBOT AFETY YMBOLS 2 Charging and Turning Open the stop button lid to access the Smartbox. the Robot ON Place the robot on the charging station. Turn the charging station ON and charge the robot for a minimum of 80 minutes. -
Page 7: Theory Of Operation
HEORY OF PERATION AFETY YMBOLS 3 Theory of Operation The robot works in a random pattern. A peripheral wire buried in the ground defines the border of the working area. The charging station energizes the peripheral wire which generates a magnetic field within the working area. When the robot senses the magnetic field above the location of the peripheral wire, it stops, turns back into the working area, and continues working. -
Page 8: System Components
YSTEM OMPONENTS ERIPHERAL 4 System Components 4.2 Station Loop Wire The station loop wire guides the robot in and out of the charging station. 1 – Robot 1 – Station loop wire 2 – Charging station 2 – Charging station 3 –... -
Page 9: The Track Border
YSTEM OMPONENTS RACK ORDER 4.4 The Track Border The track border is a path the robot follows when returning to a charging station. The minimum width is 2.5 ft. (0.8m), the maximum width is 10 ft. (3.0 m). The robot randomly chooses a value between the minimum and maximum width to avoid tracking. -
Page 10: Robot Components
OBOT OMPONENTS RACK ORDER 5 Robot Components NOTE: The serial/model number and FCC labels are located on the bottom side of the stop button lid. Chassis Assembly Cover Assembly 1 – Stop button lid/ 13 – Rear wheel 2 – Smartbox 14 –... -
Page 11: Stop Button
OBOT OMPONENTS STOP B UTTON 5.1 STOP Button The LCD menu The LCD menu provides a graphical user interface for Press or lift the stop button lid to stop the robot. the robot. 1 – Name – A user assigns this name to the robot. 2 –... -
Page 12: Lift Sensors And Cover Displacement Sensors
OBOT OMPONENTS ENSORS AND OVER ISPLACEMENT ENSORS Bumper: Moving the cover horizontally will cause the robot to move backward, turn between 60° and 120°, and When the bumper contacts an object, the robot will continue moving forward. stop, move backward, turn between 60° and 120°, then continue moving forward. -
Page 13: Tilt, Rollover, And Temperature Sensors
OBOT OMPONENTS OLLOVER EMPERATURE ENSORS 5.5 Tilt, Rollover, and Temperature Sensors 5.7 Charging Station Components These sensors are located on the main circuit board inside of the electrical box. Tilt Sensor - The tilt sensor detects the angle of the slope on which the robot is working. -
Page 14: Operational States
PERATIONAL TATES UTONOMOUS ISSION TATE 6 Operational States 6.1.1 Go Zone Mode Go Zone Mode commands the robot to leave the charging station and start working. Operational Description • at Point A it begins to follow the Filed 1 track State border Autonomous... - Page 15 PERATIONAL TATES UTONOMOUS ISSION TATE The following describes the path of the robot exiting 6.1.2 Work Mode the field for a multi-field installation: In the work mode the robot operates within the • at Point A the robot begins to follow the Field 1 working area at a default speed of 2.2 mph (1.0 m/s).
- Page 16 PERATIONAL TATES UTONOMOUS ISSION TATE Single Field With Station Loop Two Fields With Station Loop • at Point A the robot moves towards the periph- • at Point A, the robot begins to return to the eral wire charging station •...
-
Page 17: Inactive Modes
PERATIONAL TATES NACTIVE ODES 6.1.5 Wait In Charging Station Mode 6.3 Active Modes This mode instructs the robot to stay in the charging Active modes are available in the Technician Settings station until normal programming starts or a specific menu. command is issued. -
Page 18: Wire Installation
NSTALLATION TATION 7 Wire Installation The distance between the center of the charging station and the end of the station loop wire must be a minimum of 8.5 ft. (2.5 m). IMPORTANT: Only use peripheral wire which is supplied by ECHO Inc. Avoid holes, ruts, obstacles, and standing water when installing peripheral wire. -
Page 19: Peripheral Wire
NSTALLATION ERIPHERAL 7.1.1 Minimum Installation Dimensions • Each peripheral wire must overlap with its neigh- boring one. for Multiple Robots • Each pair of peripheral wires which overlap must This installation ensures that robots will not collide be designated as neighboring fields. with each other or with the charging station. - Page 20 NSTALLATION ERIPHERAL 7.2.1 Installation for Multiple Robots Raised hard landscaping: This installation ensures that robots will not collide with each other, or with the charging station. The following figure shows minimum dimensions. (240 mm) (720 mm) (750 mm) 1 – Terrace / Path / Wall 2 –...
- Page 21 NSTALLATION ERIPHERAL 7.2.3 Multiple Peripheral Wire Installation Multi-Field Overlaps An overlap is an area that lies within two fields. It is An installation may require multiple peripheral wires. used for the robot to transition from one field to Each working area is bordered by a peripheral wire. The another.
- Page 22 Zone A Zone B TM-1000 - 24.0 in. (610 mm) TM-2000 - 28.3 in. (720 mm) RP-1200 - 30.0 in. (760 mm) 1 – Narrow strait 2 – Peripheral wire 3 – Minimum distance between peripheral wire 4 –...
- Page 23 NSTALLATION ERIPHERAL If the length of the lane is less than 49.2 ft. (15 m), then • a fixed distance of 16.0 - 24.0 in. (400 - 600 mm) the minimum distance between the peripheral wire between the approach and return sides must be greater than 32.8 ft.
- Page 24 NSTALLATION ERIPHERAL WATER DEFORMS THE ELECTROMAGNETIC SIGNAL OF THE PERIPHERAL WIRE The robot can get confused on its location of the electromagnetic signal is deformed. • Use an island or a pseudo-island to avoid a water obstacle. Install the peripheral wire a minimum distance of 5.5 ft.
-
Page 25: Station Loop, Peripheral Wire Configuration - Single Field Installation
NSTALLATION TATION OOP AND ERIPHERAL ONFIGURATION INGLE IELD NSTALLATION 7.2.9 Sloped Fields Select Return direction, then press . Choose The maximum slope on any part of the field must be whether you want the robot to return in a clock- less than or equal to 17°. - Page 26 NSTALLATION TATION OOP AND ERIPHERAL ONFIGURATION INGLE IELD NSTALLATION From the INFRASTRUCTURE menu, select STATIONS, then press . Next, select Create new station, then press A name is generated. The name can be changed as applicable. Select Connected to parcels, then press list of parcels is presented.
-
Page 27: Using The Robot 2
SING THE OBOT AFETY EASURES 8 Using the Robot 8.2 ACTIONS Menu The operations provided in this menu depend on the current state of the robot when it is in the field or the charging station. PERSONAL INJURY HAZARD Contact with the robot during operation can cause personal injury. -
Page 28: Settings Menu
SING THE OBOT ETTINGS NOTE: Close the stop button lid within 10 seconds of • Set the robot to work at all times (which is a executing the operation. default factory setting). 8.2.2 Operation In the Charging Station To define a working schedule: Perform these operations when the robot is in the Press charging station. - Page 29 SING THE OBOT ETTINGS Press to select the required day of the Use the arrows to select Follow sched. Press to check the button on to ensure that the robot week, then press follows the defined schedule. When unchecked, the robot will ignore the timetable and work continuously.
-
Page 30: Service Settings Menu
SING THE OBOT SERVICE SETTINGS M Use the arrow keys to highlight Follow sched. contrast is automatically adjusted according to then press to clear the button. the ambient temperature. Press to select or clear this option. 8.3.2 System Locking Press the 9 key to invert the black and white Use this command to lock the use of the robot. - Page 31 SING THE OBOT SERVICE SETTINGS M To set the Language: • Entries in bold text are ones that the robot has connected to. Select Language. • Entries in normal text are available but which have not been used. to highlight the required language.
- Page 32 SING THE OBOT SERVICE SETTINGS M To change the name of the robot: Highlight V and press Press 8.4.4 Operations Press the arrow keys to highlight Device info, Use this menu to set the following operating parame- ters: then press •...
- Page 33 SING THE OBOT SERVICE SETTINGS M Device info options include: 8.4.7 System version To see the System version information: Option Description Press Robot name The name of the robot. Serial number Serial number of the robot. Press the arrow keys to highlight Device, then Current latitude of the robot Latitude position.
-
Page 34: Technicians Settings Menu
SING THE OBOT TECHNICIANS SETTINGS M 8.4.8 Security 8.4.9 Advanced Parameters Use this menu to enable or disable the use of a PIN Press and hold 0 on the numeric keypad until the code and to define a security area in which the robot is ADVANCED PARAMETERS menu appears. - Page 35 SING THE OBOT TECHNICIANS SETTINGS M From the home menu, press and hold 9 on the numeric Check the sign of the magnetic distance keypad until the TECHNICIAN SETTINGS menu appears. displayed at the top of the menu. If this value is negative, check the Reverse phase button ON.
- Page 36 SING THE OBOT TECHNICIANS SETTINGS M Delete Wire CH# manner. This is important if a problem has occurred and the robot does not know which parcel it is in. This option only appears if there is more than one wire defined.
- Page 37 SING THE OBOT TECHNICIANS SETTINGS M Min. bounce angle / Max. bounce angle This is the angle through which the robot turns when it arrives at the peripheral wire. The range of values for this parameter is between 60° and 120°. 1 –...
- Page 38 SING THE OBOT TECHNICIANS SETTINGS M move along the track border after leaving the distances are measured from the entry point into charging station. the parcel (shown in the following figure). 1 – Charging station 2 – Station loop wire 3 –...
- Page 39 SING THE OBOT TECHNICIANS SETTINGS M defined and the robot will choose a random Stations value between the defined limits. Press until the TECHNICIAN SETTINGS menu appears. Select INFRASTRUCTURE > Stations, then press , the Paired Stations menu will appear. If stations have already been defined a list of them is presented.
- Page 40 SING THE OBOT TECHNICIANS SETTINGS M 8.5.2 Mobile Connection 8.5.3 Demonstration In the absence of a wireless network, the robot Use this mode to demonstrate the performance of the contains a SIM card that enables you to use 4G tech- robot.
- Page 41 SING THE OBOT TECHNICIANS SETTINGS M Cutting height To execute a test: Use this option to calibrate cutting height values. • Press to select the test(s) you want to Cutting height values need to be calibrated if: execute. • erroneous (negative) cutting height values are displayed •...
- Page 42 SING THE OBOT TECHNICIANS SETTINGS M range and that it responds to pressure from an Lift Sensors - This test checks whether each of obstacle. The following information is shown: the lift sensors is responding correctly. X represents the current test X represents the current test in the current sequence.
- Page 43 SING THE OBOT TECHNICIANS SETTINGS M Signal Sensors - This test checks the functionality speed is correct. of the coil that is used to detect a signal on a If any of the heads display a NOK value that is not peripheral wire.
-
Page 44: Error Messages
RROR ESSAGES TECHNICIANS SETTINGS M 9 Error Messages Error messages are displayed an alarm has been raised. Report error messages to your authorized ECHO Robotics Dealer. Always note the date, time, and robot serial number. Error Message Description Battery temperature issue Battery temperature is above or below the allowed limit. - Page 45 RROR ESSAGES TECHNICIANS SETTINGS M Error Message Description Robot did not exit from the charging station correctly, possibly turning Unexpected exit zone event in the wrong direction. Robot can not detect any current in either the left or the right wheel The {L/R} fuse is blown or the {L/R} motor is not connected motor.
-
Page 46: Maintenance
Client Technician Perform maintenance procedures regularly throughout Serial number Field the season. Have an authorized ECHO Robotics dealer Installation Date date service the robot once a year. When maintaining the robot for optimum perfor- Robot Information (record as appropriate) mance, do not attempt to make any physical changes to the robot. -
Page 47: General Inspection And Cleaning
AINTENANCE ENERAL NSPECTION AND LEANING 10.3.1 Cover and Electrical Cables Service Inspections Clean the outside of the cover. Check that the front wheel axles rotate freely and the axle nuts are securely tightened. Stand the robot on end. Disconnect the two elec- Front wheels should spin freely without wobbling. - Page 48 AINTENANCE ENERAL NSPECTION AND LEANING Stand the robot on end. 10.3.4 Chassis and Coil Connect the electrical cables. Clean the chassis and coil once per week. Inspect the coil for damage or exposed wires on the cable. Lay the robot back onto flat ground. 10.3.2 Charge Contacts Clean the right and left side charge contacts once per week.
- Page 49 AINTENANCE ENERAL NSPECTION AND LEANING 10.3.6 Front Wheel Assemblies Verify that the wheels and wheel axles rotate easily. Clean the front wheel assemblies once per week. 1 – Rear wheel 2 – Wheel brush 1 – Wheel 10.3.8 Cutting Height System 10.3.7 Rear Wheels and Rear Wheel Clean the cutting height system once per week.
- Page 50 Complete all weekly, 6 month, and annual main- tenance procedures. • Schedule service procedures with an authorized ECHO Robotics Dealer (if required). • Store the robot in a protected dry location where the temperature is above 32° F (0° C).
-
Page 51: Service Procedures
ERVICE ROCEDURES ONAR EPLACEMENT 11 Service Procedures 11.2 Bumper Replacement NOTE: The bumper screws are accessed from the inside IMPORTANT: The power switch is located under the of the cover. cover on the back of the chassis. Move the power Remove the cover. -
Page 52: Front Lift Cushion Replacement
ERVICE ROCEDURES RONT USHION EPLACEMENT Assemble the new bumper to the cover. Complete the Lift Sensor Service Test. Assemble the bumper retaining screws, tighten to 1.5 lbf• ft (2 N•m). Assemble the bumper caps. Connect the bumper cable to the bumper. Complete the Bumper Service Test. -
Page 53: Rear Wheel Replacement
ERVICE ROCEDURES HEEL EPLACEMENT 11.6 Rear Wheel Replacement Remove the six screws and cover washers from the electrical box. NOTE: The wheel nut remains captive with the rear wheel assembly. Remove the cover. Loosen the wheel nut and remove the rear wheel. - Page 54 ERVICE ROCEDURES OTOR EPLACEMENT Remove gear motor assembly. 14 mm 1 – Gear motor assembly Remove the four screws from the gear motor. Remove c-clip from output shaft. 1 – Screw Remove gear motor from bracket assembly. 2 – C-clip 3 –...
-
Page 55: Cutting Motor Cable Replacement
ERVICE ROCEDURES UTTING OTOR ABLE EPLACEMENT Complete the Drive Motor Service Test. 11.8 Cutting Motor Cable Replacement Visually inspect cables for cuts or abrasions. Correct Replace damaged cables. Replace cable retention clips if necessary. Not Correct 11.9 Lid Closure Problems When the lid is closed, the message “Lid not closed, please select option again”... - Page 56 ERVICE ROCEDURES LOSURE ROBLEMS The relays are supplied as an assembly. The assembly contains two pairs of relays and the cabling between them. When installing replacement magnets and relays, visu- ally examine the position to ensure correct alignment. Complete the Lid Service Test 11.9.2 Magnets Assemble the magnets to the lid as shown.
-
Page 57: Robot Accessories
OBOT CCESSORIES HEEL RUSH 12 Robot Accessories 12.2 Groomer Kit Assemble the groomer kit to the rear guard of the robot. The rear guard is factory assembled to the The Wheel Brush Kit and Groomer Kit are optional bottom of the robot’s chassis. accessories for the robot. -
Page 58: Torque References
ORQUE EFERENCES ROOMER 13 Torque References IMPORTANT: The values in the following table apply only when a specific torque for a fastener is not listed. Size lbf•ft N•m No. 6 0.58 - 0.83 0.8 - 1.1 No. 8 1.25 - 1.83 1.7 - 2.5 No. -
Page 59: Mower Cover
ORQUE EFERENCES OWER OVER 13.1 Mower Cover <1 lbf· (<0.7 N·m) <1 lbf· (<0.7 N·m) 1.5 lbf· 1.5 lbf· † (2 N·m) † (2 N·m) 1.5 lbf· 5 lbf· (2 N·m) 1.5 lbf· 5 lbf· (7 N·m) (2 N·m) (7 N·m) 1.5 lbf·... -
Page 60: Cutting Height
ORQUE EFERENCES UTTING EIGHT 13.2 Cutting Height 18 lbf· (3 N·m) 18 lbf· (3 N·m) 1 lbf· 2 lbf· (1.5 N·m) (3 N·m) 9 lbf· (12 N·m) 4.5 lbf· (6 N·m) † 9 lbf· (12 N·m) 18 lbf· 1 lbf· (3 N·m) (1.5 N·m) 1-1.5 lbf·... -
Page 61: Electrical Box, Battery, And Housing
ORQUE EFERENCES LECTRICAL ATTERY OUSING 13.3 Electrical Box, Battery, and Housing 2 lbf· (3 N·m) 2 lbf· (3 N·m) 2 lbf· (3 N·m) 2 lbf· (3 N·m) 11 lbf· † (15 N·m) 9 lbf· † (12 N·m) 9 lbf· (12 N·m) †... -
Page 62: Lift Sensors
ORQUE EFERENCES ENSORS 13.4 Lift Sensors 2 lbf ft † (3 N 2 lbf ft (3 N †† 1 lbf ft (1.5 N † 4.5 lbf ft † (6 N 0.7-1.0 lbf ft † (1-1.5 N 0.7-1.0 lbf ft (1-1.5 N †... -
Page 63: Wheels, Motor, And Gear Box
ORQUE EFERENCES HEELS OTOR 13.5 Wheels, Motor, and Gear Box 9 lbf· † (12 N·m) 0.75 - 1.0 lbf· (1.0 - 1.5 N·m) 7.5 lbf· 7.5 lbf· (10 N·m) (10 N·m) 7.5 lbf· (10 N·m) 4.5 lbf· 2 lbf· †† (6 N·m) †... -
Page 64: Cutting Head
ORQUE EFERENCES UTTING 13.6 Cutting Head 1.0-1.5 lbf· (1.5-2.0 N·m) 1.5 lbf· † (2 N·m) 1.5 lbf· (2 N·m) † 4.5 lbf· (6 N·m) † 15 lbf· † (20 N·m) 4.5 lbf· †† (6 N·m) 9 lbf· † (12 N·m) 4.5-6.0 lbf·... -
Page 65: Electrical Parts
ORQUE EFERENCES LECTRICAL ARTS 13.7 Electrical Parts 1 lbf ft † (1.5 N 2 lbf ft (3 N 1 lbf ft (1.5 N View A † Loctite 243 View A Blue Threadlocker †† Loctite 2701 Green Threadlocker... -
Page 66: Main Frame
ORQUE EFERENCES RAME 13.8 Main Frame 1 lbf ft † (1.5 N 9 lbf ft † (12 N 9 lbf ft 1 lbf ft (12 N † † (1.5 N 9 lbf ft (12 N † † Loctite 243 Blue Threadlocker 4.5 lbf ft 9 lbf ft †... -
Page 67: Main Bars
ORQUE EFERENCES 13.9 Main Bars 1 lbf· †† (1.5 N·m) 4.5 lbf· † (6 N·m) 1 lbf· † (1.5 N·m) 9 lbf· † (12 N·m) 4.5 lbf· † (6 N·m) 4.5 lbf· †† (6 N·m) 9 lbf· † (12 N·m) 1 lbf·... -
Page 68: Accessories
ORQUE EFERENCES CCESSORIES 13.10 Accessories 5 lbf· † (7 N·m) † 4.5 lbf· Loctite 243 (6 N·m) Blue Threadlocker †† Loctite 2701 9 lbf· Green Threadlocker † (12 N·m) -
Page 69: Cover And Chassis
ORQUE EFERENCES OVER AND HASSIS 13.11 Cover and Chassis 11 lbf ft (15 N 5 lbf ft (7 N 1 lbf ft 2.25 lbf ft (1.5 N † (3 N 4.5 lbf ft † (6 N 11 lbf ft (15 N 1 lbf ft 1 lbf ft (1.5 N... -
Page 70: Gear Motor, Cutting Head, And Front Wheel
ORQUE EFERENCES OTOR UTTING RONT HEEL 13.12 Gear Motor, Cutting Head, and Front Wheel 2.2 lbf· † (3 N·m) 4.5 lbf· † (6 N·m) 4.5 lbf· 1.5 lbf· (6 N·m) 9 lbf· † (2 N·m) (12 N·m) 4.5 lbf· (6 N·m) †... -
Page 71: Specifications
PECIFICATIONS APACITY 14 Specifications 14.4 Weight and Dimensions Weight 156.5 lbs. (71 kg) Length 43.7 in. (1110 mm) 14.1 Capacity Width 50.3 in. (1278 mm) Height 20.3 in. (466 mm) Recommended working area Up to 6 acres (20,000 m Number of sports fields per robot 1-2 14.5 Software and Monitoring Mowing width 41 in. -
Page 72: Dimensions
PECIFICATIONS IMENSIONS 14.8 Dimensions 50.3 in. (1278 mm) 39.4 in. (1000 mm) 43.6 in. (1110 mm) 20.3 in. (515 mm) 31.6 in. 12.0 in. (804 mm) (306 mm) - Page 73 Cancer and Reproductive Harm www.P65Warnings.ca.gov ECHO Incorporated 400 Oakwood Road Lake Zurich, IL 60047 1-800-392-0329 www.echorobotics.com...
Need help?
Do you have a question about the TM-2000 and is the answer not in the manual?
Questions and answers