Table of Contents
Advertisement
Quick Links
Advertisement
Table of Contents

Subscribe to Our Youtube Channel
Related Manuals for Dahua 724 Series


Summary of Contents for Dahua 724 Series
- Page 1 Network Video Recorder (NVR6XX-4KS2, 724 Series) Quick Start Guide...
-
Page 2: Cybersecurity Recommendations
Cybersecurity Recommendations Mandatory actions to be taken towards cybersecurity 1. Change Passwords and Use Strong Passwords: The number one reason systems get “hacked” is due to having weak or default passwords. It is recommended to change default passwords immediately and choose a strong password whenever possible. - Page 3 In the event that your social media, bank, email, etc. account is compromised, you would not want someone collecting those passwords and trying them out on your video surveillance system. Using a different username and password for your security system will make it more difficult for someone to guess their way into your system.
-
Page 4: Foreword
Foreword General This quick start guide (hereinafter referred to be "the Guide") introduces the functions and operations of the Network Video Recorder device (hereinafter referred to be "the Device"). Safety Instructions The following categorized signal words with defined meaning might appear in the Guide. Signal Words Meaning Indicates a high potential hazard which, if not avoided, will result... - Page 5 electronic version shall prevail. All the designs and software are subject to change without prior written notice. The product updates might cause some differences between the actual product and the Guide. Please contact the customer service for the latest program and supplementary documentation. ...
-
Page 6: Important Safeguards And Warnings
Important Safeguards and Warnings The following description is the correct application method of the Device. Read the Guide carefully before use to prevent danger and property loss. Strictly conform to the Guide during application and keep it properly after reading. Operating Requirement ... -
Page 7: Table Of Contents
Table of Contents Cybersecurity Recommendations ......................I Foreword ..............................III Important Safeguards and Warnings ..................... V 1 Installing the Device ..........................1 1.1 Checking the Components ......................1 1.2 Front Panel ............................ 1 1.2.1 Super 4K S2 2U NVR Series ....................2 1.2.2 Super 4K S2 3U NVR Series .................... -
Page 8: Installing The Device
Installing the Device Checking the Components When you receive the Device, please check against the following checking list. If any of the items are missing or damaged, contact the local retailer or after-sales engineer immediately Sequence Checking items Requirement Appearance No obvious damage. -
Page 9: Super 4K S2 2U Nvr Series
1.2.1 Super 4K S2 2U NVR Series Figure 1-1 Super 4K S2 32-channel 2U NVR Figure 1-2 Super 4K S2 64-channel/128-channel 2U NVR Table 1-1 Description of buttons and indicators on front panel Icon Function Icon Function Status Status indicator light HDD indicator light Network indicator light Power... - Page 10 Table 1-2 Description of buttons and indicators Name Function Power button Press it once to turn on the Device. Press and hold it down for a period to turn off the Device (Usually we do not recommend). Press and hold down the power button for a period or pull out the power cable might result in device auto reboot.
-
Page 11: Super 4U Nvr Series
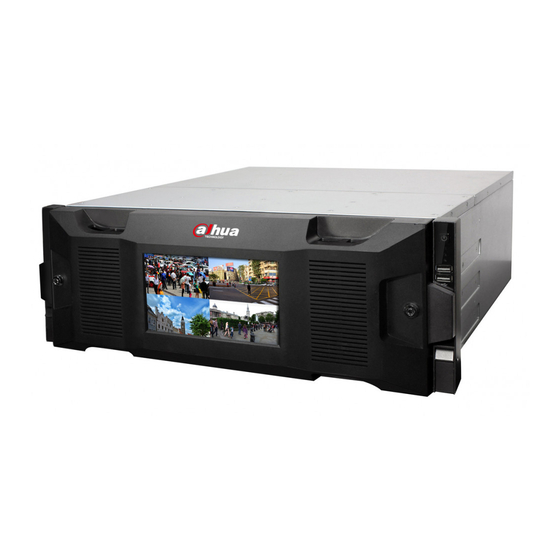
1.2.3 Super 4U NVR Series Figure 1-5 Front panel with LCD Icon Name Function It is to lock the front panel. It prevents HDD from being Front panel stolen or accidentally plugged and unplugged. lock USB port Connect to external USB storage device, mouse, etc. Network The network indicator is on when the network is in indicator... -
Page 12: Rear Panel
Figure 1-6 HDD slots After you remove the front panel, you can see the 24 HDDs. From the left to the right and from the top to the bottom, it ranges from 1~4, 5~8, 9~12, 13~16, 17~20, 21~24. See Figure 1-6. There are two indicators on the HDD bracket. -
Page 13: Super 4K S2 2U Nvr Series
1.3.1 Super 4K S2 2U NVR Series Figure 1-7 Super 4K S2 32-channel 2U NVR Figure 1-8 Super 4K S2 64-channel/128-channel 2U NVR (single power) Figure 1-9 Super 4K S2 64-channel/128-channel 2U NVR (redundant power) Table 1-3 Rear panel description No. -
Page 14: Super 4K S2 3U Nvr Series
1.3.2 Super 4K S2 3U NVR Series Figure 1-10 Rear panel with single power Figure 1-11 Rear panel with redundant power Table 1-4 Rear panel description Function Function Power on-off button Power input port 1000M fiber port Network port HDMI port RS232 port Video VGA output Audio output... -
Page 15: Super 4U Nvr Series
1.3.3 Super 4U NVR Series Figure 1-12 Rear panel with single power Figure 1-13 Rear panel with redundant power Table 1-5 Rear panel description No. Function No. Function Alarm input/alarm HDMI port (you can select to buy decoding card or output optical card) Power port... -
Page 16: Gui Operations
GUI Operations NOTE Slight difference might be found on the interfaces of different models. Following figures are for reference only. The actual product shall govern. Booting Up CAUTION Before the boot up, please make sure: The rated input voltage shall match with the device power requirement. Make sure the power wire connection is ready and then turn on the power button. - Page 17 Figure 2-1 Enter password Step 2 Configure the password, confirm the password and then enter the prompt question. Click Next. The password can be set from 8 characters through 32 characters and contain at least two types from number, letter and special character (excluding"'", """, ";", ":" and "&"). It is recommended to set a password of high security according to the prompt.
- Page 18 Figure 2-2 Password protection Step 4 Configure the protection parameters for password. For details, see Table 2-1. NOTE After configuration, if you forgot the password for admin user, you can reset the password through the reserved email address or security questions. For details about resetting the password, see User’s Manual.
-
Page 19: Resetting Password
The Startup Wizard interface is displayed. For details about quick settings during startup, see "2.4 Startup Wizard." Resetting Password NOTE Only devices of some series support this function. If you forgot the admin password, you can reset the password by the following ways: When the password reset function is enabled, you can scan the QR code on the local ... - Page 20 NOTE After clicking OK, we will collect your personal information such as cell phone number, MAC address and device serial number. The collected information is used for verifying device legality and sending security code. Please read the notice carefully and confirm if you agree with the collection or not.
-
Page 21: Startup Wizard
Figure 2-5 Reset password (4) Step 4 Click Next. Enter the new password and confirm the password. The password can be set from 8 characters through 32 characters and contain at least two types from number, letter and special character (excluding"'", """, ";", ":" and "&"). It is recommended to set a password of high security according to the prompt. -
Page 22: Preview
Figure 2-6 Startup wizard Preview After the normal login, it enters multi-screen preview mode by default. According to the different channel number, it displays different window splits. TIPS Preview drag: If you want to change the position of Channel 1 and Channel 16. Move the ... -
Page 23: Preview Control Bar
Icon Description When the current channel is in surveillance lock status, system displays this icon. When it exceeds the decoding channel number, system displays this icon. 2.5.2 Preview Control Bar Move the cursor to the top center of the current channel preview interface and you can see the control bar. -
Page 24: Record Search
Record Search Select Main Menu > OPERATION > SEARCH or right-click on the preview interface and select Search. The record search interface is displayed. See Figure 2-8. Figure 2-8 Record search Table 2-4 Record search description Name Description Here is to display the searched picture or record file. ... - Page 25 Name Description can click to start frame-by-frame playback. In frame-by-frame playback mode, click to restore normal playback. Slow play. In playback mode, click it to realize various slow play modes such as x1/2 and x1/4. It can also be used as the reverse switch key of fast-forward play.
- Page 26 Name Description timelines. In other playback mode, there is only one timeline. Click any point of the color zone in the timeline, system starts play back from this time point. If you are playing the file, it zooms in the nearest period of the current ...
-
Page 27: Network Settings
Name Description Double-click the file to play the corresponding record. NOTE Only support POS record search in single channel mode. Tag list. Click this icon to display all the records with tag. Double-click the file to play it. Human face list. - Page 28 Figure 2-9 TCP/IP Step 2 Click The Edit interface is displayed. See Figure 2-10. Figure 2-10 Edit GUI Operations 21...
- Page 29 Table 2-5 Edit parameter description Parameter Description Single NIC: The NICs operate separately. You can use the services such as HTTP and RTSP via each NIC. Usually you need to set a default card (default setting is Ethernet Port 1) to request the auto network service from the device-end such as DHCP, email and FTP.
-
Page 30: Registration
Parameter Description pops up a dialogue box to confirm the device reboot. You can click Cancel to terminate the current modification. Before the modification, you can check the MTU of the gateway. The MTU of NVR shall be the same as or lower than the MTU of the gateway. -
Page 31: Shutdown
Figure 2-11 Registration Shutdown Select Main Menu > SHUT DOWN. The SHUT DOWN interface is displayed. Click Shut down. GUI Operations 24... -
Page 32: Web Login
Web Login You can log in the Web interface of the Device via browsers such as Safari, Firefox and Chrome. NOTE Slight difference might be found on the interfaces of different models. Following figures are for reference only. The actual product shall govern. ... - Page 33 Enter C:\Program Files\webrec\WEB30\WebPlugin, and run the uninstall tool uninst.exe. The system automatically deletes the control. Enter C:\Program Files\webrec and delete the Single folder. Web Login 26...
Need help?
Do you have a question about the 724 Series and is the answer not in the manual?
Questions and answers