Table of Contents
Advertisement
INSTALLATION INSTRUCTIONS & HOME OWNERS MANUAL
When installing or using any high voltage electrical appliance, basic safety precautions should always be
followed. Under no circumstance should you attempt to clean, install, inspect, repair, disassemble or
otherwise service this water heater, without first shutting off all power to the unit directly at the circuit
breaker box. SERIOUS BODILY INJURY OR DEATH COULD OCCUR IF YOU IGNORE THIS WARNING.
IF ASSISTANCE IS NEEDED, A LICENSED AND QUALIFIED PLUMBER AND ELECTRICIAN IN ACCORDANCE
WITH ALL APPLICABLE NATIONAL, STATE, PROVINCIAL, AND LOCAL PLUMBING AND ELECTRICAL CODES
SHOULD BE HIRED.
PLEASE READ THESE INSTRUCTIONS THOROUGHLY AND COMPLETELY PRIOR TO INSTALLATION & USE.
FAILURE TO DO SO COULD CAUSE PROPERTY DAMAGE, SERIOUS INJURY, OR DEATH.
This manual should be shown to all members of the household who plan to use this unit, and be retained for
future reference.
Downloaded from https://gadgetsgo.com/AutoBooster-HATB007240-water-tank-heater-boost.html Authorized Eemax Dealer
IMPORTANT SAFETY INFORMATION
Tested and certified by the Water Quality Association against NSF/ANSI 372 for lead free
compliance.
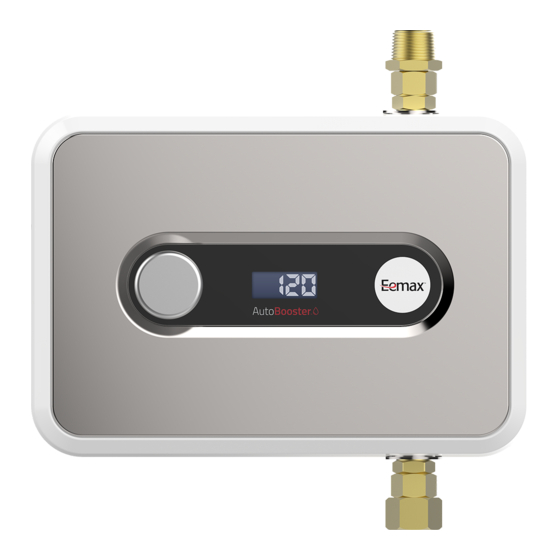
AUTOBOOSTER™
REV I – 3/1/2016
Advertisement
Table of Contents

Related Manuals for EemaX AUTOBOOSTER


Summary of Contents for EemaX AUTOBOOSTER
- Page 1 This manual should be shown to all members of the household who plan to use this unit, and be retained for future reference. Tested and certified by the Water Quality Association against NSF/ANSI 372 for lead free compliance. REV I – 3/1/2016 Downloaded from https://gadgetsgo.com/AutoBooster-HATB007240-water-tank-heater-boost.html Authorized Eemax Dealer...
-
Page 3: Table Of Contents
Activation Flow Rate 0.3 GPM To get the best performance and energy savings from your AutoBooster™, it is important that the device is installed in accordance with our instructions and the electrical and plumbing codes applicable to your area. Read this manual thoroughly for important operating instructions and tips. -
Page 4: Before Installation
If you have any questions regarding the warranty or product return policies, please contact Eemax at 1-800-543-6163. Inspect all components. The contents of your box should include the following components: ... -
Page 5: Setting Up To Install
3- SETTING UP TO INSTALL Recommended Clearances: 14 inches from above the existing tank heater to the next obstruction 6 inches in front of and to the sides of the AutoBooster™, for service maintenance 14 inches Pre-Mounting Steps 1. SHUT OFF ELECTRICITY ON YOUR CIRCUIT BREAKER BEFORE PROCEEDING TO ANY FURTHER INSTALLATION STEPS. - Page 6 No vertical movement of pipe (Pipe is completely restricted or braced) Turn to page 7, hose connections may be required Hot Water Outlet Connection Fitting (Can be variety of fittings) Downloaded from https://gadgetsgo.com/AutoBooster-HATB007240-water-tank-heater-boost.html Authorized Eemax Dealer...
- Page 7 6. Proceed to Plumbing Installation on page 7. Hot Water Copper Pipe Cut B. 11 ⅛” Cut A. 2” Hot Water Outlet ¾” Female NPT to Connection Fitting ⅝” Tube Adapter (Can be variety of fittings) Figure B. Figure A. Downloaded from https://gadgetsgo.com/AutoBooster-HATB007240-water-tank-heater-boost.html Authorized Eemax Dealer...
- Page 8 Cut C. 12 ½“ 2” Irremovable or essential union Cut C. (Can be variety of fittings) 2” Irremovable or Hot Water Outlet essential union Connection Fitting (Can be variety of fittings) Figure D. Figure C. Downloaded from https://gadgetsgo.com/AutoBooster-HATB007240-water-tank-heater-boost.html Authorized Eemax Dealer...
-
Page 9: Plumbing Installation
STEP 1: Using the appropriate fittings, connect the HOT WATER outlet from your water tank to the INLET thread located on the bottom side of the AutoBooster™ when facing the unit. STEP 2: Connect the HOT WATER copper pipe line to OUTLET thread located on the top side of the unit. -
Page 10: Electrical Installation
(see model specifications below for details). Before installing this product, ensure that the home has sufficient electrical power available to handle the maximum amperage load of the applicable model. TURN OFF THE ELECTRICAL POWER BEFORE PROCEEDING. Downloaded from https://gadgetsgo.com/AutoBooster-HATB007240-water-tank-heater-boost.html Authorized Eemax Dealer... - Page 11 Line 2 (red wire), and ground (green wire) from the home’s main breaker panel to the AutoBooster™ water heater, through the back plate hole. See Connection Reference 1 on page Note: A separate ground conductor for each incoming circuit is required.
- Page 12 Electrical Wiring Diagram Normal Tank Configuration: AutoBooster™ and Electric Tank Configuration: Connection Reference 1, shown on page 11. Connection Reference 2, shown on page 12. Downloaded from https://gadgetsgo.com/AutoBooster-HATB007240-water-tank-heater-boost.html Authorized Eemax Dealer...
- Page 13 Connection Reference 1 Connecting Lines 1 & 2 from the circuit board (existing service) to the AutoBooster™: 1. Remove the control knob from the unit, then remove the cover of the unit. Two screws must be removed in order to do this.
- Page 14 Connection Reference 2 Connecting the pigtail cord to the AutoBooster™: 1. The pigtail cord should be partially attached to the unit through the ground connection. With the cover off, you should see an exposed red wire and black wire coming from the pigtail, on the end that’s inside the unit.
-
Page 15: General Operating Instructions
General Operating Instructions. How your new unit works: The AutoBooster™ combines with the traditional hot water tank to provide an extremely effective and efficient way of heating your water. The unit reads the temperature coming out of the tank, and will turn on if the water drops below a set temperature, which you set. - Page 16 The water heater will turn on when the temperature of the water at the inlet of Activation temperature too the AutoBooster™ falls below the activation temperature (when the tank is not providing hot water). Increase activation temperature. Unit is heating but the water User temperature setting too Turn up the temperature setting on the unit.
-
Page 17: User Interface
Turn the control knob in either direction to cycle through menu options. Inlet/Outlet Temperature Reading 71 F The temperature of the water going in and out of the AutoBooster™ can be OUT 69 F observed from this display. Active Unit in Operation... - Page 18 AutoBooster™ Built-In Freeze Protect Feature (Select Models Only) While the AutoBooster™ is off, if the temperature read at the inlet of the AutoBooster™ unit drops below 60°F, the tank will automatically power on to prevent the nearby pipes from freezing and potentially bursting. Once the temperature at the inlet of the AutoBooster™...
- Page 19 Here you can view the heater software version (useful for troubleshooting). Exit SETUP If knob is pressed once on this screen, the user will be taken back to the EXIT primary menu screen cycle. Downloaded from https://gadgetsgo.com/AutoBooster-HATB007240-water-tank-heater-boost.html Authorized Eemax Dealer...
- Page 20 Eemax Inc. 400 Captain Neville Drive, Waterbury, CT 06705 Toll Free: 1-800-543-6163, or 203-267-7890 Fax: 203-267-7975 info@eemaxinc.com Downloaded from https://gadgetsgo.com/AutoBooster-HATB007240-water-tank-heater-boost.html Authorized Eemax Dealer...
Need help?
Do you have a question about the AUTOBOOSTER and is the answer not in the manual?
Questions and answers
How do I set it up as first time use
To set up the EemaX AUTOBOOSTER for first-time use, follow these steps:
1. Shut Off Electricity – Turn off the electricity at your circuit breaker before starting any installation steps.
2. Check Clearance – Ensure there is at least 14 inches of straight pipe clearance above the tank heater for proper installation.
3. Close Water Supply Valve – Shut off the supply water valve to the tank heater, usually located above the tank on the cold water inlet side.
4. Drain the Tank – Open the drain valve, typically near the bottom of the tank, to fully deplete the water from the tank.
5. Drain Hot Water Pipes – Remove any remaining water from all existing hot water pipes.
These steps prepare the system for installation and ensure proper operation.
This answer is automatically generated