Advertisement
Quick Links
Please go to
www.quoizel.com
Tools Required: Flathead screwdriver, Phillips screwdriver, pliers, wire cutters, wire strippers, electrical tape, safety glasses.
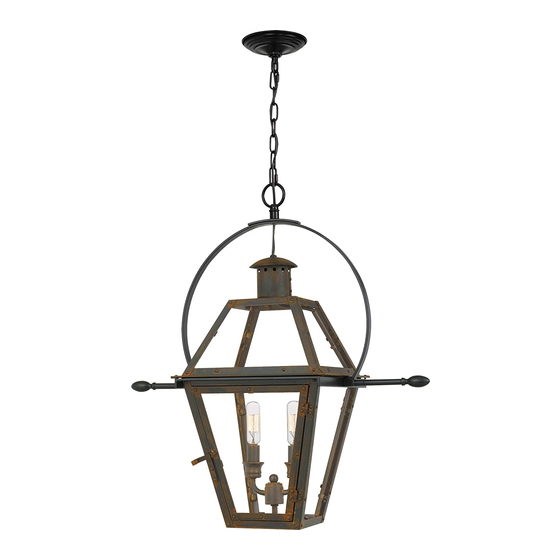
Light Source:
(3) B10 Candelabra Base Bulbs 60W Maximum, Candelabra Base T8 Vintage Bulbs are recommended, bulbs not included.
Fixture Hanging Height:
Minimum Hanging Height is 32", Maximum Hanging Height is 130".
Estimated Assembly Time:
Preparation:
Identify and inspect all parts before beginning installation. Check package content list and diagrams below to ensure all parts are
present. If any parts are missing or damaged, do not attempt to assemble, install, or operate the fixture. Contact your original place of purchase.
Warnings and Cautions
Turn off electricity at circuit breaker or main fuse box before installation. Consult a licensed electrician if in doubt.
These instructions are provided for your safety. It is very important you read them completely before installing the fixture. We strongly
recommend that a licensed, professional electrician perform the installation.
Disconnect fixture from power source before replacing bulbs. Make sure bulbs are given sufficient time to cool before removal.
Package Contents
Side Rod
A
x 2
Lock Screw
B
x 4
Crossbar
AA
Assembly
x 1
STEP 1 - Install Glass Panel
A. Insert the Glass Panel (F) into the slot
in the bottom edge of the Cage (E) and
press the tabs on the top edge of the
Cage (E) onto the top edge of the Glass
Panel (F) to secure it.
Figure 1
2019 QuoizelInc.
for product cleaning tips. Go to the
30-45 minutes
Fixture Loop
C
x 1
D
Fixture Body
E
x 1
Hardware Contents
Fixture Chain
BB
x 1
Quick Link
CC
x 2
DD
D
visit us on-line at www.quoizel.com
Installation Guide #IS-RO1914IZ
For Style RO1914IZ
Care + Maintenance
selection.
STEP 2 - Remove Papers Inside of the Cage
A. Rotate the bolt and remove it from the bolt holder to open the door.
B. Remove papers inside of the cage.
C. Close the door and place the bolt back onto the bolt holder.
Fixture
Holder
x 1
Bolt Holder
Paper
(Remove)
STEP 3 - Install the Crossbar Assembly to Outlet Box and Adjust
the length of the Nipple
A. Attach the Crossbar Assembly (AA) to the Outlet Box with the head
of the Green Ground Screw facing you. Secure it with Outlet Box
Screws (not included), tighten until snug
B. Adjust the hex nut and lock washer underside of the crossbar to the
Ceiling
middle of the nipple.
Canopy
C. Remove the canopy lock ring from the canopy chain loop. Place the
x 1
Ceiling Canopy (DD) over the canopy chain loop against the ceiling
to determine the correct position of the nipple. Thread the canopy
lock ring onto the canopy chain loop. Adjust the nipple to allow the
Ceiling Canopy (DD) to rest against the ceiling when held in place
C
Outlet Box Screw
(not included)
Figure 3
1of3
AA
Hex Nut and
Canopy Chain Loop
Lock Washer
Figure 2
Door
Bolt
.
Outlet Box
Green Ground Screw
Nipple
DD
Canopy Lock Ring
ReleasedDate:2019-02-22
Advertisement

Related Manuals for Quoizel RO1914IZ


Summary of Contents for Quoizel RO1914IZ
- Page 1 Cage (E) onto the top edge of the Glass Green Ground Screw Panel (F) to secure it. Outlet Box Screw (not included) Nipple Hex Nut and Canopy Chain Loop Lock Washer Figure 1 Figure 3 Canopy Lock Ring visit us on-line at www.quoizel.com ReleasedDate:2019-02-22 2019 QuoizelInc. 1of3...
- Page 2 “L” outlet box (or Red) Bare, or Green Ground wire Ground wire from Fixture from outlet box Figure 5 Green Ground Screw Figure 7 on the Crossbar visit us on-line at www.quoizel.com ReleasedDate:2019-02-22 2019 QuoizelInc. 2of3...
- Page 3 NOTE: ALL DIMENSIONS ARE ROUNDED UP TO THE NEAREST 1/4" RO1914IZ FINISH: INDUSTRIAL BRONZE 5.5” Dia. 130” 29.25” 23.25” 13.5” SQ. 27.25” visit us on-line at www.quoizel.com ReleasedDate:2019-02-22 2019 QuoizelInc. 3of3...