Table of Contents
Advertisement
Quick Links
Advertisement
Table of Contents
Troubleshooting

Related Manuals for Multi-Tech MultiConnect mDot MTDOT Series


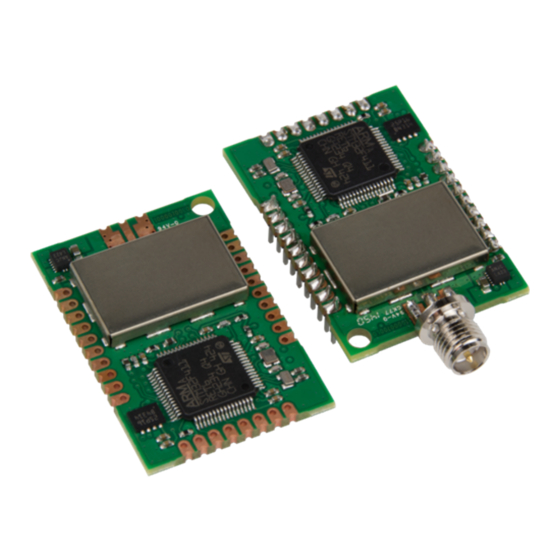
Summary of Contents for Multi-Tech MultiConnect mDot MTDOT Series
- Page 1 ® MultiConnect mDot MTDOT Developer Guide for Japan...
- Page 2 Multi-Tech Systems, Inc. reserves the right to revise this publication and to make changes from time to time in the content hereof without obligation of Multi-Tech Systems, Inc. to notify any person or organization of such revisions or changes.
-
Page 3: Table Of Contents
CONTENTS Contents Chapter 1 – Product Overview ..........................7 Overview ..................................7 What's New in Firmware Version 4.0 ........................... 7 Configuration Persistence ............................7 mDot Sleep.................................. 7 FOTA Enhancements ..............................7 AT Command Additions and Modifications ........................ 8 Documentation Overview ............................. 8 Related Documentation .............................. - Page 4 CONTENTS Route Pads ................................25 mDot Pinout Design Notes............................26 Serial Pinout Notes..............................26 LoRa .................................... 26 Throughput Rates..............................26 Range ..................................26 Resetting the mDot ..............................27 Chapter 6 – Antennas ............................28 Antenna System ................................. 28 U.FL and Trace Antenna Options ..........................28 Pulse Electronics Antenna............................
- Page 5 CONTENTS Chapter 12 – Developer Board Schematics......................43 About Schematics................................ 43 Block Diagram ................................44 Schematics .................................. 45 Chapter 13 – Micro Developer Kit .......................... 50 Micro Developer Kit ..............................50 Developer Kit Package Contents..........................50 Firmware Updates..............................50 Windows Drivers ..............................50 Micro DK Mechanical Drawings ..........................
- Page 6 CONTENTS AT Commands Added or Changed in Version 2.0..................... 64 Maintenance Release 1.0.8-1............................65 What's New in Firmware Version 1.0 ......................... 65 About Adaptive Data Rate ............................65 Peer to Peer Communication............................ 65 EU 868 Test Mode..............................66 Sleep Mode Enhancements ............................66 Preserve Session ...............................
-
Page 7: Chapter 1 - Product Overview
PRODUCT OVERVIEW Chapter 1 – Product Overview Overview The MultiConnect mDot is a programmable, long-range RF module that provides encrypted data connectivity to ™ sensors, industrial equipment, and remote appliances. By using LoRa Long Range Spread Spectrum technology, bi- directional data communication can be maintained for distances up to 5 miles/8 km line of sight, deep into buildings, or within noisy environments using unlicensed ISM bands. -
Page 8: At Command Additions And Modifications
PRODUCT OVERVIEW BSDiff and LZ4 compression can be used to reduce the size of firmware upgrades sent over-the-air. Smaller files reduce the time required to deliver an update. Smaller FOTA sessions increase end-device battery life. Multicast Session Scheduling Multicast sessions are now scheduled using LowPowerTimeout instead of events. Session schedules are maintained while sleeping. -
Page 9: Programming The Mdot Microcontroller
PRODUCT OVERVIEW Programming the mDot Microcontroller With the mDot and the MTUDK2-ST-xx developer board, use the ARM mbed ecosystem to program the microcontroller. Compile in the cloud or locally, copy the resulting binary file to the mbed USB drive, and reset the mDot. -
Page 10: Differential And Compressed Upgrade Files
PRODUCT OVERVIEW Redundancy In case of data loss or corruption, your device stores multiple copies of the configuration and can fall back to the last good copy. Wear Leveling Wear leveling writes across the entire flash sector and skips bad sections on write failure. Frequently saved session parameters have more flash space available to extend the expected life of the flash system on your device. -
Page 11: Chapter 2 - Getting Started
GETTING STARTED Chapter 2 – Getting Started Getting started depends on what you want to do. By default, mDot ships with firmware that supports AT Commands that use the serial I/O. For AT Commands, refer to the separate mDot AT Command Reference Guide. To send commands to the mDot: Mount the mDot on the developer board. -
Page 12: Chapter 3 - Fota (Fuota) Overview
FOTA (FUOTA) OVERVIEW Chapter 3 – FOTA (FUOTA) Overview ® This requires mDot firmware Version 3.1 or higher and a Conduit with AEP (mPower) 1.6 or higher. Firmware Over the Air (FOTA) also known as Firmware Upgrade Over the Air (FUOTA) is a way to upgrade Dot end devices using multicast and file fragmentation packages defined in the LoRaWAN specification. - Page 13 FOTA (FUOTA) OVERVIEW Fragmentation During this stage, the device should only send uplinks as necessary, too many can cause excessive fragment loss. Applications on the device should not perform heavy processing activities during FOTA. Doing so can cause fragments to overlap and excessive fragment loss. The number of fragments required to send a file depends on the Data Rate.
-
Page 14: Potential Problems
FOTA (FUOTA) OVERVIEW The mDot can tolerate up to 300 lost fragments. Verification Once a device completes its fragmented file, it calculates a CRC64 and sends a request to the server to verify the CRC. The server sends a response indicating if the CRC matches or not. If the CRC is verified the device reboots and performs the upgrade. -
Page 15: Troubleshooting Fota On The Conduit
FOTA (FUOTA) OVERVIEW If the Dot was able to reconstruct the file using parity fragments, it sends a CRC check to the Conduit. Check the Dot debug log for Sending CRC. If the Dot does not receive a response or the Conduit responds with CRC not correct, the Dot discards the file. - Page 16 FOTA (FUOTA) OVERVIEW Also send 'rm -r -f ~/.fota/'. Devices may be in Class C or Class A depending on the FOTA session status before it ended. Make sure to change the devices back to their appropriate class. Make sure the FOTA daemon is running by '/etc/init.d/fotad restart'.
-
Page 17: Chapter 4 - Mechanical Drawings With Pinouts
MECHANICAL DRAWINGS WITH PINOUTS Chapter 4 – Mechanical Drawings with Pinouts MTDOT-xxx-X1P-SMA ® MultiConnect mDot MTDOT Developer Guide for Japan... -
Page 18: Chapter 5 - Specifications And Pin Information
SPECIFICATIONS AND PIN INFORMATION Chapter 5 – Specifications and Pin Information MTDOT Specifications Category Description General Compatibility LoRaWAN 1.0.4 specifications Interfaces Note that pin functions are multiplexed. Up to 21 digital I/O Up to 11 analog inputs UART (RX, TX, RTS, CTS) CPU Performance STM32 Max Clock... -
Page 19: Lora Transmission Output Power
SPECIFICATIONS AND PIN INFORMATION Category Description Transmission (Japan) Max Transmitter Power Output 20 mW (TPO) Weight is for the MTDOT-xxx-X1P-SMA, which is the heaviest model. Important: The MTDOT requires 3.3 V minimum power to maintain certification and to help protect the SPI Flash file system. -
Page 20: Battery Draw Down
SPECIFICATIONS AND PIN INFORMATION Battery Draw Down mDot battery life depends on many variables, including transmit power, data rate, sleep usage, and duty cycle. The following figure represents the current consumption in one possible application. Use the current consumption values from the following Electrical Characteristics table when calculating average power consumption. -
Page 21: Electrical And Timing Characteristics
SPECIFICATIONS AND PIN INFORMATION Electrical and Timing Characteristics Note: All measurements taken at VDD = 3.3 V and 25 degrees Celsius ambient temperature unless otherwise specified. Refer to the ST Micro STM32F411RE datasheet for more detailed processor IO characteristics. The STM32F411RE and other onboard ICs are powered by an internal 3.0V voltage regulator. Signal Description Conditions... -
Page 22: Pin Information
SPECIFICATIONS AND PIN INFORMATION Pin Information Note: Using the mbed platform with the Cortex-M4 processor expands your pin functionality options. ® MultiConnect mDot MTDOT Developer Guide for Japan... -
Page 23: Spi Flash
SPECIFICATIONS AND PIN INFORMATION mDot Pin STM32411 (Where SW Name Notes applicable) 3.3 V to 5 V input UART_TX GPIO UART_RX GPIO SPI1_MISO NRST Reset nReset input I2C_SCL I2C clock I2C_SDA I2C Serial data PA12 GPIO PA11 SLEEPRQ GPIO VSSA/VSS_3/VSS_4 Ground for VCC SPI1_MOSI PA0-WKUP... -
Page 24: Pull-Up/Down
SPECIFICATIONS AND PIN INFORMATION Function Description PC_12 SPI3_MOSI SPI serial data PC_11 SPI3_MISO SPI serial data PC_10 SPI3_SCK SPI clock PC_6 SPI3_CS SPI chip select PC_7 FLASH_HOLD# Use the HOLD# signal to pause any serial communications with the device without deselecting the device PC_8 FLASH_WP#... -
Page 25: Crystals/Oscillator
SPECIFICATIONS AND PIN INFORMATION Crystals/Oscillator Description PC14 Real-time clock PC15 Real-time clock PH0-OSC_IN High speed system clock PH1-OSC_OUT High speed system clock Route Pads For U.FL models, use the U.FL connector or route pads as follows. These are also available on trace models. Pads Function Description... -
Page 26: Mdot Pinout Design Notes
SPECIFICATIONS AND PIN INFORMATION mDot Pinout Design Notes Refer to the mechanical drawing for your model for pin locations. All pins that go to connectors are directly connected to the processor. Reset is the only pin with pull up. I/O is 5V tolerant. mDots allow you to program pins depending on your application: Serial: Available out of the box. -
Page 27: Resetting The Mdot
SPECIFICATIONS AND PIN INFORMATION Resetting the mDot To reset the mDot Drive the RESET signal low for at least T NRESET Select either: Allow RESET to float. The internal pull-up resistor pulls it up. Drive the RESET line high. The processor starts executing code after the RESET line is high. ®... -
Page 28: Chapter 6 - Antennas
ANTENNAS Chapter 6 – Antennas Antenna System The LoRa antenna performance depends on the implementation and antenna design. The integration of the antenna system into the product is a critical part of the design process; therefore, it is essential to consider it early so the performance is not compromised. - Page 29 ANTENNAS Category Description Impedance 50 Ohms VSWR < 2.0 Gain 3.0 dBi Radiation Omni Polarization Vertical ® MultiConnect mDot MTDOT Developer Guide for Japan...
-
Page 30: Chapter 7 - Safety Information
SAFETY INFORMATION Chapter 7 – Safety Information Handling Precautions To avoid damage due to the accumulation of static charge, use proper precautions when handling any cellular device. Although input protection circuitry has been incorporated into the devices to minimize the effect of static build-up, use proper precautions to avoid exposure to electronic discharge during handling and mounting the device. -
Page 31: Precautions For Pacemaker Wearers
SAFETY INFORMATION Precautions for pacemaker wearers If EMI occurs, it could affect a pacemaker in one of three ways: Stop the pacemaker from delivering the stimulating pulses that regulate the heart's rhythm. Cause the pacemaker to deliver the pulses irregularly. Cause the pacemaker to ignore the heart's own rhythm and deliver pulses at a fixed rate. -
Page 32: Chapter 8 - Environmental Notices
ENVIRONMENTAL NOTICES Chapter 8 – Environmental Notices ® MultiConnect mDot MTDOT Developer Guide for Japan... -
Page 33: Restriction Of The Use Of Hazardous Substances (Rohs)
Certificate of Compliance 2015/863 Multi-Tech Systems, Inc. confirms that its embedded products comply with the chemical concentration limitations set forth in the directive 2015/863 of the European Parliament (Restriction of the use of certain Hazardous Substances in electrical and electronic equipment - RoHS). -
Page 34: Chapter 9 - Developer Kit Overview
DEVELOPER KIT OVERVIEW Chapter 9 – Developer Kit Overview Developer Board Overview MultiTech offers two Developer Kits for prototyping and developing with the mDot: MTUDK2-ST-MDOT is a scaled down version of the developer board and kit for the mDot. MTMDK-ST-MDOT is a mini developer board exclusively for the mDot. If using the Micro DK, go to Chapter 13 Micro Developer Kit for details on this developer board. -
Page 35: Chapter 10 - Board Components
BOARD COMPONENTS Chapter 10 – Board Components Developer Board ® MultiConnect mDot MTDOT Developer Guide for Japan... - Page 36 BOARD COMPONENTS Note: mDot developer boards may be white or dark blue. ® MultiConnect mDot MTDOT Developer Guide for Japan...
-
Page 37: Developer Board Connectors
BOARD COMPONENTS Developer Board Connectors Note: The development board derives power from the USB connection. The Power Jack connects to the Arduino shield socket. If the Arduino shield needs 5 V, use a 5 V power supply. A 9 V supply will not be regulated down to 5 V. -
Page 38: Led Indicators
BOARD COMPONENTS Label Description Arduino Shield Connector. Arduino Shield Connector. Arduino Shield Connector. Arduino Shield Connector. MTDOT Connector. MTDOT Connector. MTDOT Programming Header. CAUTION: Take care when connecting or disconnecting USB cables to avoid detaching the connector from the board. LED Indicators Label Location... -
Page 39: Chapter 11 - Developer Board Installation
DEVELOPER BOARD INSTALLATION Chapter 11 – Developer Board Installation Installing an mDot on the Developer Board To install an mDot on the Developer Board: Align the mDot with the developer board as shown. Gently press the mDot into the connectors. ®... - Page 40 DEVELOPER BOARD INSTALLATION ® MultiConnect mDot MTDOT Developer Guide for Japan...
-
Page 41: Arduino Shield
DEVELOPER BOARD INSTALLATION Arduino Shield mDot Arduino Pins Installing an Arduino Shield with an mDot Note: When using an Arduino Shield with an mDot, install the mDot on the developer board before installing the Arduino shield. To use an Arduino Shield with an mDot: Disable the developer card’s serial port by removing jumper from JP95. -
Page 42: Rsma To U.fl Cables
DEVELOPER BOARD INSTALLATION RSMA to U.FL Cables The developer kit includes one 4.5" RSMA to U.FL cables which is preinstalled on the developer board. Connecting an Antenna through the Developer Board Connectors Depending on the device model, you can either connect antennas directly to the device or through the RSMA-to- U.FL antenna cable on the developer board. -
Page 43: Chapter 12 - Developer Board Schematics
DEVELOPER BOARD SCHEMATICS Chapter 12 – Developer Board Schematics About Schematics The following schematics are for the fully populated MTUDK2 developer board and contain components not included on the MTUDK2-ST-MDOT model. ® MultiConnect mDot MTDOT Developer Guide for Japan... -
Page 44: Block Diagram
DEVELOPER BOARD SCHEMATICS Block Diagram ® MultiConnect mDot MTDOT Developer Guide for Japan... -
Page 45: Schematics
DEVELOPER BOARD SCHEMATICS Schematics ® MultiConnect mDot MTDOT Developer Guide for Japan... - Page 46 DEVELOPER BOARD SCHEMATICS ® MultiConnect mDot MTDOT Developer Guide for Japan...
- Page 47 DEVELOPER BOARD SCHEMATICS ® MultiConnect mDot MTDOT Developer Guide for Japan...
- Page 48 DEVELOPER BOARD SCHEMATICS ® MultiConnect mDot MTDOT Developer Guide for Japan...
- Page 49 DEVELOPER BOARD SCHEMATICS ® MultiConnect mDot MTDOT Developer Guide for Japan...
-
Page 50: Chapter 13 - Micro Developer Kit
MICRO DEVELOPER KIT Chapter 13 – Micro Developer Kit Micro Developer Kit Designed specifically for mDot development, the Micro DK plugs directly into a USB port on your computer making it easy to use the developer kit for testing, programming, and evaluating your application. Note: To work with the developer board, you need an X1P mDot model which includes a programming header. -
Page 51: Micro Dk Mechanical Drawings
MICRO DEVELOPER KIT Micro DK Mechanical Drawings ® MultiConnect mDot MTDOT Developer Guide for Japan... -
Page 52: Micro Developer Board Components
MICRO DEVELOPER KIT Micro Developer Board Components Note: The Reset Button resets the mDot processor. Description STAT LED1 Status, red light that blinks when device powers up. LED2 Communication, green light that shows when device is communicating. LED3 Power, blue lights when the board has power. RSSI LED4 Received Signal Strength Indicator. -
Page 53: Assembly Diagrams And Schematics
MICRO DEVELOPER KIT Assembly Diagrams and Schematics Assembly Diagrams ® MultiConnect mDot MTDOT Developer Guide for Japan... -
Page 54: Schematics
MICRO DEVELOPER KIT Schematics ® MultiConnect mDot MTDOT Developer Guide for Japan... - Page 55 MICRO DEVELOPER KIT ® MultiConnect mDot MTDOT Developer Guide for Japan...
- Page 56 MICRO DEVELOPER KIT ® MultiConnect mDot MTDOT Developer Guide for Japan...
- Page 57 MICRO DEVELOPER KIT ® MultiConnect mDot MTDOT Developer Guide for Japan...
- Page 58 MICRO DEVELOPER KIT ® MultiConnect mDot MTDOT Developer Guide for Japan...
-
Page 59: Chapter 14 - Design Considerations
DESIGN CONSIDERATIONS Chapter 14 – Design Considerations Noise Suppression Design Adhere to engineering noise-suppression practices when designing a printed circuit board (PCB). Noise suppression is essential to the proper operation and performance of the modem and surrounding equipment. Any OEM board design must consider both on-board and off-board generated noise that can affect digital signal processing. -
Page 60: Electrostatic Discharge Control
DESIGN CONSIDERATIONS Locate high frequency circuits in a separate area to minimize capacitive coupling to other circuits. Locate cables and connectors to avoid coupling from high frequency circuits. Lay out the highest frequency signal traces next to the ground grid. If using a multilayer board design, make no cuts in the ground or power planes and be sure the ground plane covers all traces. -
Page 61: Chapter 15 - Appendix A Release Note Archive
APPENDIX A RELEASE NOTE ARCHIVE Chapter 15 – Appendix A Release Note Archive What's New in Firmware Version 3.3 The new release includes the following changes: LoRaWAN Version 1.0.4 changes Pin Output changes New and updated AT Commands LoRaWAN Version 1.0.4 Changes MAX FCNT GAP check removed with mandatory 32-bit FCNT. -
Page 62: What's New In Firmware Version 3.2
APPENDIX A RELEASE NOTE ARCHIVE Changed AT+BLS - Beacon lock status (includes setup example for a class B device). Changed AT+ACK – now accepts 0-15 as input. Changed AT&WP - Save Protected settings available in all firmware. Changed AT+DI - Protected DeviceEUI can be changed. Changed AT+NI=2,<EUI>... -
Page 63: What's New In Firmware Version 3.1
APPENDIX A RELEASE NOTE ARCHIVE What's New in Firmware Version 3.1 The new release includes the following changes: Firmware over the Air Power Optimization Other Enhancements Firmware over the Air (FOTA) This release features a new AT command, +FOTA, for wireless firmware updates. When you deploy Release 3.1, FOTA will be enabled by default. -
Page 64: What's New In Firmware Version 2.0
APPENDIX A RELEASE NOTE ARCHIVE What's New in Firmware Version 2.0 The new release includes the following changes: LoRaWAN 1.01 Enhancements AU915 Support Class C US915 Test Mode LoRaWan 1.0.1 Enhancement Join Backoff updated to use the RTC clock to track time since the last join failure. AU915 Support AU915 support in this release as defined in LoRaWAN 1.01. -
Page 65: Maintenance Release 1.0.8-1
APPENDIX A RELEASE NOTE ARCHIVE Command Function AT+CHM New, enables channel mask. AT+MAC New, injects MAC command. Maintenance Release 1.0.8-1 Firmware release 1.0.8-1 addresses power consumption in sleep mode. For power draw changes, refer to notes and measurements in Power Measurements. -
Page 66: Eu 868 Test Mode
APPENDIX A RELEASE NOTE ARCHIVE Note: In peer to peer mode, mDots only communicate with each other; mDots cannot make both peer to peer and network connections in the same session. To use this feature, the following settings must match on each mDot. Item Command Configuration... -
Page 67: Preserve Session
APPENDIX A RELEASE NOTE ARCHIVE Wake Interval (+WI) Wake Pin (+WP) Preserve Session This feature allows you to preserve an AUTO_OTA LoRa Network session across power cycle or reset. The preserve session feature is applicable only when AT+NJM=2 (AUTO_OTA). However, AT+RS and AT+SS commands can be used with AT+NJM=1 or 0 (OTA or MANUAL) modes as well. -
Page 68: Index
INDEX Index schematics Micro Developer Board .........53 firmware upgrade over the air........12 firmware upgrade troubleshooting ......14 FOTA.................12 14 adaptive data rate............65 antenna .................28 connecting ...............42 ground plane..............59 Arduino Shield...............41 assembly diagrams Micro Developer Board..........53 handling precautions due to ESD........60 hazardous substances ...........33 battery draw down ............20 block diagram..............44 board components............37... - Page 69 INDEX peer to peer ..............65 static................30 pin information .............22 STmicro processor............8 pinout notes..............26 power ................20 preserve session............67 test mode ..............66 trace antenna..............28 transmission ..............18 radio frequency interference........30 troubleshooting.............14 range ................26 receive sensitivity............18 related products..............8 reset ................27 U.FL ................42 RoHS................33 U.FL antenna ..............28 RSMA to U.FL cable............42 upgrading firmware over the air......12 14 design consideration..........60...
Need help?
Do you have a question about the MultiConnect mDot MTDOT Series and is the answer not in the manual?
Questions and answers