Advertisement
Quick Links
Advertisement

Related Manuals for EAST COAST Monaco


Summary of Contents for EAST COAST Monaco
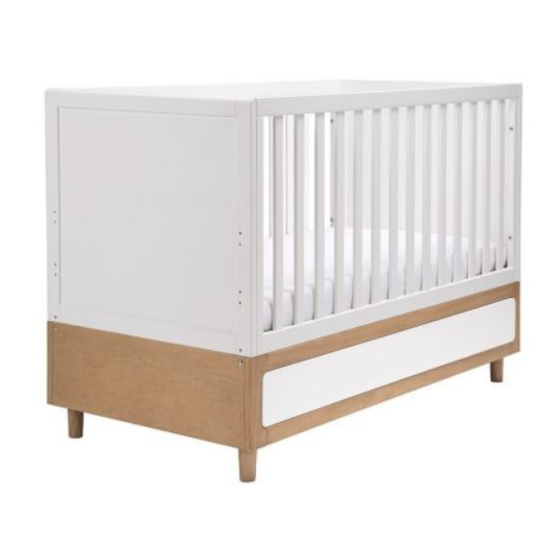
- Page 1 Monaco Cot bed with drawer...
- Page 2 IMPORTANT RETAIN FOR FUTURE REFERENCE: READ CAREFULLY Please read the instructions and warnings carefully before use to ensure safe and satisfactory operation of this product. Your child’s safety is your responsibility. If you have a query with this product or require replacement parts, please contact 01692 408802.
- Page 3 Cotbed Parts (2/2) Base Front Foot x 4 Base Rear Panel Drawer Front Drawer Back Drawer Divider Foot Panel x 2 Drawer base x 2 Base Side x 2 (L & R) Drawer Side x 2 (L & R) Hardware D x 4 A x 12 (45mm) B x 14 (65mm)
- Page 4 Cot Mode: Assembly 1 A x 2 Foot Foot Panel Foot NOTE: Repeat for second Foot Panel Cot Mode: Assembly 2 H x 2 NOTE: Repeat for second Foot Panel Cot Mode: Assembly 3 Base Side G x 2 G x 2 B x 3 NOTE: Repeat for second Foot Panel...
- Page 5 Cot Mode: Assembly 4 H x 2 NOTE: H x 2 Repeat for second Foot Panel Cot Mode: Assembly 5 Base Front E x 4 Cot Mode: Assembly 6 Base Side NOTE: Ensure that the drawer runner is toward the front as shown. F x 2 Repeat for remaining base side.
- Page 6 Cot Mode Assembly 7 Base Rear Panel E x 4 Cot Mode Assembly 8 Base Rear Panel F x 4 Cot Mode Assembly 9 Cot End x 2 E x 2 Cot Side x 2 E x 3...
- Page 7 Cot Mode Assembly 10 G x 6 Cot Mode Assembly 11 Cot Side F x 3 Cot Mode Assembly 12 Cot End A x 2 NOTE: Repeat with the second Cot End. Do not tighten bolts "A" F x 2 fully at this stage.
- Page 8 Cot Mode Assembly 13 Base C x 4 NOTE: Ensure that the slots in part "C" are visible when inserted in to the Base. Cot Mode Assembly 14 Base NOTE: B x 4 There are three Base positions available. The lowest Base position is the safest and B x 4 should always be used in that position as soon as the baby is old enough to sit up.
- Page 9 Drawer Assembly 1 Drawer Front E x 1 Drawer Assembly 2 Drawer Divider G x 4 Drawer Assembly 3 Drawer Divider Drawer base Drawer base Drawer Front F x 1 Drawer Assembly 4 Drawer Side Drawer Side J x 2 NOTE: Drawer runner fits toward J x 2...
-
Page 10: Drawer Assembly
Drawer Assembly 5 D x 2 J x 1 Drawer Back D x 2 I x 2 I x 2 Drawer Assembly 6 NOTE: Ensure that inner drawer runner is at forward edge before inserting the drawer. Position the drawer mounted strip inside the inner runner and holding the drawer level, gently slide the drawer all the way into the frame. - Page 11 Bed Mode Conversion 2 Footboard Bed Side Bed Side Headboard E x 10 Bed Mode Conversion 3 Headboard Bed Side Footboard A x 4 Bed Side F x 10 A x 4 Bed Mode Conversion 4 Base B x 4 B x 4 C x 4...
-
Page 12: Care And Maintenance
Warning: Do not place the child's bed near heat sources, windows or other furniture. This product can be dismantled carefully for storage and transportation. Customer Care line for this product 01692 408802 East Coast Nursery Ltd. Robertson House, North Walsham, Norfolk, NR28 0BX www.eastcoastnursery.co.uk 7847-01...
Need help?
Do you have a question about the Monaco and is the answer not in the manual?
Questions and answers