Table of Contents
Advertisement
Hitch ball not included except model 92-00-1065.
Model
92-00-0600
92-00-0800
92-00-1000
92-00-1200
Your model # can be found on the stickers on
either spring bar. Make a note of it here for
future reference.
fastwaytrailer.com
owner's manual
Max Tongue
Max Trailer
Weight (lb)
Weight (lb)
600
800
1,000
1,200
Fastway e2 Hitch - Faster, Easier.
6,000
8,000
10,000
12,000
Read the entire manual
before starting installation.
Dealer: Please give this
manual to the end user
after hitch installation.
™
A Product of Progress Mfg. Inc.
Advertisement
Table of Contents

Related Manuals for Fastway e2 HITCH TRUNNION


Summary of Contents for Fastway e2 HITCH TRUNNION
- Page 1 92-00-1200 1,200 12,000 Your model # can be found on the stickers on either spring bar. Make a note of it here for future reference. Fastway e2 Hitch - Faster, Easier. ™ fastwaytrailer.com A Product of Progress Mfg. Inc.
-
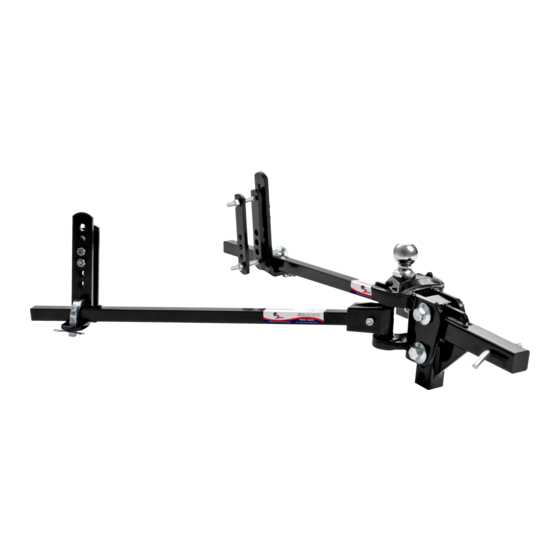
Page 2: Parts Breakdown
fastwaytrailer.com... -
Page 4: Table Of Contents
Table of Contents Page Parts Breakdown....... . . 2-3 Important Safety Information ......5 Important Hitch Information . -
Page 5: Important Safety Information
• Read and follow owner’s manual at all times. 10,000 lb maximum trailer weight • Check for proper setup before towing. 92-00-1000 For a copy of the instructions visit fastwaytrailer.com Fastway e2 - Faster, Easier E2TR_0719 ™ Head Sticker Bar Sticker (not actual size) Important Safety Information Failure to follow all safety warnings may result in severe injury or death. - Page 6 Towing with a tongue weight more than 15% or less than 10% of gross trailer weight greatly increases the likelihood for loss of vehicle control. Always use a hitch ball with a rating that equals or exceeds the trailer Gross Vehicle Weight (GVW).
-
Page 7: Important Hitch Information
Important Hitch Information Weight Distribution Weight distribution is the ability of a hitch to transfer load from the rear axle of the tow vehicle to the front axle of the tow vehicle and to the trailer axles. Without weight distribution the tow vehicle teeter-totters on the rear axle of the tow vehicle, and unloads the front axle. -
Page 8: Step 1: Ready The Tow Vehicle And Trailer
your trailer load, perhaps even during the same trip. For example, a trailer that starts with full clean water and propane tanks may tow differently when that water becomes black and grey water, and the propane tanks are empty. Or, a trailer loaded with gear for a long cross-country trip may tow differently than the same trailer loaded for a weekend getaway. -
Page 9: Step 3: Attach Hitch Head To Shank
Hitch balls require a 1-7/8” socket and a torque wrench capable of approximately 420 ft-lb torque for installation. Your nearest Fastway e2 hitch dealership will have the tools needed and will usually install the hitch ball for a reasonable fee. Step 3 - Attach Hitch Head to Shank... - Page 10 In some cases, the shank may need to be turned upward, or a specialty length shank may be needed so the ball can be placed at the correct height. See Figure 3. Extended bumper guards, truck campers, or rear mounted spare tires can limit your turning radius, and may lead to a collision between the tow vehicle and trailer in a tight turn unless a longer shank is used.
-
Page 11: Step 4: Sway Control Bracket Assembly
Step 4 - Sway Control Bracket Assembly Sway Bracket Location Measure from the center of the coupler along the trailer frame, and place a mark at 30” on both sides. This is the center mark for the sway control bracket assembly. Make sure there are no gas lines, brake lines, or electrical wires located along the frame that could be affected by the installation of the link plates. - Page 12 Identify your coupler style. See Figure 8. Top-mount Bottom-mount Figure 8 Top-mount Couplers Place the link plates so the single hole is above the trailer frame, and the L-bracket studs are toward the top of the frame on the outside. See Figure 9. Bottom-mount Couplers If your trailer has a bottom-mounted Figure 9...
- Page 13 There should not be a gap between the trailer frame and the link plate bolts above or below the frame. See Figure 11. Move electrical or propane lines if necessary. Correct - No Gaps Incorrect - Gap Between Frame and Bolt ...
-
Page 14: Step 5: Spring Bar Installation
L-bracket Installation For the first setup, slide the L-brackets onto the link plate studs with the studs in the two center holes, with the friction plate facing away from the trailer. They may need to be adjusted up or down later to get good weight distribution. Thread on the nylock nuts and tighten them. -
Page 15: Step 6: Weight Distribution Setup
Release the bars by lifting the locking tab and rolling the bar out of the top socket of the hitch head. Frequently apply a thin coat of bearing grease to the area of the spring bar knuckles where they rub inside the hitch head sockets to reduce wear and make insertion easier. - Page 16 Start by measuring the distance from the ground to the wheel well directly above the front axle with the trailer uncoupled. Measure both driver and passenger sides, and use the average of these two. Record this on line A of the weight distribution setup table.
-
Page 17: Step 7: Weight Distribution Adjustment
With the trailer coupled and weight distribution engaged (spring bars in place and jack retracted), measure the front wheel well height exactly as done before for lines A and B. Record this new measurement on line C of the weight distribution setup table on p. 15. 3”... - Page 18 WARNING WARNING Over or under adjusted weight distribution decreases tow vehicle stability. Fixing Under or Over Adjustment: ADVERTENCIA If the hitch is transferring too little or too much weight, you must make adjustments ADVERTENCIA to the hitch setup. For changes during the initial setup we recommend adding or removing spacer washers first to try and keep the spring bars parallel with the trailer AVERTISSEMENT frame.
- Page 19 If you have reached the maximum number of spacer washers (9), or if adjusting temporarily due to a change in vehicle loading, use the tongue jack to unload the spring bars. Raise the L-brackets one hole. Move the spring bars back over the L-brackets and retract the tongue jack.
-
Page 20: Step 8: Trailer Pitch Adjustment
Step 8 - Trailer Pitch Adjustment After achieving a good weight distribution setup you may need to adjust the pitch (angle or attitude) of the trailer. Step back and look at the trailer to see if the front appears to be tipped up or down excessively. Measure the front and rear of the trailer again at the same points you did when setting the trailer parallel to the ground in Step 3. -
Page 21: Step 10: Regular Maintenance
After you have made proper adjustments to the Torque Spec Summary hitch to give your setup good weight distribution Shank bolts 250 ft-lb and trailer pitch, tighten all of the nuts and bolts completely. Link plate bolts 65 ft-lb Unhitch the trailer and pull the tow vehicle L-bracket nuts 75 ft-lb forward a few feet to give yourself working room. -
Page 22: Step 11: Hitching Up
If your jack is fully extended before you can get the spring bars over the L-brackets, use the Snap-up lever to lift the bars in place. Using a block or a jack extension foot, like the Fastway FLIP™ automatic jack foot, may be helpful to get the spring bars fastwaytrailer.com... -
Page 23: Step 12: Unhitching
Figure 30 high enough to easily move them in place. Swing the spring bars into place over the L-brackets and secure them with the L-pins. Retract the jack, lowering both the trailer and tow vehicle together, until the jack is completely retracted. - Page 24 Fastway FLIP automatic jack foot, may be helpful to lift the vehicles high enough to release the tension on the spring bars. Remove the L-pins. Swing the spring bars outward, away from the frame, enough that they will easily clear the L-brackets as they are lowered.
-
Page 25: Appendix A: Troubleshooting Guide
TW/GTW causing your sway ratio. Remove cargo carriers issues, contact your or 2nd trailer from rear of dealer or Fastway trailer. See Appendix B. customer support for Improperly rated or Inflate tires correctly, or assistance. -
Page 26: Customer Support
Trailer nose is too high Incorrect hitch ball Follow Step 8 - Trailer Pitch or too low (cont.) height Adjustment to change the hitch ball height. Bent or broken Sway control bracket Follow Step 4 and set the L-bracket, L-pin, or installed too far back center of the sway control link plate... -
Page 27: Appendix B: Weight Distribution Adjustments
Appendix B - Weight Distribution Adjustments Study the following concepts and their effects on your vehicles when setting up your hitch for the first time, and when adjusting your hitch before each trip: Tow vehicle rear axle to hitch ball distance: A longer distance will transfer less weight distribution than a shorter distance, with the same spacer washer and L-bracket settings. -
Page 28: Appendix C: Installing With Auto-Level/Air Bags
Cargo carriers, bike racks, and second trailers attached to the rear bumper of a trailer add weight to the rear of the trailer that automatically subtracts tongue weight. We recommend you do not add weight of any form to the rear bumper of your trailer. -
Page 29: Warranty
corresponding weight distribution calculation will be reasonably accurate. If the system adjusts both front and rear axle heights, this new measurement will only be a reference measurement or estimate of the current weight distribution. It may no longer correlate to the load on the front axle when compared with previous measurements since the height may have been adjusted by the auto-level system. -
Page 30: Service Tech Checklist
Service Tech and Experienced Installer Check List Step 1 Park the loaded tow vehicle and trailer on a level surface. Step 2 Install the hitch ball. If already installed, check that the ball is in good condition and is tight on the hitch head. Step 3 Measure from the ground to the trailer coupler. - Page 31 No other wheel chock delivers more wheel stabilization than the ONESTEP. The Fastway ZIP™ breakaway cable provides a safer and more effective connection to your trailer, because it doesn’t rust, fray, or become damaged while towing. This keeps you and your trailer safer.
- Page 32 More Great Fastway Towing Accessories The Fastway FLIP™ automatic jack foot extends your trailer jack by up to six inches, eliminating 50 cranks both up and down, saving you time and effort. It provides more safety and stability for your trailer, and eliminates the time and effort it takes to search for and store wood blocks to put under your tongue jack.
Need help?
Do you have a question about the e2 HITCH TRUNNION and is the answer not in the manual?
Questions and answers