
Related Manuals for Zivid One+ S


Summary of Contents for Zivid One+ S
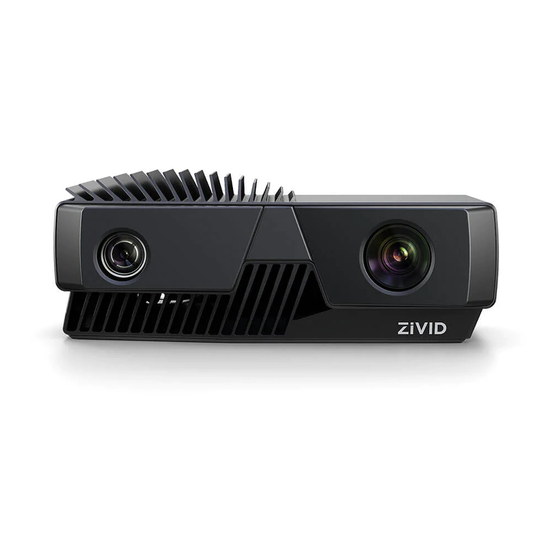
- Page 1 Zivid One User Guide Zivid One+ S (ZVD1P-S) Zivid One+ M (ZVD1P-M) Zivid One+ L (ZVD1P-L )
-
Page 2: Table Of Contents
Start Guide Zivid box contents ........ -
Page 3: Start Guide
Start Guide Start Guide Zivid box contents In the Zivid box you should nd: • Zivid D camera • Power supply • m USB . Cable (Machine Vision Certi ed) Optional: m optical cable. . - /... -
Page 4: Target Applications
Due to the high dynamic range, Zivid One+ cameras are suitable for imaging dark absorptive parts and shiny metal parts. The following cases do not work well with Zivid cameras: •... -
Page 5: Robustness, Safety And Ip Rating
Do not connect external I/O signals to the device while it is powered; this may damage the device. IP rating Zivid One+ cameras are water and dust resistant and are rated IP6 . Zivid One+ cameras can handle vibrations and shocks without being damaged according to the following shock/vibration standards: •... -
Page 6: System Requirements
Exceeding the limit values may cause permanent damage. Please note the power ratings if power is provided from other sources than the supplied AC/DC converter. The Zivid unit is protected against reverse polarity and against overheating by a thermis- tor that physically removes the power. -
Page 7: Mechanical And Electrical Installation
Start Guide .6 Mechanical and Electrical Installation Working Distance and Field of View . - /... - Page 8 Start Guide Mounting Speci cations and Dimensions Use the threaded holes on the bottom side of the device to mount it to a bracket. Zivid cameras can be xed on most standard photography tripods. . - /...
- Page 9 Start Guide Angle the camera The imaging sensor inside Zivid cameras is offset at a slight pan angle in the azimuth direction (y-axis). This should be considered if it is desired to have the camera perpen- dicular to the scene.
- Page 10 . Plug the USB cable into the “DATA” port and into a USB . port on your PC. Note Ensure that all connections are screwed tightly in. Using a direct cable from the PC to the Zivid camera works better than connecting the camera via a USB hub. Use only Zivid approved cables and extenders.
-
Page 11: Service And Maintenance
The device contains no user-serviceable parts inside. The product warranty will be void if opened. Follow the below instructions to ensure that your Zivid camera is well maintained: • Check screw connections and connectors at regular intervals. • Do not block the air opening on the front and rear sides of the product. - Page 12 Start Guide Software APIs C++, C#, .NET, Python, ROS, GenICam/HALCON Windows / 8 / Ubuntu 6. / Ubuntu 8. Operating temperature °C Storage temperature to 6 °C Safety and EMC CE / CB / EN6 / FCC class A...
-
Page 13: Zivid Studio
• Save point clouds and color images to disk. Toolbar The toolbar is located at the top of the Zivid Studio GUI. It consists of drop-down menus to handle les, control the GUI, and get information about the Zivid Software. - Page 14 Zivid Studio File Shortcut Function Load a ZDF le. .zdf is the native Zivid le format that includes point Open Ctrl+O cloud, color image, and depth image data. Save a point cloud, color image, and depth image data to a ZDF le, the...
-
Page 15: Available Views
Zivid Studio Available Views There are three available views to choose from at the bottom of the Zivid Studio GUI. Point Cloud This view displays the point cloud of the scene after a capture or after loading a ZDF le. -
Page 16: Color
Zivid Studio Color This view displays the color image of the scene after a capture or after loading a ZDF le. • Position the mouse pointer over a pixel in the image to get image coordinates, RGB, and contrast values. The pixel values are displayed in the status bar in the bottom left corner of the window. -
Page 17: Control Panel
Zivid Studio Control Panel The control panel is located on the right side in the Zivid Studio GUI. It contains two sections: This view displays the depth image of the scene after a capture or after loading a ZDF •... -
Page 18: Capture
Zivid Studio Capture This section is used to capture D images. Here you can control and con gure the cam- era settings. This section has two modes: • Assisted Mode • Manual Mode Assisted Mode This mode is the easiest to use. - Page 19 It is possible to save all settings to disk. • Click on the three dots next to Capture • Then click Save settings to folder The folder needs to be empty. Settings can be loaded using the Zivid SDK. . - /...
- Page 20 Zivid Studio Manual Mode In the manual mode, users must con gure all settings and lters manually. Settings and Filters Setting Function Exposure Time The duration a single camera image is exposed to light. The opening that controls the amount of light to the camera sensor through Iris/Aperture Step the lens.
- Page 21 Zivid Studio The color temperature of ambient light affects the appearance of the color image. Set the white balance by adjusting red and blue color balance to make color images look natural. Single and Live captures • The “Single” button captures a single frame with the speci ed settings, which is then displayed.
- Page 22 Zivid Studio Once you select the manual mode, you can click the “Add Frame” button to add additional frames. By default, each new frame added uses the settings of the previous frame. You can clone a speci c frame by clicking on the three dots next to that frame and then on the “Clone”...
-
Page 23: Quick Reference Index
Quick Reference Index File Shortcut Function Load a ZDF le. .zdf is the native Zivid le format that includes Open Ctrl+O point cloud, color image, and depth image data. Save a point cloud, color image, and depth image data to a ZDF... - Page 24 Zivid Studio Trigger a single frame capture with the settings speci ed in the Single checked frame. Trigger a continuous capture that allows viewing the scene in Live real-time. Trigger a multi-frame HDR capture with the settings speci ed in the checked frames;...
- Page 25 Zivid Studio The color temperature of ambient light affects the appearance of the color image. Setting white balance by adjusting blue and Blue color balance red color balance makes the color image look natural. The blue color balance parameter ranges between . and 8. .
- Page 26 Zivid Studio Zivid AS Gjerdrums vei NO 8 Oslo Norway © Zivid AS. All rights reserved. Subject to change without notice. . - /...
Need help?
Do you have a question about the One+ S and is the answer not in the manual?
Questions and answers