Advertisement
Quick Links
Advertisement

Subscribe to Our Youtube Channel
Summary of Contents for Tinkerine Studio DittoPro-R
- Page 1 Setup & Operations Manual Version 1.0...
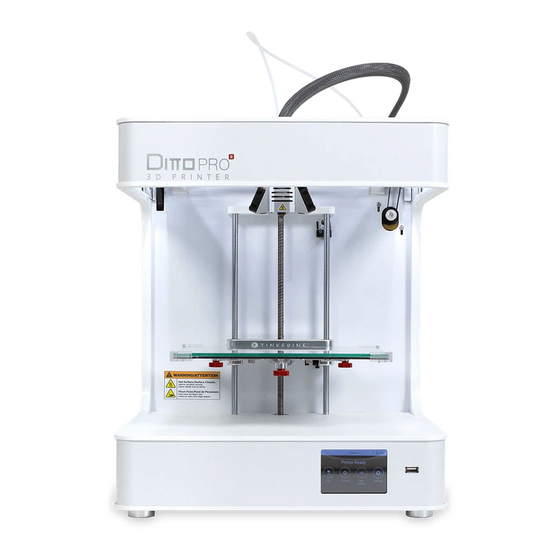
- Page 2 Unboxing Welcome Congratulations on receiving your DittoPro-R 3D Printer! This guide is designed to walk you through the unboxing and setup process so you can start printing your 3D creations. The DittoPro-R 3D Printer Got space? Save the can be too heavy to lift out shipping box and of the box by yourself.
- Page 3 Unboxing Step 1 Removing the Accessory Box The accessory box is slotted into the top foam compartment of the printer’s packaging. Remove the accessory box and check to see that you have all of the following accessories. Product Warranty Registration Visit the online printer registration page and follow the instructions to activate your product warranty.
- Page 4 Remove the top foam shipping bracket and take out the 3D printing filament located at the side of the box. Remove the DittoPro-R 3D Printer and place it upright on a firm flat surface. Airflow Allow passive airflow around the DittoPro-R 3D Printer.
- Page 5 Removing the Gantry Clips Located near the top of the DittoPro-R 3D Printer are two plastic gantry clips that prevent the extruder from moving freely during shipping. You can remove the two gantry clips securing the extruder by pushing down the tabs on each end of the clips.
- Page 6 UV and moisture. Store opened spools of filament inside the original packaging or in a sealed bag with a desiccant packet. The use of third-party filament voids the warranty on your DittoPro-R 3D Printer. Loading Removing...
- Page 7 Loading the Filament Step 6 Loading the Filament (Cont.) Thread the filament through the guide tube (1). Push the tensioner button (2) down to make it easier to thread the filament through the drive gear and into the hotend (3). Once the filament is inserted all the way down into the hotend, insert the guide tube into the top of the extruder cap.
- Page 8 Installing the Glass Print Surface Step 7 Installing the Glass Print Surface Slide the glass print surface onto the bed with the blue painter’s tape side facing upward. The taped surface will act as an adhesion material for the PLA plastic. At an angle, slide the glass print surface into the two rear corners of the bed. While gently pushing it against the rear corners, clip the print surface into the two front corners as illustrated below.
- Page 9 First Time Setup Upon powering up your DittoPro-R for the first time, you’ll be prompted to perform a one-time setup for your printer. The setup process will guide you through the steps of naming your printer and connecting it to a wireless network.
- Page 10 Print Surface Levelling Step 9 Print Surface Levelling You’ll need to perform a print surface calibration for your printer to ensure the print surface is perfectly levelled in relation to the print nozzle. Doing so allows the molten plastic to evenly adhere onto the print surface during printing. It is recommended that you perform the calibration process every time the printer has been transported to a new location.
- Page 11 Starting a Print Step 10 Starting a Print Follw the instructions below to begin your 3D print! Before you proceed, make sure you’ve installed the filament and performed the print surface calibration. Select Print from the Home Menu to access the Select a file to print from the list.
- Page 12 Print Adhesion Important! Ensuring Proper Print Adhesion Whenever you begin a print, always check that the first layer of the print is properly stuck onto the blue painter’s tape. A properly levelled print surface should have the extruded filament a bit squished. While the printer is printing the skirt (outer perimeter), observe the deposited filament and make micro-adjustments with the thumbscrew if necessary.
-
Page 13: Final Step
Print Removal Final Step Print Removal When your print is completed, it’s time to remove it from the print surface. While smaller prints can sometimes be easily removed by hand, we recommend you to use a Print Removal Knife for removing prints. After your print has completed, remove the glass print surface from Using the Print Removal Knife, slowly wedge the knife between the the printer and place down on a flat surface. - Page 14 LCD Menu Settings Additional LCD Menu Settings Home Menu Print - Select a file for printing. Filament - Load/remove filament wizard. Surface Levelling - Print surface calibration wizard. Settings - Settings menu. Filament Menu Accessed from the Home Menu, the Load/Remove Filament wizards will guide users with loading and unloading filament from the printer.
- Page 15 LCD Menu Settings Additional LCD Menu Settings Print Status Menu Default screen shown when printing is in progress. 1. File Name 2. Estimated remaining print time shown in (Hours : Minutes) 3. Print progress (0-100%) 4. Elapsed print time shown in (Hours : Minutes) 5.
- Page 16 LCD Menu Settings Additional LCD Menu Settings Settings The Settings menu contains different printer functions. Printer Name - Set or rename printer’s identification name. Network - Wireless connection setup. Storage - View and manage on-board storage space. Sleep - Change printer sleep timer. About Printer - Printer information and statistics.
-
Page 17: Printer Specifications
Printer Specifications Printer Specifications PHYSICALS ELECTRICAL Dimensions 37 x 49 x 43.6 cm (14.6 x 15.4 x 17.2 in) Connectivity USB, Wifi Weight 10 kg (22 lb) Consumption ~7W (sleep), ~17W (idle), ~72W (operational) Electronics RAMPS 1.4, AT mega 2560, A4988 stepper driver, DRV8825 stepper driver, BCM2837 micro-processor Power Input AC 110-220V, 50-60 Hz... - Page 18 Notes...
- Page 19 Questions? Phone: Email: 1-604-288-8778 contact@tinkerine.com (Vancouver, BC) 1-844-846-5377 (International)


Need help?
Do you have a question about the DittoPro-R and is the answer not in the manual?
Questions and answers