Table of Contents
Advertisement
Quick Links
Head office
2 rue Marc Donadille
13013 Marseille - France
Installation, operation and
maintenance instructions
DualSun XXXM-60-3BBP
Version 1.2 – March 2020
DualSun online library
We reserve the right at any time to make any changes that we deem useful
© DualSun SAS
EN
Manufacturing site
Rue du Champ de Foire
01640 Jujurieux – France
Advertisement
Table of Contents

Related Manuals for DUALSUN M-60-3BBP Series


Summary of Contents for DUALSUN M-60-3BBP Series
- Page 1 Installation, operation and maintenance instructions DualSun XXXM-60-3BBP Version 1.2 – March 2020 DualSun online library Head office Manufacturing site 2 rue Marc Donadille Rue du Champ de Foire 01640 Jujurieux – France 13013 Marseille - France We reserve the right at any time to make any changes that we deem useful...
-
Page 2: Table Of Contents
7.2 Hydraulic disconnection ............................ 40 7.3 Waste treatment .............................. 40 Responsibilities..........................40 8.1 Warranty conditions ............................41 8.2 Disclaimer ................................. 41 Installation, operation and maintenance instructions - DualSun XXXM – 60 – 3BBP V1.2 – March 2020 Page 2 sur 41... -
Page 3: Introduction
String: single circuit of modules mounted in series, either at the electrical level (PV photovoltaic) or at the hydraulic level (thermal). Installation, operation and maintenance instructions - DualSun XXXM – 60 – 3BBP V1.2 – March 2020 Page 3 sur 41... -
Page 4: General Safety Instructions
Please read this installation manual thoroughly and in detail in order to be able to fully exploit the functionality of the product. DualSun disclaims all liability for defects and damages resulting from failure to comply with the installation instructions (improper use, incorrect installation, handling error, etc...). -
Page 5: General Standards To Be Respected
The entire solar installation must be mounted and operated in accordance with the recognised technical rules. All electrical work must be carried out according to local directives. Installation, operation and maintenance instructions - DualSun XXXM – 60 – 3BBP V1.2 – March 2020... -
Page 6: General Description
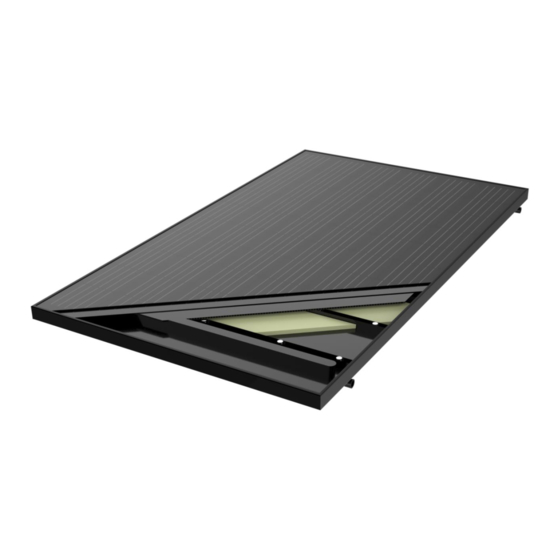
2 General description 2.1 Operating principle of the Spring Panel DualSun Spring is a new generation hybrid solar panel that provides both electricity (photovoltaic) and hot (thermal) water for housing. Protected by several patents, the Spring Panel produces 2.5 times more energy than a photovoltaic panel of the same surface. -
Page 7: Technical Specifications
*u’; u’ = u - 3. collectors carried out by KIWA for a wind speed u = 1 m/s: a *u’ ; a Installation, operation and maintenance instructions - DualSun XXXM – 60 – 3BBP V1.2 – March 2020 Page 7 sur 41... -
Page 8: Thermal Output Vs. Flow Rate Behaviour
DT (G=800 W/m2) DT (G=500 W/m2) Figure 2 : Delta T = f (Q) curves for DUALSUN Spring XXXM – 60 – 3BBPI – insulated version Delta T° vs. flow rate and irradiation Tamb = 25°C and Tin = 25°C - wind = 1 m/s... -
Page 9: Pressure Loss
3000 2000 1000 Flow rate (L/h/panel) Figure 4 : Pressure loss curves for DUALSUN Spring XXXM – 60 – 3BBPI and 3BBPN panels in portrait with DN15 fittings Pressure loss- DN 15 fittings (Glycol 40% @ T=30°C) 10000 9000 8000... -
Page 10: Recommended Flow Rates
2500 PORTRAIT 2000 1500 1000 Flow rate (L/h/panel) Pressure loss curves for DUALSUN Spring XXXM – 60 – 3BBPN panels in portrait with DN26 fittings Figure 6 : 2.3.6 Recommended flow rates Nominal flow rates: Application Thermal discharge Direct pool heating... -
Page 11: General Recommendations
2.4 General recommendations 2.4.1 Handling DualSun modules must be handled like any glass product. To avoid accidents, injuries, or damage to the module during work, the following precautions must always be followed: • Do not walk on the modules. •... -
Page 12: Technical Considerations
2.5.2 Tilt angle The optimal mounting position of DualSun solar panels results in a 90° incidence angle of sun rays relative to the surface of the panels (i.e. Perpendicular to the panels). To maximize the productivity of the installation, panels should be positioned at the optimum orientation and tilt angle. -
Page 13: Types Of Mounting
2.5.6 Fire/explosion protection Do not install the DualSun modules in the vicinity of highly flammable gases, vapours, or dust (e.g., next to a gas station or containers). The national and local fire prevention standards and regulations must be respected during installation. -
Page 14: Assembly And Installation
The DualSun panels can be installed both in portrait and landscape orientation. DualSun does not provide the mounting system for fastening the modules on the roof: please refer to the installation instructions of the chosen mounting system, to install the modules whether for an integrated or for a superimposed installation, in landscape or portrait. - Page 15 The compatibility of the mounting system with the modules must be assessed before any installation, especially when the system does not use brackets or clamps. Installation, operation and maintenance instructions - DualSun XXXM – 60 – 3BBP V1.2 – March 2020...
-
Page 16: Mechanical Installation
3.2.1 Positioning areas of mounting system rails The hybrid DualSun Spring modules have the particularity of integrating a heat exchanger on the back of a photovoltaic panel whose physical characteristics correspond to photovoltaic panels on the current market, 35 mm frame thickness in particular. -
Page 17: Raising The Panels Relative To The Roof Surface
Figure 9 : Overall dimensions of hydraulic connections on the rear panel The bulk of the hydraulic fittings on the rear side of the DualSun Spring panels is to be considered carefully to avoid contact of the fittings with the surface of the roof cover. -
Page 18: Possible Connection Configurations With Hydraulic Links
3.2.3 Possible connection configurations with hydraulic links In order to facilitate their routing in a maximum of configurations, the DualSun hydraulic links have been developed to allow connection in portrait or landscape mode. It is thus possible to adapt the hydraulic links according to the desired layout and also to bypass obstacles between the panels and the roof. -
Page 19: Trapezoidal Sheet Metal Roofing
In this case, the edge of the hydraulic fitting can be placed 60 mm to the edge of the corrugation crest. Figure 15 : DN26 hydraulic link routing through corrugation crest Installation, operation and maintenance instructions - DualSun XXXM – 60 – 3BBP V1.2 – March 2020... - Page 20 The positioning of the first module depends on the corrugation crest routing detailed above. Then check that each DualSun fitting is correctly positioned in the corrugation recess, according to the width of the inter-panel clamps, respecting the minimum distances for the routing of the hydraulic links through the corrugation crests.
- Page 21 Figure 18 : Rails avoidance in portrait with DN15 hydraulic links Rails avoidance in landscape: Fixing areas ROOF SURFACE Figure 19 : Rails avoidance in portrait with DN26 hydraulic links Installation, operation and maintenance instructions - DualSun XXXM – 60 – 3BBP V1.2 – March 2020 Page 21 sur 41...
-
Page 22: Electrical Installation
PV output. 4.1 Electrical connection Serial wiring Parallel wiring Serial/parallel wiring Overcurrent protection Diode Connector Figure 20 : Electrical wiring configurations Installation, operation and maintenance instructions - DualSun XXXM – 60 – 3BBP V1.2 – March 2020 Page 22 sur 41... -
Page 23: Serial Wiring
(refer to the product datasheet in chapter 2.3.2) If additional PV modules are to be installed in a string with the DualSun modules, their power and current must be equal to those of the DualSun panels within the tolerances of the manufacturers. -
Page 24: Electrical Fittings, Cables And Diodes
However, the bypass diode is not the overcurrent protection device. If the diode is suspected to get out of order, the installer or system maintenance supplier shall contact DualSun. The diode type is 20SQ045 (for SUNTER, rated current is 15A, peak reverse voltage is 45V). -
Page 25: Grounding And Lightning Protection
The frame of the DualSun panels comes with two earthed holes at each corner of the frame. Avoid direct contacts between aluminium and copper by using an intermediate metal such as stainless steel or tin. -
Page 26: Indirect Lightning Strike
Figure 22 : Simplified diagrams showing two examples of good and poor grounding of a PV field Installation, operation and maintenance instructions - DualSun XXXM – 60 – 3BBP V1.2 – March 2020 Page 26 sur 41... -
Page 27: Hydraulic Installation
DualQuicfit fittings To connect the Spring panels to each other, DualSun has developed the DualQuickfit quick fittings. They are mounted on flexible lines and conditioned as rings. These flexible lines are preassembled according to the roof layout of the installation, in portrait or landscape. - Page 28 Simplified diagram of a 4-panel line in portrait: Plug exit entrance Plug Simplified diagram of a 2-panel line in landscape: Plug exit entrance Plug Installation, operation and maintenance instructions - DualSun XXXM – 60 – 3BBP V1.2 – March 2020 Page 28 sur 41...
- Page 29 To ensure proper filling of the panels during commissioning, no more than 6 panels shall be placed in line either in portrait or landscape. Figure 25 : Maximum number of modules in line Installation, operation and maintenance instructions - DualSun XXXM – 60 – 3BBP V1.2 – March 2020 Page 29 sur 41...
-
Page 30: Hydraulic Balancing Of Panel Fields
Figure 27 : Hydraulic balancing – Pressurised system Panels in landscape – DN15 Hydraulic links in landscape – cf. 3.2.3.3 Installation, operation and maintenance instructions - DualSun XXXM – 60 – 3BBP V1.2 – March 2020 Page 30 sur 41... - Page 31 (higher flow rate). With manual balancing valves, fully open the balancing valves when filling for commissioning. Installation, operation and maintenance instructions - DualSun XXXM – 60 – 3BBP V1.2 – March 2020 Page 31 sur 41...
- Page 32 Figure 31 : Hydraulic balancing with balancing valves – Pressurised system Panels in landscape – DN15 Hydraulic links in landscape – cf. 3.2.3.3 Installation, operation and maintenance instructions - DualSun XXXM – 60 – 3BBP V1.2 – March 2020 Page 32 sur 41...
- Page 33 The installation of stop valves is recommended to purge string by string during filling, commissioning and possible maintenance operations. Panels only in portrait to enable water draining. Installation, operation and maintenance instructions - DualSun XXXM – 60 – 3BBP V1.2 – March 2020 Page 33 sur 41...
- Page 34 Figure 35 : Hydraulic balancing – Direct pool heating system Panels in portrait – DN26 Hydraulic links in portrait – cf. 3.2.3.1 Installation, operation and maintenance instructions - DualSun XXXM – 60 – 3BBP V1.2 – March 2020 Page 34 sur 41...
-
Page 35: Connecting The Panel Field To The Transfer Circuit
3. Multilayer PEX-Al-PEX tubes. DualSun suggest the use of multilayer pipes for hydraulic transfer lines. Indeed, due to the low temperatures and pressures in the solar circuit (<80°C and 6 bar max.) and the resistance to glycol at over 80°C, the multilayer is ideal for hybrid systems. - Page 36 DN Copper DN14 DN18 DN22 DN28 DN32 DN42 Number of strings DN Stainless steel DN12 DN16 DN20 DN25 DN32 DN40 Installation, operation and maintenance instructions - DualSun XXXM – 60 – 3BBP V1.2 – March 2020 Page 36 sur 41...
- Page 37 DN Copper DN14 DN18 DN22 DN28 DN32 DN42 Number of strings DN Stainless steel DN12 DN16 DN20 DN25 DN32 DN40 Installation, operation and maintenance instructions - DualSun XXXM – 60 – 3BBP V1.2 – March 2020 Page 37 sur 41...
-
Page 38: Panel Temperature Probe
To do this, use a cable with at least two conductors of diameter greater than 0.5 mm² (2G0, 5) The DualSun temperature probe is a PT1000 4 mm probe, supplied into the DualSun essential kit. It is placed at the outlet of the last Spring module of the thermal circuit. -
Page 39: Cleaning The Surface Of The Modules
7.1 Disassembling a module If it proves necessary to disassemble a module, the following procedure must be followed: Drain the installation (see DualSun instructions – Installation and commissioning of a pressurised system and • Swimming pool system installation). -
Page 40: Hydraulic Disconnection
Kit. Figure 37 : hydraulic fittings Disassembly of DuaQuickfit 7.3 Waste treatment For the waste treatment of a used DualSun system, the applicable regional and national regulations must be met. 8 Responsibilities DualSun installer user DualSun products are produced... -
Page 41: Warranty Conditions
• Failure to comply with the safety rules set out in the recommendation published by the national risk prevention body Installation, operation and maintenance instructions - DualSun XXXM – 60 – 3BBP V1.2 – March 2020 Page 41 sur 41...
Need help?
Do you have a question about the M-60-3BBP Series and is the answer not in the manual?
Questions and answers