
Related Manuals for Ecler WiSpeak


Summary of Contents for Ecler WiSpeak
- Page 1 WiSpeak Hardware WiSpeak – Wireless Pro Audio Transmitters - Receivers USER MANUAL v.20200302...
-
Page 2: Table Of Contents
6.2. CUBE receivers mounting and power up................13 6.3. CORE transmitter installation ....................16 PAIRING THE RECEIVERS & STARTING UP THE WiSpeak SYSTEM ....... 18 CORE transmitter VOLUME control: REMOTE and MUTE control ports ....20 LED information, codes and additional procedures............21 9.1 CORE transmitter ........................ - Page 3 14. FUNCTION DIAGRAMS ....................... 28 14.1. CORE ............................28 14.2. TUBE ............................29 14.3. CUBE ............................30 15. TECHNICAL CHARACTERISTICS ..................31 15.1. CORE ............................31 15.2. TUBE ............................33 15.3. CUBE ............................35...
-
Page 4: Important Remark
1. IMPORTANT REMARK The lightning flash with arrowhead symbol, within an equilateral triangle, is intended to alert the user to the presence of uninsulated “dangerous voltage” within the product’s enclosure that may be of sufficient magnitude to constitute a risk of electric shock to persons. The exclamation point within an equilateral triangle is intended to alert the user to the presence of important operating and maintenance (servicing) instructions in the literature accompanying the appliance. - Page 5 8. Do not install near any heat sources such as radiators, heat registers, stoves, or other apparatus (including amplifiers) that produce heat. 9. Do not defeat the safety purpose of the polarized or grounding type plug. A polarized plug has two blades with one wider than the other. A grounding type plug has two blades and a third grounding prong.
-
Page 6: Important Note
(permanent or temporary) installations, including transmitter devices and receiver (loudspeakers) devices. The main highlights of the WiSpeak technology are: • Simple and fast installation (with or without the use of the WiSpeak grip app) • Plug & play: no wires, no construction works •... - Page 7 A WiSpeak installation is typically made up of one transmitter device and from 1, up to a maximum of 24 receiver units, where: • the transmitter device is the electronic unit that communicates with all the receiver devices to create a WiSpeak wireless network, and takes the role of the Master...
-
Page 8: Transmitter And Receiver Models
Main features: • External, universal Power Supply (100-240VAC 50-60Hz) • Compatible with WiSpeak grip app for set up and control functions (available for Android and iOS), using Bluetooth® connection 3 audio inputs available: • o Analogue stereo, unbalanced. 2 x RCA connectors o Analogue stereo, balanced. -
Page 9: Tube Model
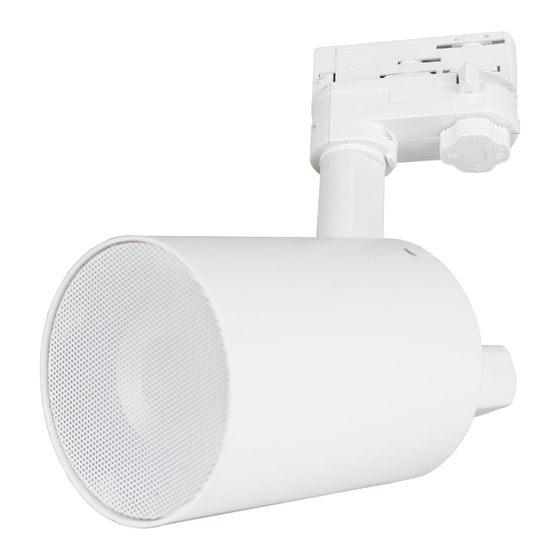
Lighting rail mount included • Surface mount accessory available, optional (ref. TUBE SMA) Universal, internal power supply, taking mains AC from the lighting rail bracket • (100-240VAC 50-60Hz) • 1 x WiSpeak wireless audio signal received, from the transmitter it is paired to... -
Page 10: Cube Model
1 x AUX OUT analogue signal available (a copy of the received WiSpeak signal). It can be used for linking the unit to another WiSpeak transmitter, to extend the network, or to external audio devices, such as amplifiers, mixers or subwoofer units •... -
Page 11: Installation
6. INSTALLATION 6.1. TUBE receivers mounting and power up The TUBE receivers come with the lighting rail bracket already mounted. Follow these steps to install a TUBE unit in a lighting rail: 1. Ensure that the 4-position (OFF-1-2-3) circuit selector wheel in the TUBE unit is in the OFF position 2. - Page 12 3. Rotate the safety lug to secure the loudspeaker on the lighting rail. Rotate the circuit selector wheel to a position other than OFF, the one matching with a circuit in the rail that will deliver mains AC to the unit. Then, the safety lug will be locked 4.
-
Page 13: Cube Receivers Mounting And Power Up
6.2. CUBE receivers mounting and power up The CUBE receivers come with a lighting rail bracket already mounted, but they also include a wall / surface mount bracket that can replace the lighting bracket in case that a wall mount is the chosen option. A CUBE unit could be as well installed directly on a surface, like a desktop, shelf, table, etc, without using the rail mount or the wall mount included brackets. - Page 14 3. Rotate the safety lug to secure the loudspeaker on the lighting rail. Rotate the circuit selector wheel to a position other than OFF, the one matching with a circuit in the rail that will deliver mains AC to the unit. Then, the safety lug will be locked 4.
- Page 15 Follow these steps to install a CUBE unit on a wall: 1. Drill three 6 mm holes in the wall, matching the position of the holes in the bracket. 2. Insert three 6 mm wall plugs into them. 3. Place the wall bracket in place, previously passing the supplied AC cable (if required) through the square hole in the bracket.
-
Page 16: Core Transmitter Installation
6.3. CORE transmitter installation A CORE transmitter unit is necessary to control and feed with wireless audio a WiSpeak network of TUBE and/or CUBE receivers, up to a maximum of 24 units. The CORE unit is suitable for installation on a wall or under a surface (table, shelf, cupboard, etc.), thanks to its design and layout of its connectors, controls and LED... - Page 17 Example 2: the transmitter is close to a corner in a rectangular space, to be covered with WiSpeak receivers Max: 24 receivers Master (transmitter) Máx: 12 meters In the second example, the maximum coverage area will be around ¼th of the...
-
Page 18: Pairing The Receivers & Starting Up The Wispeak System
CORE transmitter and every single TUBE or CUBE receiver are them all powered ON and within the coverage range of the WiSpeak system. Otherwise, a Partial Pairing result can be achieved (See chapter 9 for further information) - Page 19 The above process provides a solid “plug&play” method to easily set a system up and running in few minutes, with no need to use the WiSpeak grip app. However, WiSpeak grip provides the installer of the system with many additional fine-tune options that can lead to a system’s more precise performance, better yet customised to each venue and...
-
Page 20: Core Transmitter Volume Control: Remote And Mute Control Ports
(relay, switch, etc.) that, when closed, will MUTE the WiSpeak wireless audio transmission, as well as the audio delivered at the AUX OUT back panel connector. It is a very useful way of silencing the WiSpeak audio system completely whenever an external emergency or alarm system, for instance, must be activated •... -
Page 21: Led Information, Codes And Additional Procedures
At the left-hand side, there are two LED indicators that provide information about the global status of the transmitter unit and its network of paired receivers: WiS (WiSpeak interface status) and RX (receivers’ network status), with these possible codes or combinations:... - Page 22 CORE unit for audio transmission (A2DP). Therefore, even the Bluetooth® input is selected in the CORE unit, no audio will be received via Bluetooth® by the CORE unit, thus not sent via WiSpeak wireless audio transmission to the receivers’ network...
-
Page 23: Tube / Cube Receivers
9.2 TUBE / CUBE receivers 9.2.1. TUBE The TUBE receiver has two LED indicators at its rear panel: WiS (WiSpeak interface status) and STR (wireless streaming reception status): The possible combinations of the status of both LEDs have the following meaning... -
Page 24: Cube
Blinking The unit is paired with a transmitter, but currently not online with it for any reason (the transmitter is OFF, out of range, etc.), and trying to establish a proper WiSpeak connection Blinking Blinking The unit is not paired to any transmitter and it is available to... -
Page 25: Extended Information About The Wispeak Pairing Procedure
10. Extended information about the WiSpeak PAIRING PROCEDURE The WiSpeak pairing procedure must be necessarily performed at least once to setup a WiSpeak system, after the transmitter and all the receivers have been physically installed and powered, and it’s time to set up and run the installation. -
Page 26: Unpair Procedure
Partial Pairing, a new pairing process will be required, after having applied the proper countermeasures to try to pair again and get a successful result. A WiSpeak system always needs a successful pairing process to start performing in a stable and reliable way. -
Page 27: Special Reset Procedures
As both procedures are extremely dangerous for a running WiSpeak system when applied without the proper permissions, and/or without the right knowledge of their consequences, we beg you ask your official WiSpeak installer / distributor to carry them out. 13. CLEANING The casing should not be cleaned with solvents or abrasive materials since they can damage the screen printing. -
Page 28: Function Diagrams
14. FUNCTION DIAGRAMS 14.1. CORE 1. RF Antenna 2. WiSpeak LED 3. RX LED 4. WiSpeak Pair key 5. Volume / MUTE 6. Input 1 LED 7. Input 2 LED 8. Bluetooth ® 9. Input Source Selector 10. Bluetooth Antenna ®... -
Page 29: Tube
14.2. TUBE 1. WiSpeak interface status LED 2. WiSpeak Pair key 3. Wireless streaming reception status LED 4. Local Aux Output... -
Page 30: Cube
14.3. CUBE 1. WiSpeak interface status LED 2. Wireless streaming reception status LED 3. WiSpeak Pair key 4. Local Aux Output 5. Rail / wall bracket guide 6. AC cable connector 7. Mains switch... -
Page 31: Technical Characteristics
IN 1&2: >95dB Local Output Type AUX OUT: Analog, Mono, Balanced, Euroblock Input Selection CH 1&2: WiSpeak grip control app Nominal Output Level / Min Load AUX OUT: 0dBV / 10kΩ WiSpeak Channels (RF Wireless Audio) Channel CH 1&2: Digital, Mono, RF Wireless Audio General Controls (affects Ch1&2) - Page 32 Up to 12m from a TX to any paired RX, direct line of sight Audio Transmission 24bit uncompressed, 48kHz SR Audio Channels WiSpeak CH 1&2 Latency (I2S digital audio to RX output) 5.1ms, fixed Inter-channel delay error ±1us Reconnection time...
-
Page 33: Tube
CH1 / CH2: via WiSpeak grip app Controls VOL: via WiSpeak grip app SOLO: via WiSpeak grip app ID TEST SIGNAL: via WiSpeak grip app PAIR / UNPAIR: via WiSpeak grip app and Panel button Outputs Type Internal Loudspeaker: Analog, Mono, Self-... - Page 34 Latency From TX IN to RX AUX OUT <6ms From TX IN to RX Speaker <6ms From Speaker to Speaker ±1us Digital Audio Performance Sample size 24 bits Sampling rate 48kHz Frequency response 20Hz – 20kHz (-0.1dB) Converters Resolution (DAC) 24 bits Dynamic range (DAC) 100dB...
-
Page 35: Cube
CH1 / CH2: via WiSpeak grip app Controls VOL: via WiSpeak grip app SOLO: via WiSpeak grip app ID TEST SIGNAL: via WiSpeak grip app PAIR / UNPAIR: via WiSpeak grip app and Panel button Outputs Type Internal Loudspeaker: Analog, Mono, Self-... - Page 36 Latency From TX IN to RX AUX OUT <6ms From TX IN to RX Speaker <6ms From Speaker to Speaker ±1us Digital Audio Performance Sample size 24 bits Sampling rate 48kHz Frequency response 20Hz – 20kHz (-0.1dB) Converters Resolution (DAC) 24 bits Dynamic range (DAC) 100dB...
- Page 37 NEEC AUDIO BARCELONA S.L. reserves the right to make changes or improvements in the design or manufacturing that may affect these product specifications. Motors, 166‐168 08038 Barcelona ‐ Spain ‐ (+34) 932238403 | information@ecler.com www.ecler.com...
Need help?
Do you have a question about the WiSpeak and is the answer not in the manual?
Questions and answers