Lochinvar 100 Series User's Information Manual
Water source commercial heat pump water heating systems
Hide thumbs
Also See for 100 Series:
- Instruction manual (52 pages) ,
- Installation & service manual (44 pages)

Related Manuals for Lochinvar 100 Series


Summary of Contents for Lochinvar 100 Series
- Page 1 User’s Information Manual Series 100 Models: WHP025-WHP060- WHP090-WHP125-WHP185- WHP250 Water Source Commercial Heat Pump Water Heating Systems Certified UL 1995:2015 CSA C22.2 NO. 236:2015...
-
Page 3: Table Of Contents
TABLE OF CONTENTS SAFE INSTALLATION, USE AND SERVICE....1 INSTALLATION............13 GENERAL SAFETY INFORMATION......2 REQUIRED ABILITY.............13 PRECAUTIONS..............2 GENERAL.................13 GROUNDING INSTRUCTIONS..........2 REQUIRED TOOLS & MATERIALS........13 INTRODUCTION............3 INSTALLATION & START UP TOOLS......13 QUALIFICATIONS..............3 SERVICE TOOLS..............14 PREPARING FOR THE INSTALLATION........3 UNIT PLACEMENT..............14 PRINCIPLE OF OPERATION..........4 MOUNTING FRAME............14 THE REFRIGERATION CYCLE..........4 PAD MOUNTING.............14... - Page 4 TABLE OF CONTENTS MASTER SCREENS...........23 MASTER PANEL HOME SCREEN........23 MASTER PANEL ALARM SCREEN........23 MASTER PANEL CONFIGURATION SCREEN....23 MASTER SCREEN TERMINOLOGY......23 HOME SCREEN..............23 ALARM SCREEN..............23 CONFIGURATION SCREEN..........24 MASTER CONTROL PANEL SETUP TO MEMBER UNITS..........24 MASTER CONTROL UNIT SUPPORT CALL SEQUENCE OF OPERATIONS.....24 MEMBER SCREENS..........24 SINGLE UNIT HOME SCREEN OPERATING WITH MASTER CONTROLS.......24...
-
Page 5: Safe Installation, Use And Service
SAFE INSTALLATION, USE AND SERVICE The proper installation, use and servicing of this commercial heat pump water heater is extremely important to your safety and the safety of others. Many safety-related messages and instructions have been provided in this manual and on your own heat pump water heater to warn you and others of a potential injury hazard. -
Page 6: General Safety Information
GENERAL SAFETY INFORMATION PRECAUTIONS GROUNDING INSTRUCTIONS This heat pump water heater must be grounded in accordance **DO NOT USE THIS APPLIANCE IF ANY PART HAS BEEN UNDER WATER.** with the National Electrical Code and/or local codes. These Immediately call a qualifi ed service agency to inspect the must be followed in all cases. -
Page 7: Introduction
INTRODUCTION Thank you for purchasing this heat pump water heater. Properly This manual contains instructions for the installation, operation, installed and maintained, it should give you years of trouble and maintenance of the heat pump water heater (HPWH). It free service. also contains warnings throughout the manual that you must read and be aware of. -
Page 8: Principle Of Operation
4. In order to expedite your request, please have full model low temperature operating conditions. The accumulator and serial number available for the technician. prevents liquid refrigerant from entering the compressor where it could damage internal components. 5. Carefully consider your intended placement and location for the HPWH. -
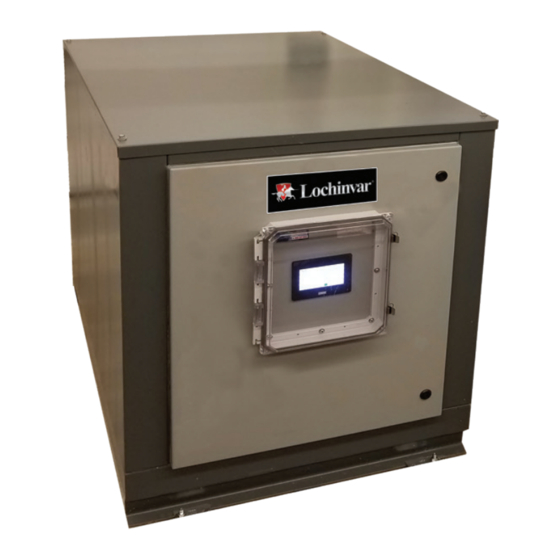
Page 9: Features & Components
FEATURES & COMPONENTS PRODUCT ILLUSTRATION ELECTRICAL PANEL RECEIVER ACCUMULATOR EVAPORATOR (HEAT EXCHANGER) (WATER TO REFRIGERANT) CONDENSER SOURCE (HEAT EXCHANGER) WATER OUTLET (REFRIGERANT TO POTABLE WATER) HEATED WATER OUTLET THERMOSTATIC SOURCE EXPANSION VALVE WATER INLET (TXV) COMPRESSOR HEATED WATER INLET Figure 1 Component Refrigeration Circuit Refrigerant State Component Heated Water Circuit... -
Page 10: Water To Water Cycle
WATER TO WATER CYCLE... -
Page 11: Rough In Dimensions
ROUGH IN DIMENSIONS PERFORMANCE SPECIFICATIONS Performance Dimensions Weight Source Heated Water Cooling Inlet Operating Model Number Water Flow Water Flow Heating Outlet Length Width Height Capacity Weight Weight Rate (GPM) Rate (GPM) Capacity Water (LBS) (LBS) (FPT) BTUH BTUH WHP025 28,600 22,275 ¾... -
Page 12: Installation Requirements
INSTALLATION REQUIREMENTS Read all installation requirements in this manual before SOURCE WATER TEMPERATURE installation begins. The installation must conform to these ENTERING SOURCE WATER TEMPERATURE instructions and all local and national code authority having jurisdiction. The entering source water temperature range of operation for the unit is 40°... -
Page 13: Clearances
CLEARANCES ELECTRICAL REQUIREMENTS To ensure optimal performance a minimum of 30 inches Ensure the power supply voltage and phase at the job site clearances required from the back, left and right sides of the matches the power supply ratings listed on the HPWH data HPWH unit and any wall obstruction. -
Page 14: Minimum Wire Size
MINIMUM WIRE SIZE Allowable Ampacities of Insulated Conductors Single-phase heat pump water heaters are two wire circuits. Three-phase heaters are three wire circuits. In addition to the foregoing, a grounded conductor is required. Not more than three conductors in raceway, cable, or earth (directly buried), based on ambient temperature of 30°C (86°F) TABLE 3... -
Page 15: Water Piping
WATER PIPING CLOSED WATER SYSTEMS Read all installation requirements in this manual before Water supply systems may, because of code requirements or installation begins. such conditions as high line pressure, among others, have installed devices such as pressure reducing valves, check The water piping installation must conform to these instructions valves, and back fl ow preventers. -
Page 16: Contaminated Water
Mixing valves are available at plumbing supply stores. Consult a Qualifi ed Installer or Service Agency. Follow the mixing valve manufacturer’s instructions for installation of the valves. TABLE 5 CONTAMINATED WATER TANK SELECTION This HPWH unit must not be used to heat any fl uid other than The HPWH unit is not an instantaneous water heater and must water. -
Page 17: Storage Recommendations
• IMPORTANT: Do not remove, cover or deface any permanent instructions, wiring diagrams, labels, or the rating label from the outside cabinet or the inside panels on the HPWH unit. FIGURE 5 • Do not tilt the unit beyond 45° at any time. All internal components are braced from the base of unit. -
Page 18: Service Tools
Heat transfer compound (paste) such as Honeywell part be evenly dispersed across the footing channels on the bottom number 107408 or equivalent. of the unit. See Table 1 on page 7 for unit dimensions and weights. Electrical switch lock out device - used to secure disconnect switches/breaker panels while servicing. -
Page 19: Transformer Configuration
TRANSFORMER CONFIGURATION 208 VAC MODELS WHP025 & WHP060 Only The transformer leads must be changed on units connected to a 208 VAC power supply as described below. Turn on power to the HPWH momentarily and measure the voltage to the primary winding of the transformer at the F3 fuse block. -
Page 20: Multiple Tank Configuration
temperature control opening. It is not recommended to install the temperature probe or sensor in the bottom or the top of the tank. It is typical to install in the mid to lower portion of the tank. Do not install the temperature sensor near the cold water supply connection to the storage tank to prevent short cycling. -
Page 21: Electrical
DO NOT install a T&P valve in the outlet (supply) water line of PRE-STARTUP CHECKLIST the HPWH unless required by local code. Before applying power, check all electrical connections. Ensure isolation valves are installed on the HPWH supply Tighten if necessary. and return water line at the storage tank for servicing and Verify electrical installation. -
Page 22: Single Phase Startup Procedures
• Double check to make sure all the air is out of the water the power back on. See fi gure #1. Press the orange by-pass line so the heat pump doesn’t get air bound. button on the pump relay to operate the water pump. •... -
Page 23: Rotation Direction
the storage tank. Use a suitable heat transfer compound balanced. In addition, since internal compressor pressures are on the probe to ensure an accurate temperature reading. always balanced at start-up, low voltage starting characteristics are excellent for Copeland Scroll™ compressors. Moreover, if If desired connect the Building Management System to low voltage conditions exist at start up, protector trips could the Master Control Panel using the protocol determined... -
Page 24: Setting Lower Limit Control Valve Limit For Single-Pass
WHY: Every piping system is diff erent therefore they have diff erent head losses in the system. In order for the Lochinvar heat pump to operate effi ciently and meet the supply demands eff ectively it is important to set the lower limit of the control valve to meet the minimum water fl ow rate requirements for the heat pump. -
Page 25: Function Ranges & Settings
The Anti-Short Cycle Delay indicates the time required for the unit to wait before running again. This parameter is set to 0 min because Lochinvar units come equipped with safety timers already in place. Sensor Failure indicates that the temperature sensor has failed. -
Page 26: Restricted Mode
TEMPERATURE & SETPOINTS So: Sensor Off set allows for compensation of any diff erence between the displayed temperature and the temperature being To view and adjust the temperature setpoint, follow these read by the sensor. steps. RESTRICTED MODE • View the HMI mounted on the electrical panel door. Locate the “High Temp”... -
Page 27: Master Screens
MASTER SCREENS MASTER SCREEN TERMINOLOGY MASTER PANEL HOME SCREEN HOME SCREEN “LP” – Low Pressure: indicates the suction line pressure on the low side of the system “HP” – High Pressure: indicates the discharge line pressure on the high side of the system “LLSV”... -
Page 28: Configuration Screen
CONFIGURATION SCREEN compressor run hours, alarm status, and unit number. Then the master will call the unit in the fi rst unit in the run order “Comp HRS” – Compressor Hours: indicates the compressor to turn on run time hours of each unit If the tank temperature does not increase 1°F in 300 “Pump %”... -
Page 29: Single Unit Home Screen Displaying Alarm Status
SINGLE UNIT HOME SCREEN DISPLAYING ALARM SINGLE UNIT IP ADDRESS CONFIGURATION SCREEN (FOR USE CONTACT LOCHINVAR) SINGLE UNIT ALARM SCREEN SINGLE UNIT HEAT BANK SCREEN SINGLE UNIT PIPE CONFIGURATION SCREEN MEMBER SCREEN TERMINOLOGY HOME SCREEN “LP” – Low Pressure: indicates the suction line pressure on the low side of the system “HP”... -
Page 30: Alarm Screen
Unit Number – Only used for custom network confi gurations, difference below setpoint where the unit will turn on (only this confi gures your Lochinvar unit to connect to a Master Panel available if the unit isn’t in remote mode) under a desired number. -
Page 31: Cleaning Internal Insulation
completely reset and continues to release water, immediately close measure the water temperature rise. the cold water inlet to the heat pump, follow the draining If the measured water temperature rise during start up was instructions in the storage tank manual, and replace the within 8°F to 12°F (4°C to 7°C) checking the charge is not temperature-pressure relief valve with a properly rated/sized necessary unless other conditions warrant testing. - Page 32 TABLE 10 FIGURE 12...
-
Page 33: Troubleshooting
TROUBLESHOOTING Problem Possible Causes Corrections Sheet Metal fasteners are loose. Tighten Fasteners Operating vibration is transferring to fl oor or Heat Pump is too noisy building structure. Place vibration dampers underneath unit Blower pulley assembly loose or out of Tighten or align pulleys alignment Tubing, valves, or fi... -
Page 40: Limited Warranty
LIMITED WARRANTY Lochinvar Water Heating Systems, the warrantor, extends the following LIMITED WARRANTY to the original owner of this commercial heat pump water heater subject to the terms, conditions and disclaimers stated below: SERVICE REPAIR AND EXPENSE WHAT IS COVERED:... - Page 41 Technical Support: 1-833-447-3201...
-
Page 42: Service Log
Service Log Issue Description Date Servicer... - Page 43 Service Log Issue Description Date Servicer...
Need help?
Do you have a question about the 100 Series and is the answer not in the manual?
Questions and answers