Table of Contents
Advertisement
INSTALLATION AND MAINTENANCE MANUAL
HITACHI SPLIT AIR CONDITIONERS
Installation and Maintenance Manual
Models
< Indoor Units >
Heat Pump Type
RCI-1.5UNE1NH*
RCI-2.0UNE1NH*
RCI-3.0UNE1NH
RCI-4.0UNE1NH
RCI-5.0UNE1NH
RCI-6.0UNE1NH
RCI-6.5UNE1NH
< Outdoor Units >
Heat Pump Type
RAS-1.5UNESNH1*
RAS-2.0UNESNH1*
RAS-3.0UNESNH1
RAS-4.0UNESNH1
RAS-5.0UNESMH1
RAS-6.0UNESMH1
RAS-6.5UNESMH1
Cooling Only Type
RCI-1.5TNE1NH*
RCI-2.0TNE1NH*
RCI-3.0TNE1NH*
RCI-4.0TNE1NH*
RCI-5.0TNE1NH*
RCI-6.0TNE1NH*
RCI-6.5TNE1NH*
Cooling Only Type
RAS-1.5TNESNH1*
RAS-2.0TNESNH1*
RAS-3.0TNESNH1*
RAS-4.0TNESNH1*
RAS-5.0TNESMH1*
RAS-6.0TNESMH1*
RAS-6.5TNESMH1*
HPM2017008HA
Advertisement
Table of Contents

Related Manuals for Hitachi RCI-1.5UNE1NH


Summary of Contents for Hitachi RCI-1.5UNE1NH
- Page 1 INSTALLATION AND MAINTENANCE MANUAL HITACHI SPLIT AIR CONDITIONERS Installation and Maintenance Manual Models < Indoor Units > Heat Pump Type Cooling Only Type RCI-1.5UNE1NH* RCI-1.5TNE1NH* RCI-2.0UNE1NH* RCI-2.0TNE1NH* RCI-3.0UNE1NH RCI-3.0TNE1NH* RCI-4.0UNE1NH RCI-4.0TNE1NH* RCI-5.0UNE1NH RCI-5.0TNE1NH* RCI-6.0UNE1NH RCI-6.0TNE1NH* RCI-6.5UNE1NH RCI-6.5TNE1NH* < Outdoor Units >...
- Page 2 ● The numbers in the model represent the cooling capacity HP. For example, RCI-1.5UNE1NH or RAS-1.5UNESNH1 represent 1.5HP This manual should be considered as a permanent part of the air conditioning equipment and should remain with the air conditioning equipment.
- Page 3 CHECKING PRODUCT RECEIVED ● Upon receiving this product, inspect it for any shipping damage.Claims for damage, either apparent or concealed, should be filed with the shipping company immediately. ● Check the model number, electrical characteristics (power supply,voltage and frequency) and accessories to determine if they are correct.
-
Page 4: Table Of Contents
Contents Safety Precautions......................1 Identification of Parts ......................3 Before Operation.........................5 Diagram of Refrigerant Cycle & Wiring................8 1. Refrigerant Flow Diagram ....................8 2. Electrical Wiring Diagram....................8 Installation and Maintenance.....................9 1. Safety Notice........................9 2. The Tools and Instruments for Installation ..............10 3. The Installation of the Indoor Unit ..................10 3.1 The Initial Check .......................11 3.2 Installation(1.5HP~2HP) ...................13 3.3 Installation(3HP~6.5HP) ...................15... -
Page 5: Safety Precautions
Safety Precautions Symbols in this Installation Manual are interpreted as shown below: Be sure not to do. Be sure to follow the instruction. The feature of the appliance, Grounding is necessary. instead of a fault. Warning: Incorrect handling could Pay attention to such a situation. cause a serious hazard, such as death, serious injury, etc. - Page 6 Safety Precautions Safety Precautions Operating condition Noise pollution The protective device may trip and stop the if it is Install the air conditioner at a place that operated outside allowed temperature range. can bear its weight to for quiet operation. If the air conditioner runs in "COOLING"...
-
Page 7: Identification Of Parts
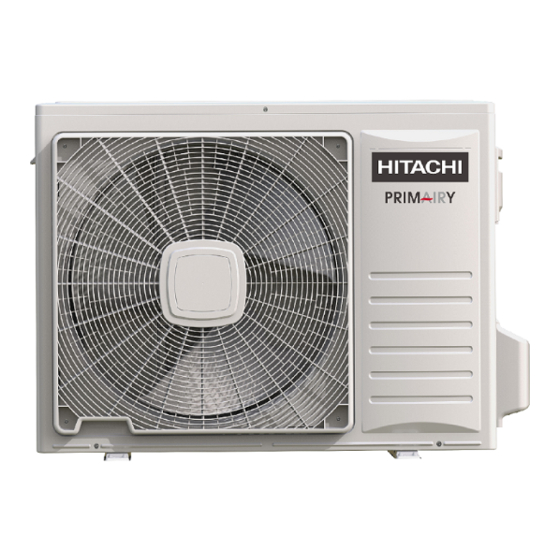
Identification of Parts Indoor unit 1.5/2.0HP 3.0~6.5HP outdoor unit 1.5~5.0HP 6.0/6.5HP Note: The figures are based on the external views of a standard model. Consequently, the shape may differ from that of the air conditioner you have selected. - Page 8 Identification of Parts Remote Controller (Optional) You can control the air-conditioner with the wired controller or remote controller. It is used for power ON/OFF, setting the operation mode, temperature, fan speed and other functions. There are different types of remote controllers that can be used. Operation instructions will be further specified in remote controller's manual .
-
Page 9: Before Operation
Before Operation Before Operation ● Supply electrical power to system for approximately 12 hours before start-up after long time shutdown. ● Do not start the system immediately after power supply, it may cause a compressor failure, because the compressor is not heated well. ●... - Page 10 3. Filter Cleaning Do not operates the system without air filter to protect the indoor unit heat exchanger against being clogged. Turn OFF the main power switch before taking filter. (The previous operation mode may appear.) 3.1 Setting the Cleaning Period of Filter Step 1 Enter choose and set mode It is time to clean the filter, when the filter icon ( add filter icon) turns on.
- Page 11 Before Operation 3.3 Clean the Filter Clean the air filter according to the following steps. Step 1 Use a vacuum cleaner or let water flow onto the air filter for removing the dirt from the air filter. Do not use hot water with temperature more than 40℃. Step2 Dry the air filter in the shade to remove excess moisture.
-
Page 12: Diagram Of Refrigerant Cycle & Wiring
Diagram of Refrigerant Cycle & Wiring 1. Refrigerant Flow Diagram INDOOR UNIT OUTDOOR UNIT Gas piping Compressor Accumulator Wide service valve 4-way valve Liquid piping Service valve Heating cycle Cooling cycle 2. Electrical Wiring Diagram Outdoor unit Indoor unit Indoor unit Outdoor unit Terminal Terminal... -
Page 13: Installation And Maintenance
Installation and Maintenance 1. Safety Notice WARNING · Installation should be performed by a qualified personnel. (Improper installation may cause water leakage, electrical shock or fire.) ·Install the unit according to the instructions given in this manual. (Incomplete installation may cause water leakage, electrical shock or fire). -
Page 14: The Tools And Instruments For Installation
Installation and Maintenance The Tools and Instruments for Installation Number Tool Number Tool Standard screwdriver Knife or wire stripper Vacuum pump Leveller Charge hose Hammer Pipe bender Churn drill Adjustable wrench Pipe expander Inner hexagon spanner Pipe cutter Cross head screw-driver Measuring Tape The Installation of the Indoor Unit Do not install the indoor unit in a flammable environment to avoid fire or an explosion. -
Page 15: The Initial Check
Installation and Maintenance 3.1 The Initial Check ● Install the indoor unit with a proper clearance around it for operation and maintenance space, as shown in Fig.3.1. ● Provide a service access door near the unit piping connection area on the ceiling. ●... - Page 16 Installation and Maintenance ● Do not install the indoor unit in a machinery shop or kitchen where oil vapor or its mist flows to the indoor unit. The oil will deposit on the heat exchanger, thereby reducing the indoor unit performance, and may deform and in severe case, break the plastic parts of the indoor unit.
-
Page 17: Installation(1.5Hp~2Hp)
Installation and Maintenance 3.2 Installation(1.5~2.0Hp) 3.2.1 Location for Installing Indoor Unit Roof Wall Drain pipe Where there is no obstacle near the air outlet and air can be easily blown to every corner. Ceiling Where drain pipe can extend outside of the wall from the ceiling board. - Page 18 Installation and Maintenance Take out the moulding board from the packing carton of indoor unit, do not fold it, just use it to decide an installation location and direction of the unit on the roof and ceiling. Press the moulding board tightly onto the surface of the roof, draw out the hole position for suspension bolts with a pencil, then take off the moulding board, drill 8 holes for the...
-
Page 19: Installation(3Hp~6.5Hp)
Installation and Maintenance 3.3 Installation(3.0~6.5HP) 3.3.1 Opening of False Ceiling and Suspension Bolts (1) Determine the final location and direction of installation of the indoor unit paying careful attention to the space for the piping, wiring and maintenance. Pattern board for installation is printed on the packing. Cut off the pattern for opening the false ceiling and installation suspension bolts. - Page 20 Installation and Maintenance 3.3.3 Mounting the Indoor Unit (1) Mount the nuts and washers into the suspension bolts. (mm) Suspension Bolt (Field Supplied) Nut (Field Supplied) *Washer with Insulation (Accessary) Suspension Blacket (Attaced Indoor Unit) *Washer (Accessary) Nut (Field Supplied) Surface of Ceiling Fig.3.7 Mounting Nuts and washer *Place the washer so that the surface with insulation faces downwards.
-
Page 21: Installation Details For Air Panels
Installation and Maintenance (mm) Slub Indoor Unit 10 to 35 10 to 35 Surface of Ceiling Surface of Flange Indoor Unit (Viewed from Bottom Side) a .For Ceiling already Completed with Panels Attach the scale to the Attach the scale to the bottom side of the unit. -
Page 22: The Installation Of Outdoor Unit
Installation and Maintenance The Installation of Outdoor Unit 4.1 The Initial Check ● The outdoor unit should be kept in well ventilated and dry place. ● Make sure that the noise and exhaust does not disturb your neighbors. ● Never install the outdoor unit at the place with high oil fog, acidic or alkaline environment, salt mist or harmful gas such as sulfur steam. -
Page 23: Refrigerant Length Between Indoor And Outdoor
Installation and Maintenance Setscrew (at least 4) Min.10cm Cut off excess length of bolts to avoid difficulties anchor bolt in movement in future. Fig.4.3 The installation of anchor bolts Fig.4.4 Wire Ropes Fig.4.5 4.3 Refrigerant Length between Indoor and Outdoor Pipe length L Indoor unit Height difference H... -
Page 24: Refrigerant Piping
Installation and Maintenance 5.Refrigerant Piping Use refrigerant R410A in the refrigerant cycle (refer to outdoor nameplate). Do not charge oxygen, acetylene or other flammable and poisonous gases into the refrigerant cycle when performing a leakage test or an air-tight test. These type of gases are extremely dangerous and can cause an explosion. -
Page 25: Air Exhaust
Installation and Maintenance (3) After connecting the refrigerant piping,seal the refrigerant pipes by using the factory-supplied insulation material as shown in Fig 5.3. Insulation for Refrigerant Pipe Cord Clamp (Factory-Supplied) (Factory-Supplied) (Factory-Supplied) Unit Side Insulation for Refrigerant Pipe (Factory-Supplied) Insulation Material (Factory-Supplied) Fig.5.3 Insulation on Pipes ●... -
Page 26: Drain Piping
Installation and Maintenance 6.Drain Piping ● Do not create an upper-slope or rise for the drain piping, since drain water can flow back to the indoor unit causing leakage into the room when the system operation is stopped. ● Do not connect the drain pipe with sanitary or sewage piping or any other drainage piping. ●... - Page 27 Installation and Maintenance Prepare a polyvinyl chloride pipe with a 21mm inside diameter (1.5/2.0). Prepare a polyvinyl chloride pipe with a 32mm outer diameter (3.0~6.5). (2) Fasten the tubing to drain hose with the adhesive agent and factory-supplied clamp.The drain piping must be performed with a down-slope pitch of 1/25 to 1/100.
-
Page 28: Electrical Wiring
Installation and Maintenance 7.Electrical Wiring ● Turn OFF the main power switch to the indoor unit and the outdoor unit before electrical wiring work or a periodical check is performed. ● Check to ensure that the indoor fan and the outdoor fan have stopped before electrical wiring work or a periodical check is performed. -
Page 29: Test Run
Installation and Maintenance 8.Test Run ● Only after all the checking points have been checked the unit can be operated. (A) Check and make sure that the resistance of the terminal to ground is more than 2MΩ, otherwise, you cannot operate the unit before the electricity leakage point is found and repaired. (B) Check and make sure that the stop valve has been opened before operating the unit. -
Page 30: Electrical Installation
Installation and Maintenance Installation and Maintenance 9. Electrical Installation ● Use an ELB (Electric Leakage Breaker). If not used, it may cause an electric shock or a fire. ● Do not operate the system until all the check points have been cleared. (A) Check to ensure that the insulation resistance is more than 2MΩ, by measuring the resistance between ground and the terminal of the electrical parts. - Page 32 They can take this product for environmental safe recycling. Specifications in this document are subject to change without notice, in order that Hitachi-Johnson Controls Air Conditioning, Inc. may bring the latest innovations to their customers.
Need help?
Do you have a question about the RCI-1.5UNE1NH and is the answer not in the manual?
Questions and answers