Dell Inspiron 15 3000 Series Service Manual
Hide thumbs
Also See for Inspiron 15 3000 Series:
- Quick start manual ,
- Service manual (115 pages) ,
- Setup and specifications (25 pages)

Related Manuals for Dell Inspiron 15 3000 Series


Summary of Contents for Dell Inspiron 15 3000 Series
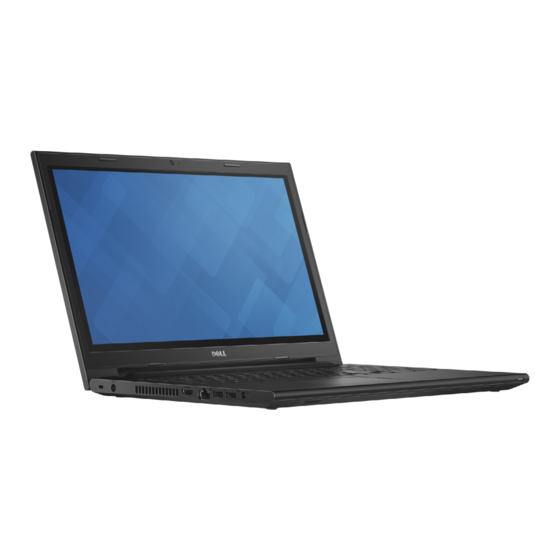
- Page 1 Inspiron 15 3000 Series Service Manual Computer Model: Inspiron 15–3559 Regulatory Model: P47F Regulatory Type: P47F004...
- Page 2 AS dan internasional. Dell ™ logo Dell merupakan merek dagang dari Dell Inc. di Amerika Serikat dan/atau yurisdiksi lain. Seluruh merek dan nama lainnya yang disebutkan di sini dapat merupakan merek dagang perusahaannya masing-masing.
-
Page 3: Table Of Contents
Contents Sebelum mengerjakan bagian dalam komputer....9 ......................9 Persiapan ..................9 Petunjuk keselamatan ..............11 Alat bantu yang direkomendasikan After working inside your tablet..........12 Melepaskan baterai..............13 ......................13 Procedure Memasang kembali baterai............14 ......................14 Procedure Melepaskan panel bawah............15 ..................... 15 Prerequisites ...................... - Page 4 Melepaskan modul memori.............22 .....................22 Prerequisites ......................22 Procedure Memasang kembali modul memori........24 ......................24 Procedure ....................25 Post-requisites Melepaskan kartu nirkabel............26 .....................26 Prerequisites ......................26 Procedure Memasang kembali kartu nirkabel......... 28 ......................28 Procedure ....................28 Post-requisites Melepaskan keyboard...............29 .....................29 Prerequisites ......................
- Page 5 Melepaskan panel sentuh............39 .....................39 Prerequisites ......................40 Procedure Memasang kembali panel sentuh...........43 ......................43 Procedure ....................43 Post-requisites Melepaskan board tombol daya..........44 ....................44 Prerequisites ......................45 Procedure Memasang kembali board tombol daya........47 ......................47 Procedure ....................47 Post-requisites Melepaskan speaker..............
- Page 6 Melepaskan board sistem............55 .....................55 Prerequisites ......................56 Procedure Memasang kembali board sistem...........59 ......................59 Procedure ....................60 Post-requisites Melepaskan baterai sel berbentuk koin.........61 ..................... 61 Prerequisites ......................61 Procedure Memasang kembali baterai sel berbentuk koin....63 ......................63 Procedure ....................63 Post-requisites Melepaskan unit pendingin............. 64 ....................
- Page 7 Melepaskan unit display............71 ..................... 71 Prerequisites ......................71 Procedure Memasang kembali unit display..........74 ......................74 Procedure ....................74 Post-requisites Melepaskan port adaptor daya..........75 .....................75 Prerequisites ......................75 Prosedur Memasang kembali port adaptor daya........77 ......................77 Procedure ....................77 Post-requisites Melepaskan bezel display............
- Page 8 Post-requisites Melepaskan engsel display............88 ....................88 Prerequisites ......................88 Procedure Memasang kembali engsel display........90 ......................90 Procedure ....................90 Post-requisites Menjalankan Flashing BIOS............. 91 Mendapatkan bantuan dan menghubungi Dell....92 ................ 92 Sumber daya bantuan mandiri ................... 93 Menghubungi Dell...
-
Page 9: Sebelum Mengerjakan Bagian Dalam Komputer
Sebelum mengerjakan bagian dalam komputer CATATAN: Gambar di dalam dokumen ini mungkin berbeda dengan komputer Anda bergantung pada konfigurasi yang Anda pesan. Persiapan Simpan dan tutup semua file yang terbuka, lalu keluar dari semua aplikasi yang terbuka. Matikan komputer Anda. –... - Page 10 Dell. Kerusakan karena melakukan servis yang tidak diizinkan oleh Dell tidak akan dicakup oleh garansi Anda. Lihat instruksi keselamatan yang dikirimkan bersama produk tersebut atau yang ada di www.dell.com/regulatory_compliance.
-
Page 11: Alat Bantu Yang Direkomendasikan
Alat bantu yang direkomendasikan Prosedur dalam dokumen ini memerlukan alat bantu sebagai berikut: • Obeng Phillips • Pencungkil plastik... -
Page 12: After Working Inside Your Tablet
After working inside your tablet CAUTION: Membiarkan sekrup yang lepas atau longgar di dalam komputer Anda dapat merusak parah komputer. Replace all screws and ensure that no stray screws remain inside your tablet. Connect any external devices, peripherals, and cables you removed before working on your tablet. -
Page 13: Melepaskan Baterai
Setelah Mengerjakan Bagian Dalam Komputer. Untuk praktik terbaik tentang keselamatan lainnya, lihat home page Kepatuhan Regulatori di www.dell.com/regulatory_compliance. Procedure Close the display and turn the computer over. Slide the battery-release latch to the unlock position. Lift the battery at an angle and remove the battery from the battery bay. -
Page 14: Memasang Kembali Baterai
Setelah Mengerjakan Bagian Dalam Komputer. Untuk praktik terbaik tentang keselamatan lainnya, lihat home page Kepatuhan Regulatori di www.dell.com/regulatory_compliance. Procedure Slide the tabs on the battery into the slots on the battery bay and snap the battery into place. -
Page 15: Melepaskan Panel Bawah
Komputer. Setelah mengerjakan bagian dalam komputer Anda, ikuti instruksi di Setelah Mengerjakan Bagian Dalam Komputer. Untuk praktik terbaik tentang keselamatan lainnya, lihat home page Kepatuhan Regulatori di www.dell.com/regulatory_compliance. Prerequisites Remove the battery. Procedure Remove the screws that secure the base panel to the computer base. -
Page 16: Memasang Kembali Panel Bawah
Setelah Mengerjakan Bagian Dalam Komputer. Untuk praktik terbaik tentang keselamatan lainnya, lihat home page Kepatuhan Regulatori di www.dell.com/regulatory_compliance. Procedure Slide the tabs on the base panel into the slots on the computer base and snap the base panel into place. -
Page 17: Melepaskan Hard Disk
Setelah Mengerjakan Bagian Dalam Komputer. Untuk praktik terbaik tentang keselamatan lainnya, lihat home page Kepatuhan Regulatori di www.dell.com/regulatory_compliance. PERHATIAN: Hard disk merupakan benda yang rapuh. Berhati-hatilah saat menangani hard disk. PERHATIAN: Untuk menghindari kehilangan data, jangan melepaskan hard disk saat komputer sedang dalam kondisi tidur atau menyala. - Page 18 Lift the hard-drive assembly off the computer base. screws (4) hard-drive assembly hard-drive cable latch...
- Page 19 Disconnect the interposer from the hard drive. hard-drive assembly interposer...
- Page 20 Remove the screws that secure the hard-drive bracket to the hard drive and lift the hard-drive bracket off the hard drive. screws (4) hard-drive bracket hard drive...
-
Page 21: Memasang Kembali Hard Disk
Setelah Mengerjakan Bagian Dalam Komputer. Untuk praktik terbaik tentang keselamatan lainnya, lihat home page Kepatuhan Regulatori di www.dell.com/regulatory_compliance. PERHATIAN: Hard disk merupakan benda yang rapuh. Berhati-hatilah saat menangani hard disk. Procedure Place the hard-drive bracket over the hard drive and align the screw holes on the hard-drive bracket with the screw holes on the hard drive. -
Page 22: Melepaskan Modul Memori
Sebelum Mengerjakan Bagian Dalam Komputer. Setelah mengerjakan bagian dalam komputer Anda, ikuti instruksi di Setelah Mengerjakan Bagian Dalam Komputer. Untuk praktik terbaik tentang keselamatan lainnya, lihat home page Kepatuhan Regulatori di www.dell.com/regulatory_compliance. Prerequisites Remove the battery. Remove the base panel. - Page 23 Slide and remove the memory module from the memory-module slot. securing clips (2) memory module...
-
Page 24: Memasang Kembali Modul Memori
Komputer. Setelah mengerjakan bagian dalam komputer Anda, ikuti instruksi di Setelah Mengerjakan Bagian Dalam Komputer. Untuk praktik terbaik tentang keselamatan lainnya, lihat home page Kepatuhan Regulatori di www.dell.com/regulatory_compliance. Procedure Align the notch on the memory module with the tab on the memory- module slot. -
Page 25: Post-Requisites
Slide the memory module firmly into the slot at an angle and press the memory module down until it clicks into place. NOTE: If you do not hear the click, remove the memory module and reinstall it. notch memory module securing clips (2) Post-requisites Replace the... -
Page 26: Melepaskan Kartu Nirkabel
Sebelum Mengerjakan Bagian Dalam Komputer. Setelah mengerjakan bagian dalam komputer Anda, ikuti instruksi di Setelah Mengerjakan Bagian Dalam Komputer. Untuk praktik terbaik tentang keselamatan lainnya, lihat home page Kepatuhan Regulatori di www.dell.com/regulatory_compliance. Prerequisites Remove the battery. Remove the base panel. - Page 27 Lift the wireless card, and then slide and remove it from the system board. antenna cables (2) wireless card screw notch...
-
Page 28: Memasang Kembali Kartu Nirkabel
Setelah Mengerjakan Bagian Dalam Komputer. Untuk praktik terbaik tentang keselamatan lainnya, lihat home page Kepatuhan Regulatori di www.dell.com/regulatory_compliance. Procedure CAUTION: To avoid damage to the wireless card, do not place any cables under it. Align the notch on the wireless card with the tab on the wireless-card slot and slide the card into the slot. -
Page 29: Melepaskan Keyboard
Komputer. Setelah mengerjakan bagian dalam komputer Anda, ikuti instruksi di Setelah Mengerjakan Bagian Dalam Komputer. Untuk praktik terbaik tentang keselamatan lainnya, lihat home page Kepatuhan Regulatori di www.dell.com/regulatory_compliance. Prerequisites Remove the battery. Procedure Turn the computer over and open the display as far as possible. - Page 30 Using a plastic scribe, gently release the tabs that secure the keyboard to the palm-rest assembly. plastic scribe keyboard palm-rest assembly Carefully turn the keyboard over and place it on the palm-rest assembly.
- Page 31 Lift the latches and disconnect the keyboard cable and the keyboard- backlight cable from the system board. NOTE: The keyboard-backlight cable is present only if the laptop is shipped with a backlit keyboard. latch keyboard cable keyboard palm-rest assembly Lift the keyboard, along with the cables, off the palm-rest assembly.
-
Page 32: Memasang Kembali Keyboard
Setelah Mengerjakan Bagian Dalam Komputer. Untuk praktik terbaik tentang keselamatan lainnya, lihat home page Kepatuhan Regulatori di www.dell.com/regulatory_compliance. Procedure Slide the keyboard cable into the system-board slot and press down on the latch to secure the cable. Carefully turn the keyboard over, slide the tabs on the keyboard into the slots on the palm rest, and snap the keyboard into place. -
Page 33: Melepaskan Sandaran Tangan
Sebelum Mengerjakan Bagian Dalam Komputer. Setelah mengerjakan bagian dalam komputer Anda, ikuti instruksi di Setelah Mengerjakan Bagian Dalam Komputer. Untuk praktik terbaik tentang keselamatan lainnya, lihat home page Kepatuhan Regulatori di www.dell.com/regulatory_compliance. Prerequisites Remove the battery. Remove the base panel. - Page 34 Remove the screws that secure the palm-rest assembly to the computer base. power-button cable screws (7) palm-rest assembly touch-pad cable latch Close the display and turn the computer over.
- Page 35 Remove the screws that secure the palm-rest assembly to the computer base. screws (10) computer base...
- Page 36 Slightly open the computer base and, using a plastic scribe, pry the palm- rest assembly off the computer base. computer base palm-rest assembly plastic scribe Turn the computer over and open the display.
- Page 37 Lift the palm-rest assembly off the computer base. palm-rest assembly computer base Follow the procedure from step 1 to step 5 in “Removing the touch pad”.
-
Page 38: Memasang Kembali Sandaran Tangan
Komputer. Setelah mengerjakan bagian dalam komputer Anda, ikuti instruksi di Setelah Mengerjakan Bagian Dalam Komputer. Untuk praktik terbaik tentang keselamatan lainnya, lihat home page Kepatuhan Regulatori di www.dell.com/regulatory_compliance. Procedure Follow the procedure from step 1 to step 5 in “Replacing the touch pad”. -
Page 39: Melepaskan Panel Sentuh
Sebelum Mengerjakan Bagian Dalam Komputer. Setelah mengerjakan bagian dalam komputer Anda, ikuti instruksi di Setelah Mengerjakan Bagian Dalam Komputer. Untuk praktik terbaik tentang keselamatan lainnya, lihat home page Kepatuhan Regulatori di www.dell.com/regulatory_compliance. Prerequisites Remove the battery. Remove the base panel. -
Page 40: Procedure
Procedure Peel the tape off the touch-pad bracket. tape touch-pad bracket palm rest Remove the screws that secure the touch-pad bracket to the touch pad. - Page 41 Lift the latch and disconnect the touch-pad cable from the touch pad. touch-pad cable latch screws (2) palm rest touch-pad bracket Peel off the tape from the touch pad.
- Page 42 Lift the touch pad off the palm rest. tape touch pad palm rest...
-
Page 43: Memasang Kembali Panel Sentuh
Setelah Mengerjakan Bagian Dalam Komputer. Untuk praktik terbaik tentang keselamatan lainnya, lihat home page Kepatuhan Regulatori di www.dell.com/regulatory_compliance. Procedure Slide the tabs on the touch pad into the slots on the palm rest. Adhere the tape that secures the touch pad to the palm rest. -
Page 44: Melepaskan Board Tombol Daya
Sebelum Mengerjakan Bagian Dalam Komputer. Setelah mengerjakan bagian dalam komputer Anda, ikuti instruksi di Setelah Mengerjakan Bagian Dalam Komputer. Untuk praktik terbaik tentang keselamatan lainnya, lihat home page Kepatuhan Regulatori di www.dell.com/regulatory_compliance. Prerequisites Remove the battery. Remove the base panel. -
Page 45: Procedure
Procedure Slide the power-button board cable through the slot on the palm rest. power-button board cable slot palm rest Turn the palm rest over. Remove the screw that secures the power-button board to the palm rest. Slide the power-button board out from the tab on the palm rest. - Page 46 Lift the power-button board, along with its cable, off the palm rest. screw power-button board power-button board cable...
-
Page 47: Memasang Kembali Board Tombol Daya
Setelah Mengerjakan Bagian Dalam Komputer. Untuk praktik terbaik tentang keselamatan lainnya, lihat home page Kepatuhan Regulatori di www.dell.com/regulatory_compliance. Procedure Slide the power-button board under the tab on the palm rest and align the screw hole on the power-button board with the screw hole on the palm rest. -
Page 48: Melepaskan Speaker
Sebelum Mengerjakan Bagian Dalam Komputer. Setelah mengerjakan bagian dalam komputer Anda, ikuti instruksi di Setelah Mengerjakan Bagian Dalam Komputer. Untuk praktik terbaik tentang keselamatan lainnya, lihat home page Kepatuhan Regulatori di www.dell.com/regulatory_compliance. Prerequisites Remove the battery. Remove the base panel. -
Page 49: Procedure
Procedure Disconnect the speaker cable from the system board. speaker cable slot Turn the computer over and open the display. Note the speaker-cable routing and remove the cable from the routing guides on the computer base. - Page 50 Slide the speaker cable through the slot on the computer base and lift the speakers, along with the speaker cable, off the computer base. speaker cable speakers (2)
-
Page 51: Memasang Kembali Speaker
Setelah Mengerjakan Bagian Dalam Komputer. Untuk praktik terbaik tentang keselamatan lainnya, lihat home page Kepatuhan Regulatori di www.dell.com/regulatory_compliance. Procedure Using the alignment posts, align and place the speakers on the palm rest. Route the speaker cable through the routing guides on the palm rest. -
Page 52: Melepaskan Board I/O
Sebelum Mengerjakan Bagian Dalam Komputer. Setelah mengerjakan bagian dalam komputer Anda, ikuti instruksi di Setelah Mengerjakan Bagian Dalam Komputer. Untuk praktik terbaik tentang keselamatan lainnya, lihat home page Kepatuhan Regulatori di www.dell.com/regulatory_compliance. Prerequisites Remove the battery. Remove the base panel. - Page 53 Lift the I/O board off the computer base. screw I/O board latch I/O-board cable...
-
Page 54: Memasang Kembali Board I/O
Setelah Mengerjakan Bagian Dalam Komputer. Untuk praktik terbaik tentang keselamatan lainnya, lihat home page Kepatuhan Regulatori di www.dell.com/regulatory_compliance. Procedure Align the screw hole on the I/O board with the screw hole on the computer base. Replace the screw that secures the I/O board to the computer base. -
Page 55: Melepaskan Board Sistem
Setelah Mengerjakan Bagian Dalam Komputer. Untuk praktik terbaik tentang keselamatan lainnya, lihat home page Kepatuhan Regulatori di www.dell.com/regulatory_compliance. CATATAN: Tag Servis komputer Anda disimpan di dalam board sistem. Anda harus memasukkan Tag Servis ke dalam program pengaturan BIOS setelah Anda memasang kembali board sistem. -
Page 56: Procedure
Procedure Disconnect the speaker cable from the system board. speaker cable slot Turn the computer over and open the display as far as possible. Peel the tape that secures the display cable to the system board. Lift the latch and disconnect the display cable from the system board. Disconnect the power-adapter port cable from the system board. - Page 57 Lift the latch and disconnect the I/O-board cable from the system board. tape display cable latch power-adapter port cable I/O-board cable system board Remove the screw that secures the system board to the computer base.
- Page 58 Lift the system board off the computer base. system board computer base screw Remove the coin-cell battery. 10 Remove the heat sink.
-
Page 59: Memasang Kembali Board Sistem
Setelah Mengerjakan Bagian Dalam Komputer. Untuk praktik terbaik tentang keselamatan lainnya, lihat home page Kepatuhan Regulatori di www.dell.com/regulatory_compliance. CATATAN: Tag Servis komputer Anda disimpan di dalam board sistem. Anda harus memasukkan Tag Servis ke dalam program pengaturan BIOS setelah Anda memasang kembali board sistem. -
Page 60: Post-Requisites
10 Connect the speaker cable to the system board. Post-requisites Follow the procedure from step 2 to step 6 in “Replacing the palm rest”. Replace the keyboard. Replace the wireless card. Replace the memory modules. Follow the procedure from step 3 to step 5 in “Replacing the hard drive”. -
Page 61: Melepaskan Baterai Sel Berbentuk Koin
Setelah Mengerjakan Bagian Dalam Komputer. Untuk praktik terbaik tentang keselamatan lainnya, lihat home page Kepatuhan Regulatori di www.dell.com/regulatory_compliance. PERHATIAN: Melepaskan baterai sel berbentuk koin akan me-reset setelan program pengaturan BIOS ke pengaturan standar. Disarankan agar Anda mencatat setelan program pengaturan BIOS sebelum melepaskan baterai sel berbentuk koin tersebut. - Page 62 system board plastic scribe coin-cell battery...
-
Page 63: Memasang Kembali Baterai Sel Berbentuk Koin
Komputer. Setelah mengerjakan bagian dalam komputer Anda, ikuti instruksi di Setelah Mengerjakan Bagian Dalam Komputer. Untuk praktik terbaik tentang keselamatan lainnya, lihat home page Kepatuhan Regulatori di www.dell.com/regulatory_compliance. Procedure With the positive-side facing up, snap the coin-cell battery into the battery socket on the system board. Post-requisites Follow the procedure from step 3 to step 10 in “Replacing the... -
Page 64: Melepaskan Unit Pendingin
Setelah Mengerjakan Bagian Dalam Komputer. Untuk praktik terbaik tentang keselamatan lainnya, lihat home page Kepatuhan Regulatori di www.dell.com/regulatory_compliance. PERINGATAN: Unit pendingin bisa menjadi panas selama pengoperasian normal. Berikan waktu yang cukup bagi unit pendingin untuk menjadi dingin dulu sebelum Anda menyentuhnya. - Page 65 Disconnect the fan cable from the system board. cooling assembly captive screws (3) system board fan cable Lift the cooling assembly off the system board. Remove the fan.
-
Page 66: Memasang Kembali Unit Pendingin
Setelah Mengerjakan Bagian Dalam Komputer. Untuk praktik terbaik tentang keselamatan lainnya, lihat home page Kepatuhan Regulatori di www.dell.com/regulatory_compliance. PERHATIAN: Kekeliruan dalam penempatan unit pendingin bisa merusak board sistem dan prosesor. CATATAN: Gemuk termal original dapat digunakan kembali jika board sistem dan unit pendingin original dipasang kembali secara bersama- sama. - Page 67 Replace the battery. Replace the base panel.
-
Page 68: Melepaskan Kipas
Sebelum Mengerjakan Bagian Dalam Komputer. Setelah mengerjakan bagian dalam komputer Anda, ikuti instruksi di Setelah Mengerjakan Bagian Dalam Komputer. Untuk praktik terbaik tentang keselamatan lainnya, lihat home page Kepatuhan Regulatori di www.dell.com/regulatory_compliance. Prerequisites Remove the battery. Remove the base panel. -
Page 69: Procedure
Procedure Remove the screws that secure the fan to the heat sink. cooling assembly screws (3) Turn the cooling assembly over. Peel off the tape that secures the fan to the heat sink. Lift the fan off the heat sink. tape... -
Page 70: Memasang Kembali Kipas
Setelah Mengerjakan Bagian Dalam Komputer. Untuk praktik terbaik tentang keselamatan lainnya, lihat home page Kepatuhan Regulatori di www.dell.com/regulatory_compliance. Procedure Place the fan on the heat sink. Adhere the tape that secures the fan to the heat sink. Turn the cooling assembly over. -
Page 71: Melepaskan Unit Display
Sebelum Mengerjakan Bagian Dalam Komputer. Setelah mengerjakan bagian dalam komputer Anda, ikuti instruksi di Setelah Mengerjakan Bagian Dalam Komputer. Untuk praktik terbaik tentang keselamatan lainnya, lihat home page Kepatuhan Regulatori di www.dell.com/regulatory_compliance. Prerequisites Remove the battery. Remove the base panel. - Page 72 Note the display cable routing and remove the cable from its routing guides on the computer base. display assembly display cable computer base antenna cables (2) Remove the screws that secure the display hinges to the computer base.
- Page 73 Carefully lift the display assembly off the computer base. display assembly screws (3) computer base...
-
Page 74: Memasang Kembali Unit Display
Setelah Mengerjakan Bagian Dalam Komputer. Untuk praktik terbaik tentang keselamatan lainnya, lihat home page Kepatuhan Regulatori di www.dell.com/regulatory_compliance. Procedure Align the screw holes on the display hinges with the screw holes on the computer base. Replace the screws that secure the display hinges to the computer base. -
Page 75: Melepaskan Port Adaptor Daya
Sebelum Mengerjakan Bagian Dalam Komputer. Setelah mengerjakan bagian dalam komputer Anda, ikuti instruksi di Setelah Mengerjakan Bagian Dalam Komputer. Untuk praktik terbaik tentang keselamatan lainnya, lihat home page Kepatuhan Regulatori di www.dell.com/regulatory_compliance. Prerequisites Remove the battery. Remove the base panel. - Page 76 Angkat port adaptor daya, bersama dengan kabel port adaptor daya, dari dasar komputer. sekrup dasar komputer port adaptor daya kabel port adaptor daya...
-
Page 77: Memasang Kembali Port Adaptor Daya
Setelah Mengerjakan Bagian Dalam Komputer. Untuk praktik terbaik tentang keselamatan lainnya, lihat home page Kepatuhan Regulatori di www.dell.com/regulatory_compliance. Procedure Slide the power-adapter port into the slot on the computer base. Replace the screw that secures the power-adapter port to the computer base. -
Page 78: Melepaskan Bezel Display
Komputer. Setelah mengerjakan bagian dalam komputer Anda, ikuti instruksi di Setelah Mengerjakan Bagian Dalam Komputer. Untuk praktik terbaik tentang keselamatan lainnya, lihat home page Kepatuhan Regulatori di www.dell.com/regulatory_compliance. Prerequisites NOTE: These instructions are applicable only for laptops with a non- touch screen display. Remove the battery. - Page 79 Lift the display bezel off the display assembly. display bezel display panel...
-
Page 80: Memasang Kembali Bezel Display
Komputer. Setelah mengerjakan bagian dalam komputer Anda, ikuti instruksi di Setelah Mengerjakan Bagian Dalam Komputer. Untuk praktik terbaik tentang keselamatan lainnya, lihat home page Kepatuhan Regulatori di www.dell.com/regulatory_compliance. Procedure Align the display bezel with the display back-cover and gently snap the display bezel into place. Post-requisites... -
Page 81: Melepaskan Panel Display
Komputer. Setelah mengerjakan bagian dalam komputer Anda, ikuti instruksi di Setelah Mengerjakan Bagian Dalam Komputer. Untuk praktik terbaik tentang keselamatan lainnya, lihat home page Kepatuhan Regulatori di www.dell.com/regulatory_compliance. Prerequisites NOTE: These instructions are applicable only for laptops with a non- touch screen display. Remove the battery. - Page 82 Turn the display panel over. screws (4) display panel display back-cover Peel the tape that secures the display cable to the display back-cover. Lift the latch and disconnect the display cable from the display back- cover.
- Page 83 Lift the display panel off the display back-cover. display panel display cable latch tape display back-cover...
-
Page 84: Memasang Kembali Panel Display
Setelah Mengerjakan Bagian Dalam Komputer. Untuk praktik terbaik tentang keselamatan lainnya, lihat home page Kepatuhan Regulatori di www.dell.com/regulatory_compliance. Procedure Slide the display cable into the connector on the display back-cover and press down the latch to secure the cable. -
Page 85: Melepaskan Kamera
Komputer. Setelah mengerjakan bagian dalam komputer Anda, ikuti instruksi di Setelah Mengerjakan Bagian Dalam Komputer. Untuk praktik terbaik tentang keselamatan lainnya, lihat home page Kepatuhan Regulatori di www.dell.com/regulatory_compliance. Prerequisites NOTE: These instructions are applicable only for laptops with a non- touchscreen display. Remove the battery. - Page 86 Disconnect the camera cable from the camera. display back-cover camera plastic scribe camera cable...
-
Page 87: Memasang Kembali Kamera
Setelah Mengerjakan Bagian Dalam Komputer. Untuk praktik terbaik tentang keselamatan lainnya, lihat home page Kepatuhan Regulatori di www.dell.com/regulatory_compliance. Procedure Connect the camera cable to the camera. Align the camera to the alignment posts on the display back-cover and snap the camera in place. -
Page 88: Melepaskan Engsel Display
Komputer. Setelah mengerjakan bagian dalam komputer Anda, ikuti instruksi di Setelah Mengerjakan Bagian Dalam Komputer. Untuk praktik terbaik tentang keselamatan lainnya, lihat home page Kepatuhan Regulatori di www.dell.com/regulatory_compliance. Prerequisites NOTE: These instructions are applicable only for laptops with a non- touchscreen display. Remove the battery. - Page 89 Release the hinges from the latches and lift the display hinges off the display back-cover. screws (6) latches (2) display hinges (2) display back-cover...
-
Page 90: Memasang Kembali Engsel Display
Setelah Mengerjakan Bagian Dalam Komputer. Untuk praktik terbaik tentang keselamatan lainnya, lihat home page Kepatuhan Regulatori di www.dell.com/regulatory_compliance. Procedure Slide the hinges under the latches on the display back-cover. Align the screw holes on the display hinges with the screw holes on the display back-cover. -
Page 91: Menjalankan Flashing Bios
Untuk menjalankan flashing BIOS: Hidupkan komputer. Kunjungi www.dell.com/support. Klik Product Support (Dukungan Produk), masukkan Tag Servis dari komputer Anda lalu klik Submit (Ajukan). CATATAN: Jika Anda tidak memiliki Tag Servis, gunakan fitur deteksi otomatis atau ramban secara manual untuk melihat mode komputer Anda. -
Page 92: Mendapatkan Bantuan Dan Menghubungi Dell
Mendapatkan bantuan dan menghubungi Dell Sumber daya bantuan mandiri Anda bisa mendapatkan informasi dan bantuan tentang produk dan layanan Dell dengan menggunakan sumber daya bantuan mandiri ini: Informasi tentang produk dan www.dell.com layanan Dell. Windows 8.1 dan Windows 10 aplikasi Dell Help & Support (Bantuan &... -
Page 93: Menghubungi Dell
Anda, pencadangan data, diagnostik, dan lain sebagainya. Menghubungi Dell Untuk menghubungi Dell mengenai penjualan, dukungan teknis, atau masalah layanan pelanggan, lihat www.dell.com/contactdell. CATATAN: Ketersediaan bervariasi tergantung negara dan produk, dan beberapa layanan mungkin tidak tersedia di negara Anda.
Need help?
Do you have a question about the Inspiron 15 3000 Series and is the answer not in the manual?
Questions and answers