Advertisement
Table of Contents
- 1 Remove Product from Packaging
- 2 Check Items
- 3 Place the Product
- 4 Open the Air Valve
- 5 Get Pump
- 6 Fit Pump Hose over Valve
- 7 Remove Pump and Close Valve
- 8 Pump Air into Cushion
- 9 Place Person on Chair
- 10 Settle Person
- 11 Position Hand for Adjustment
- 12 Properly Position the Hand
- 13 Begin Releasing Air
- 14 Cushion Lowers
- 15 Close Valve
- 16 Check Cushion Height
- Download this manual
INSTRUCTIONS FOR ADJUSTMENT
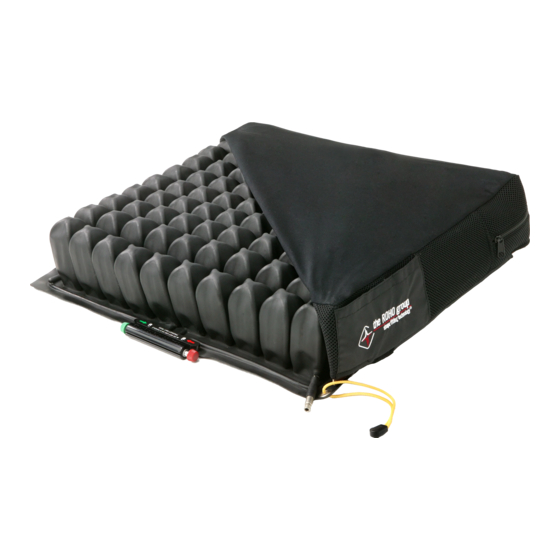
ROHO® Cushion
STEP 1: Remove Product from Packaging
Congratulations. You now own a ROHO cushioning
product designed and manufactured so you can achieve
the highest possible level of performance and personal
satisfaction.
STEP 2: Check Items
Your product should have come with the cushion, cover,
manual, and hand-operated air pump.
NOTE: Cover (included) is recommended for use, but
omitted from these instructions for graphic presentation.
Please use the yellow rope handle to lift and carry your
cushion.
Advertisement
Table of Contents

Related Manuals for ROHO Cushion


Summary of Contents for ROHO Cushion
- Page 1 STEP 2: Check Items Your product should have come with the cushion, cover, manual, and hand-operated air pump. NOTE: Cover (included) is recommended for use, but omitted from these instructions for graphic presentation.
- Page 2 STEP 3: Place the Product Place your ROHO cushion on the chair, making sure it is centered and right side up, with the air valve in the front left corner. STEP 4: Open the Air Valve Turn valve counter-clockwise to open.
- Page 3 Slide the collar of the pump over the valve. STEP 7: Pump Air Into Cushion Inflate cushion until it begins to slightly arch upward. STEP 8: Remove Pump and Close Valve Remove the pump and quickly close the air valve by twisting in a clockwise direction.
- Page 4 Gently place person on chair, making sure the ROHO cushion is centered underneath. STEP 10: Settle Person Place the individual on the cushion in his/her normal sitting position. STEP 11: Position Hand for Adjustment Slide your hand between the cushion surface and the person's bottom and feel for the lowest bony prominence.
- Page 5 STEP 13: Begin Releasing Air Rotate valve counter clockwise to begin letting out air, while keeping your hand under the person's sitting bones. STEP 14: Cushion Lowers Allow cushion to lower until you can barely move your finger tips (approx. ½ inch or 1.25cm)
- Page 6 STEP 15: Close Valve Rotate valve clockwise to close. STEP 16: Check Cushion Height Wiggle fingers to make sure there is approximately ½ inch of air between person and bottom. Caution: Avoid 'bottoming out'. The cushion is most effective when there is air between all parts of the person and the chair.
Need help?
Do you have a question about the Cushion and is the answer not in the manual?
Questions and answers
how do you adjust the valves on a Roho cushion with red and green knobs