Table of Contents
Advertisement
Advertisement
Table of Contents

Subscribe to Our Youtube Channel
Related Manuals for Onda V-10 PLUS


Summary of Contents for Onda V-10 PLUS
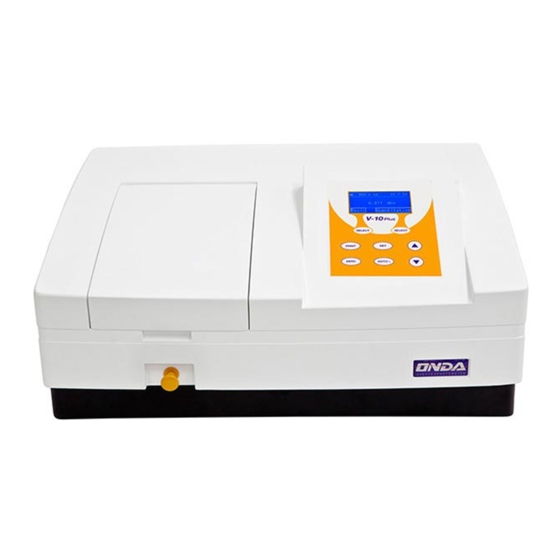
- Page 1 VISIBLE SPECTROPHOTOMETER V-10 PLUS User’s Manual...
-
Page 2: Table Of Contents
Contents Safety ............................1 Package Contents ........................1 Unpacking ..........................1 Installation ..........................2 Environment Required ....................2 Install Spectrophotometer ..................2 Overview ............................2 Symbols .............................2 Main Specifications ........................3 Description of Appearance and Keys ..................4 Appearance ........................ 4 Keypad ........................5 Description of Keys..................... 5 Functions...........................6 Getting Started ..........................6 Important Guidelines ........................7... - Page 3 Warranty ..........................19 Equipment Disposal ......................19...
-
Page 4: Safety
Safety Please follow the guidelines below, and read this manual in its entirety to ensure safe operation of the unit. We recommends against the use of UV-20 Spectrophotometer. Do not open the device. Disconnect the device from the mains supply before carrying out maintenance work or changing the fuses. -
Page 5: Installation
Installation 1. Environment Required To ensure the best performance, the following conditions are required: The best working temperature range is 16—35℃ and the humidity is 45—80%. Keep it as far as possible away from the strong magnetic or electrical fields or any electrical device that may generate high-frequency fields. -
Page 6: Main Specifications
Caution, Danger! Caution, High Voltage! Caution, Hot! Ground Fuse Recycle, this instrument will be called back by the appointed Electrical Treatment Department or by the original Manufacturer when wasted. Main Specifications Optical System Single beam Wavelength Range 325—1000nm ... -
Page 7: Description Of Appearance And Keys
Description of Appearance and Keys 1. Appearance Front View Back View LCD Display USB port Keypad Cover of Fan Lid of Sample Room Power Socket 10 Power Switch LCD Contrast Adjust 11 Cover of Cooling Vents Printer port... -
Page 8: Keypad
2. Keypad 3. Description of Keys SET Key: Set Parameters GOTO ʎ Key: Set Wavelength GOTO λ ZERO Key: Blank ZERO PRINT Key: Print measuring result PRINT... -
Page 9: Functions
Function Key: Functions according to the screen SELECT UP, DOWN Keys: Scroll menu/data and set Y scale ▲ Functions Photometry Display results as Abs, %T or Energy. Quantitation Use a Standard Sample to establish Standard Curve. Getting Started The following chart describes the basic operation of the instrument. Turn On and Self-check Switch on the power. -
Page 10: Important Guidelines
Important Guidelines Reagents and dilution buffers can cause cauterization and other damage to health. Samples (nucleic acids, proteins, bacteria cultures) can be infectious and cause serious damage to health. During sample preparation, measuring procedures and maintenance and cleaning work, observe all local laboratory safety precautions (e.g. -
Page 11: Measuring
Blank ZERO Put the Reference in the light path, press to do blank. Measure Samples SELECT Put the samples in the light path, press (left) to measure. Print the test results ▲ PRINT select “Print, clear data”, press the key Test Interface, press the key SELECT (left) to print. -
Page 12: Quantitation
▲ GOTO λ Press to set wavelength, press to input wavelength value, press SELECT (left) to go to wavelength. Step 3. Blank ZERO Put the Reference in the light path and press to do blank. Step 4. Measure samples Put the sample in the light path, and then the result displays on the screen automatically, SELECT press (left) to record. - Page 13 Method 1: Establish Standard Curve by inputting coefficients ▲ SELECT to select “Coefficient” , Starts establish. Press then press (left) to confirm. W L: 500. 0nm W L: 500. 0nm W or k W L. : Coef f i ci ent 500.
- Page 14 SELECT Blank. Put the Reference in the light path, press (left) to do blank. ▲ Setup number of Standard Samples. Press to input the quantity of SELECT standard sample(No more than 9 standard curve.), press (left) to confirm. W L: 500. 0nm W L: 500.
-
Page 15: Utility
Step 3. Enter into Measuring Interface SELECT Press (left) to enter into the Quantitation Measuring Interface. 4. 000 W L: 500. 0nm 0. 000A No. W L Abs. Conc. 0. 000 - 0. 100 0. 900 r =0. 996, C=2. 267+1. 211 Test Cancel Test... - Page 16 SELECT choose “Abs”, “%T”, “Energy”, press (left) to confirm. Test M ode D2 Lam p W Lam p Ener gy Cancel Cancel Turn On/Off D2 Lamp ▲ ▲ SELECT to choose “D2 Lamp”, then press Press (left) to enter into. Press SELECT to choose “On”...
-
Page 17: Troubleshooting
Dar k Cur r ent Reset W L G et Dar k Cur r ent ! Ver si on Cancel Reset Wavelength ▲ to choose “Reset WL”, then Keep the light path without anything blocking, press SELECT press (left) to reset wavelength. Dar k Cur r ent Reset W L Cal i br at i ng W L! -
Page 18: Repair And Maintenance
Sample is not Stable Improve the sample The concentration of sample is Diluted sample too high Power Supply Voltage Low or Improve the Power Supply not Stable Lamp damage or lamp life Replace lamp maturity Dark Current Error when self- The lid of the compartment is Close the lid, restart check... - Page 19 Danger! Be sure to switch off the power and unplug the socket before replacement! Step 1. Tools preparation Prepare a 3×75 Flat Blade screwdriver. Step 2. Switch Off the power supply Switch off the power supply, and unplug the socket. Step 3.
- Page 20 Replace Lamps Hot! Wait 20 minutes before open the lamp chamber after power off to avoid scald! Step 1. Tools preparation Prepare a 6×150mm Cross Blade screwdriver and a pair of glove. Step 2. Power Off Switch off the power supply and unplug the socket. Step 3.
- Page 21 Lamp Filament Adjust the position of the W lamp Switch on the power(the Switch Mirror should be placed to the position as indicates). Observe the entrance facular, and it should in the center of the entrance hole. If the facular deviate to Left or Right, then loosen the No.1 screws in Fig.
- Page 22 Warranty warrant that this product will be free from defects in material and workmanship for a period of one (1) year from date of purchase. If a defect is present, we will, at its option, repair, replace, or refund the purchase price of this product at no charge to you, provided it is returned during the warranty period.
- Page 24 Giorgio Bormac S.r.l. Add.: VIA DELLA MECCANICA, 25 41012 CARPI (MO) ITALY Tel.: +39 059 653 274 Fax: +39 059 653 282...
Need help?
Do you have a question about the V-10 PLUS and is the answer not in the manual?
Questions and answers