
Related Manuals for KING Flex VQ2100


Summary of Contents for KING Flex VQ2100
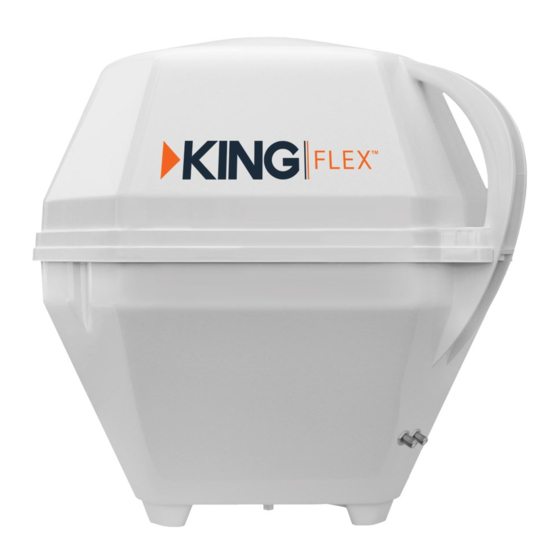
- Page 1 Portable Automatic Satellite TV Antenna VQ2100 Owner’s Manual 11200 Hampshire Avenue South, Bloomington, MN 55438 PH 952.922.6889 || FAX 952.922.8424 || kingcontrols.com...
- Page 3 ® Portable Satellite Antenna does not operate as outlined in this manual, please call KING at (952) 922-6889 or visit our website at www.kingcontrols.com. KING is not responsible for changes outside of its control. Please read the appropriate sections of this manual before using your new KING Flex.
- Page 5 DIRECTV THANK YOU for your purchase of the KING Flex Portable Automatic Satellite TV Antenna! Section 1 SETUP Pages 2-3 Section 2 ANTENNA AND ALARM CONFIGURATION Pages 4-5 Section 3 OPERATION Pages 6-7...
- Page 6 Place KING Flex in position. Place the KING Flex on a stable surface. With its built-in operation. NOTE: ground is dry and free of loose dirt or sand. Do not place in an area where water may potentially pool or where water does not drain properly.
- Page 8 101° W satellite (DIRECTV SD (DIRECTV SD with Locals) MUST BE COMPLETED before using your 1. Press POWER to turn on KING Flex controller. The COAX CONNECTION SCAN PROGRESS 2. Simultaneously press and hold POWER and SCAN The COAX CONNECTION light and the SCAN PROGRESS lights that indicate the currently SCAN repeatedly to scroll thru the available service provider options.
- Page 9 When alarm is enabled: If the coax cable is disconnected from the antenna unit or the controller while the system is POWER until the controller turns off. This unit is shipped from the factory with the alarm feature in the ON condition. IMPORTANT! The KING Flex will not work with SWM only receivers. DIRECTV SD...
-
Page 10: Operation
OPERATION Section 3 IMPORTANT! The KING Flex will not receive channels broadcast from DIRECTV’s Ka band satellites at 99° and 103°. The KING Flex will not work with SWM only receivers. NOTE: IMPORTANT! The antenna unit requires a “direct line of sight” to the satellites for signal reception. - Page 11 SCAN FOR SATELLITES SCAN for • The antenna will scan for the selected satellites. The four SCAN PROGRESS lights will cycle on and off to indicate a scan is in progress. • SCAN PROGRESS lights will turn on (see below). •...
- Page 13 DISH THANK YOU for your purchase of the KING Flex Portable Automatic Satellite TV Antenna! necessary to receive your favorite SD and HD programming from DISH. IMPORTANT! DISH CUSTOMERS WITH HD SOLO RECEIVERS ONLY! If you have a DISH model ViP211z, ViP211k, ViP211 or 411 single tuner HD receiver, you can user interface on your receiver.
- Page 14 Place KING Flex in position. Place the KING Flex on a stable surface. With its built-in operation. NOTE: ground is dry and free of loose dirt or sand. Do not place in an area where water may potentially pool or where water does not drain properly.
- Page 15 If using a second receiver, it will be connected in Section 5 on page 12. (2nd receiver not recommended for Tailgater Mode.)
- Page 16 Section 2 ANTENNA CONFIGURATION MUST BE COMPLETED before using your KING 1. Press POWER to turn on KING Flex controller. The COAX CONNECTION SCAN PROGRESS 2. Simultaneously press and hold POWER and SCAN The COAX CONNECTION light and the SCAN PROGRESS lights that indicate the currently SCAN repeatedly to scroll thru the available service provider options.
- Page 17 press and hold POWER and SCAN SCAN PROGRESS lights will turn off and the COAX CONNECTION ALARM CONFIGURATION Single Beep (beep...beep...beep)......OFF. Double Beep (beep beep...beep beep) ....5. Press and release SCAN to toggle between the on and off conditions. Beep pattern will change to indicate new condition.
-
Page 18: Receiver Configuration
RECEIVER CONFIGURATION Section 3 IMPORTANT! YOU MUST HAVE COMPLETED THE ANTENNA CONFIGURATION ON PAGES 4-5 BEFORE CONTINUING BELOW. NOTE: DISH SD. For DISH SD and HD c) you travel outside the coverage area of either DISH SD and HD or DISH SD and HD Alternate and switch to the other. - Page 19 MENU 6 1 1. Press SELECT on your remote. NOTE: Some receivers may prompt you to select “Check Switch” a second time to initiate Screen graphics may vary. the test. are NOT selected. NOTE: Not all receivers will display a screen with options that include “SuperDISH”...
- Page 20 DISH SD and HD DISH SD and HD Alternate NO “X”s MUST SHOW “SW64” DISH SD and HD and DISH SD and HD Alternate...
- Page 22 “direct line of sight” to the satellites for signal reception. Any tall objects can block the signal from reaching the antenna. POWER UP 2. Press POWER to turn on KING Flex controller. • • The COAX CONNECTION • The SCAN PROGRESS •...
- Page 23 SCAN FOR SATELLITES SCAN for • The antenna will scan for the selected satellites. The four SCAN PROGRESS lights will cycle on and off to indicate a scan is in progress. • SCAN PROGRESS lights will turn on (see below). •...
- Page 24 2ND RECEIVER OPERATION Section 5 INITIAL SETUP FOR SECOND RECEIVER Second receiver must be disconnected during 1. With the second receiver disconnected from initial check switch test. DISH remote control and press MENU 6 1 1 to display the Point Dish screen. Press SELECT on your remote.
- Page 25 Press SELECT on your remote. Connect to AUX port. connect the second receiver to the DOWNLOADING PROGRAMMING TO THE SECOND RECEIVER 1. With the second receiver now connected seconds. The TV picture will go away and should reappear within two minutes. The receiver will then download the program guide to show only the channels available on the current satellite as determined by the channel selected on the main receiver.
-
Page 26: Tailgater Mode
TAILGATER MODE Section 6 IMPORTANT! You must have chosen Tailgater Mode on pages 4-5. Your local channels may not be available when traveling outside your home area. Use these steps if your receiver is NEW AND UNACTIVATED. If it is not new, go to page 20. IMPORTANT! The antenna unit requires a “direct line of sight”... - Page 27 the receiver and press SAT. Press RECORD. Press SELECT on your remote. The Portable Antenna Setup screen will display. highlight the letter group that includes the Press SELECT.
- Page 28 from the state menu. Press SELECT. Press SELECT. several minutes to complete. The receiver will update software for 20-25 minutes.
- Page 29 Mobile Antenna Setup Screen will appear. initiate a second scan. The unit will scan a second time. “Acquiring Signal minutes to complete.
- Page 30 it is ready to be activated. If your receiver the electronic program guide will download. (potentially longer if an external hard drive is connected). This completes the setup for new receivers. From now on, use the standard operation procedure starting on page 20.
- Page 32 STANDARD TAILGATER OPERATION IMPORTANT! You must have chosen Tailgater Mode on pages 4-5. Your local channels may not be available when traveling outside your home area. If your receiver is NEW AND UNACTIVATED, start on page 14. IMPORTANT! The antenna unit requires a “direct line of sight”...
- Page 33 The Mobile Antenna Setup screen will be displayed on your TV. NOTE: If the Mobile Antenna Setup screen does not MENU 6 1 1 on your DISH remote. Press SELECT on your remote. The Mobile Antenna Setup screen should now display. highlight the letter group that includes the Press SELECT on your remote.
- Page 34 5. Highlight the state you are currently in from the state menu. Press SELECT. Press SELECT. several minutes to complete. This screen will display during the scan. “Acquiring Signal minutes to complete.
- Page 35 the electronic program guide will download. (potentially longer if an external hard drive is connected). OPERATING NOTES To turn the unit off at any time press POWER programming. DISH SD and HD Alternate.
- Page 37 Bell TV THANK YOU for your purchase of the KING Flex Portable Automatic Satellite TV Antenna! necessary to receive your favorite SD and HD programming from Bell TV. Section 1 SETUP Pages 2-3 Section 2 ANTENNA AND ALARM CONFIGURATION Pages 4-5...
- Page 38 Place KING Flex in position. Place the KING Flex on a stable surface. With its built-in operation. NOTE: ground is dry and free of loose dirt or sand. Do not place in an area where water may potentially pool or where water does not drain properly.
- Page 39 If using a second receiver, it will be connected in Section 5 on page 10.
- Page 40 Section 2 ANTENNA CONFIGURATION MUST BE COMPLETED before using your KING 1. Press POWER to turn on KING Flex controller. The COAX CONNECTION SCAN PROGRESS 2. Simultaneously press and hold POWER and SCAN The COAX CONNECTION light and the SCAN PROGRESS lights that indicate the currently SCAN repeatedly to scroll thru the available service provider options.
- Page 41 press and hold POWER and SCAN SCAN PROGRESS lights will turn off and the COAX CONNECTION ALARM CONFIGURATION Single Beep (beep...beep...beep)......OFF. Double Beep (beep beep...beep beep) ....5. Press and release SCAN to toggle between the on and off conditions. Beep pattern will change to indicate new condition.
- Page 42 RECEIVER CONFIGURATION Section 3 IMPORTANT! YOU MUST HAVE COMPLETED THE ANTENNA CONFIGURATION ON PAGES 4-5 BEFORE CONTINUING BELOW. NOTE: satellites and get signal. IMPORTANT! The antenna unit requires a “direct line of sight” to the satellites for signal reception. Any tall objects can block the signal from reaching the antenna.
- Page 43 MENU 6 1 1. Press SELECT on your remote. NOTE: Some receivers may prompt you to select “Check Switch” a second time to initiate the test. are NOT selected. NOTE: Not all receivers will display a screen with options that include “SuperDISH” and “Alternate”...
- Page 44 “direct line of sight” to the satellites for signal reception. Any tall objects can block the signal from reaching the antenna. POWER UP 2. Press POWER to turn on KING Flex controller. • • The COAX CONNECTION • The SCAN PROGRESS •...
- Page 45 SCAN FOR SATELLITES SCAN for • The antenna will scan for the selected satellites. The four SCAN PROGRESS lights will cycle on and off to indicate a scan is in progress. • SCAN PROGRESS lights will turn on (see below). •...
- Page 46 2ND RECEIVER OPERATION Section 5 INITIAL SETUP FOR SECOND RECEIVER Second receiver must be disconnected during 1. With the second receiver disconnected from initial check switch test. DISH remote control and press MENU 6 1 1 to display the Point Dish screen. Press SELECT on your remote.
- Page 47 Press SELECT on your remote. Connect to AUX port. connect the second receiver to the DOWNLOADING PROGRAMMING TO THE SECOND RECEIVER 1. With the second receiver now connected seconds. The TV picture will go away and should reappear within two minutes. The receiver will then download the program guide to show only the channels available on the current satellite as determined by the channel selected on the main receiver.
- Page 49 APPENDIX Section 1 TROUBLESHOOTING Page 2 Section 2 MOUNTING BRACKETS Page 3 Section 3 SECURITY FEATURE Page 4 Section 4 FCC GUIDELINES Page 4 Section 5 LIMITED WARRANTY Page 5...
-
Page 50: Troubleshooting
Inclement weather can occasionally cause loss of signal. Wait till weather improves and rescan. stable and rescan. and KING Flex controller not unit and KING Flex controller. connected. and KING Flex controller faulty. on antenna unit. antenna unit. -
Page 51: Mounting Brackets
MOUNTING BRACKETS Section 2 NOTE: IMPORTANT! KING Flex must not be on bracket while vehicle is in motion. IMPORTANT! KING Flex must not be on bracket while vehicle is in motion. NOTE: the MB100-RETROFIT Kit. USE OF THESE BRACKETS WITHOUT THE MB100-RETROFIT KIT WILL VOID... -
Page 52: Security Feature
SECURITY FEATURE Section 3 FCC GUIDELINES Section 4 undesired operation. -
Page 53: Limited Warranty
KING. This warranty is not transferable from the original owner. Software updates to address such issues are not covered under warranty. This disclaimer applies both during and after the term of the warranty. - Page 54 NOTES...
- Page 56 11200 Hampshire Avenue South, Bloomington, MN 55438 PH 952.922.6889 || FAX 952.922.8424 || kingcontrols.com 21438 Rev D...
Need help?
Do you have a question about the Flex VQ2100 and is the answer not in the manual?
Questions and answers