
Related Manuals for Suncast Covington BMS7425


Summary of Contents for Suncast Covington BMS7425
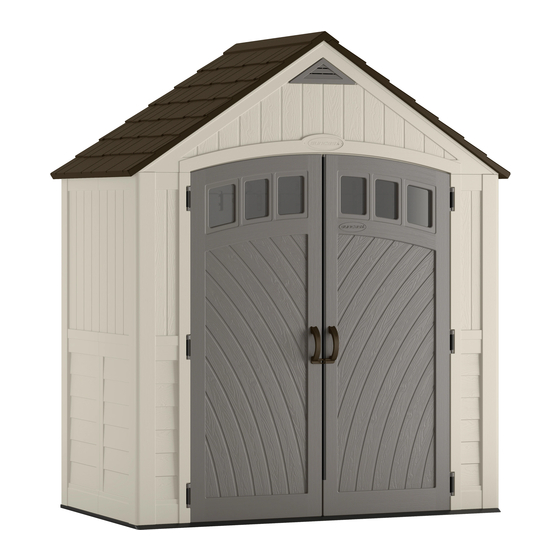
- Page 1 BMS7425– Covington™ Tools needed for installation Blow Molded Resin Storage Shed ASSEMBLY INSTRUCTIONS INCLUDED IN KIT Easy Bolt Easy Driver 010210410 Quality Control Number: © 2019 Suncast Corporation, Batavia, IL 0361322C...
- Page 2 • This kit contains parts with metal edges. Please be careful when handling. Suncast Products and Replacement Parts Suncast Products and Replacement Parts To purchase Suncast replacement parts and learn about other Suncast products visit us online or call. www.suncast.com 24 hours a day, 7 days a week, 365 days a year.
- Page 3 Note: This product contains parts that are used in different orientations to construct the shed. Please take note of the orientation of the parts shown throughout this instruction manual. Failure to follow instructions could re- sult in damage to parts. Suncast is not responsible for replacing parts lost or damaged due to incorrect assembly.
- Page 4 IMPORTANT OPEN ALL BOXES FIRST AND NEATLY LAYOUT PARTS. SMALL PARTS MAY BE CONTAINED IN EACH BOX. PLEASE REFERENCE THE PARTS LIST WITHIN THIS MANUAL TO VERIFY ALL PARTS ARE PRESENT. COMPLETE SITE PREPARATION AND FOUNDATION CONSTRUCTION BEFORE UNPACKING ALL PARTS. Parts - BMS7425 Walls and Floors 0B00103 0B00106...
- Page 5 Parts - BMS7425 Doors IMPORTANT OPEN ALL BOXES FIRST AND NEATLY LAYOUT PARTS. SMALL PARTS MAY BE CONTAINED IN EACH BOX. PLEASE REFERENCE THE PARTS LIST WITHIN THIS MANUAL TO VERIFY ALL PARTS ARE PRESENT. COMPLETE SITE PREPARATION AND FOUNDATION CONSTRUCTION BEFORE UNPACKING ALL PARTS.
- Page 6 Parts - BMS7425 Headers and Roof IMPORTANT OPEN ALL BOXES FIRST AND NEATLY LAYOUT PARTS. SMALL PARTS MAY BE CONTAINED IN EACH BOX. PLEASE REFERENCE THE PARTS LIST WITHIN THIS MANUAL TO VERIFY ALL PARTS ARE PRESENT. COMPLETE SITE PREPARATION AND FOUNDATION CONSTRUCTION BEFORE UNPACKING ALL PARTS.
- Page 7 Hardware - BMS7425 0480324A 0MP000002 0480327 0480303B – 0480374 0480337 0480341 Hardware shown at actual size (*Unless otherwise noted.) Extra hardware provided. Not all are used.
- Page 8 Door Handle Kit - BMS7425 0463370 Hardware 0480370 Hardware shown at actual size (*Unless otherwise noted.) Extra hardware provided. Not all are used.
- Page 9 Note: Site preparation is required for this shed. Placing the shed on a constructed foundation is required. Without a constructed foundation, settling will probably occur, causing distortion and damage to the shed. Suncast is not responsible for replacing parts damaged or property lost due to incorrect assembly. Warranty requires foundation.
- Page 10 Site Preparation and Platform Construction (continued) Materials NOT supplied with BMS7425 Shed Kit Wood platform critical spacing 4 " 4 " (APPROXIMATE) 29" 29" 4 " 4 " 8 " 4 " 4 " FRONT 84" • Check all critical spacing measurements. Materials list Item Size...
- Page 11 Door Pre-Assembly Peel film from both sides of window (S). Note: One side of film will say "THIS SIDE OUT." Make sure this side faces out when installing window. Stand left door (I) vertically. In this order, layer into door channel the window gasket (TT), and door window (S).
- Page 12 Door Pre-Assembly (continued) At top interior side of left door (I), attach D-ring slide bolt (W) with four screws (LL) through provided holes. x4 x4 At bottom interior side of left door (I), attach D-ring slide bolt (W) with four screws (LL) through provided holes.
- Page 13 Header Pre-Assembly Slide roof ridge beam bracket (V) under tabs on inside Place header vent (R) into front opening in front header peak of front header (J) and secure with two screws (KK). (J). Secure through back of header with four screws (LL). DO NOT over tighten screws.
- Page 14 Shed Assembly/Walls Critical: When installing corners, flex corner hinges back and forth several times. This will help provide a square corner and ensure proper fit of remaining panels. Important: DO NOT flex in reverse position, as this can crack the panel. Align tab on bottom right side of left front (C) with slot Tip left front (C) outward slightly and bend corner hinge.
- Page 15 Shed Assembly/Walls (continued) Before proceeding, make sure corner is square (top view) where it meets the floor and that panel is flush (side view) with floor. If not, repeat Steps 8–11 until square and flush. Top view Top view Side view Side view Tip left front (C) back to vertical position and align lower tabs on right side with slots in floor.
- Page 16 Shed Assembly/Walls (continued) Before proceeding, make sure corner is square (top view) where it meets the floor and that panel is flush (rear view) with floor. If not, repeat Steps 13–15 until square and flush. Top view Top view Rear Rear view view Tip back corner (E) back to vertical position and align...
- Page 17 Shed Assembly/Walls (continued) Hardware Needed Repeat steps 8-17 for remaining panels.
- Page 18 Shed Assembly/Headers and Truss Place front header (J) over door opening and fit two protruding support legs into pockets molded in front corners. Secure front header using two screws (KK) in each front corner. Place rear header (K) over back walls and fit four protruding support legs into pockets molded in back walls.
- Page 19 Shed Assembly/Headers and Truss (continued) Raise ridge beam (U) up and into rear roof ridge beam Slide ridge beam (U) into front roof ridge beam bracket. bracket. Secure with one 2" hex bolt (HH) and one nut (JJ). Secure with one 2" hex bolt (HH) and one nut (JJ). Note: Alignment of ridge beam to bracket may require Note: Alignment of ridge beam to bracket may require header panels to be pushed inwards or outwards slightly...
- Page 20 Shed Assembly/Roof Before proceeding, locate and identify six dovetails on interior side of right roof (L) and left roof (M). Before proceeding, locate and identify six front header tabs and six rear header tabs.
- Page 21 Shed Assembly/Roof (continued) x4 x4 x6 x6 Lay right roof (L) directly over three tabs on right side Pull down each lower corner of right roof (L) from of front header (J). With right roof slots seated over/on outside. From inside shed, attach each tab to the header tabs, check alignment in all three spots.
- Page 22 Push down the roof from outside. From inside shed, secure roof panels together along ridge of roof using three rubber washers (YY) and three sealing screws (AAA). Note: For clarity, illustration is shown with front header removed. x2 x3 x6 x3 Secure roof support bar to roof using three screws (KK).
- Page 23 Shed Assembly/Doors Stand right door (H) upright with three hinge mounts facing right. Slide one metal hinge plate (FF) up onto each hinge mount. Rotate hinge plates to outside of door. With door hinge in open position, slide one door hinge over each hinge receptacle on inside of right front corner.
- Page 24 Shed Assembly Doors (continued) Secure each metal hinge plate with one screw (MM) and one nut (JJ). Repeat Steps 31-33 for left door (I). Note: For clarity, illustration is shown with roof and back panel removed. Attach door handle (HHH) to left door with two screws (III) and two washers (RR).
- Page 25 Shed Assembly Doors (continued) Push D-ring (W) up to engage with slot in header. Turn D-ring to left for locked position. Push D-ring (W) down to engage with hole in floor. Turn D-ring to left for locked position.
- Page 26 Shed Assembly Doors (continued) Attach a 5/16" lock (not provided) to door handles, to properly secure shed. 5/16" (12.7 cm) Max. 3/4" (7.6 cm) 5/16" 1 1/2" Max. (12.7 cm)
-
Page 27: Warranty
Painting, sandblasting, cleaning with harsh chemicals not recommended for plastics voids the warranty on resin components. Modification of the original product voids all warranties. Suncast assumes no liability for any modified product or consequences resulting from failure of a modified product.
Need help?
Do you have a question about the Covington BMS7425 and is the answer not in the manual?
Questions and answers