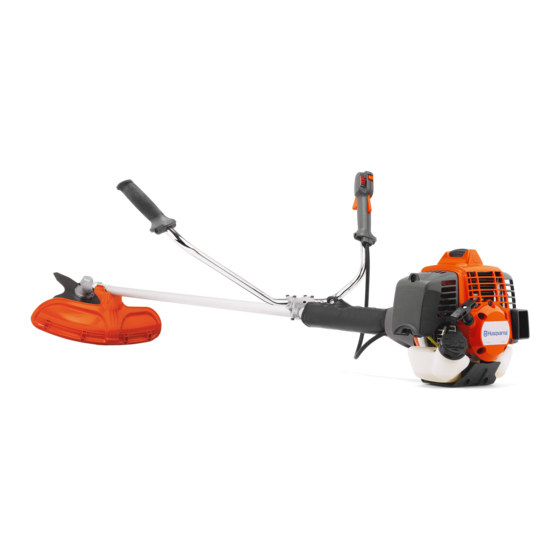
Husqvarna 543RS Operator's Manual
Hide thumbs
Also See for 543RS:
- Workshop manual (60 pages) ,
- Operator's manual (58 pages) ,
- Operator's manual (765 pages)
Table of Contents
Advertisement
Quick Links
Advertisement
Table of Contents

Related Manuals for Husqvarna 543RS


Summary of Contents for Husqvarna 543RS
- Page 1 543RS Operator's manual 2-23 操作手册 24-43...
-
Page 2: Table Of Contents
Contents Introduction..............2 Troubleshooting............21 Safety................3 Transportation and storage...........21 Assembly................ 8 Technical data.............. 22 Operation..............13 Accessories..............23 Maintenance..............17 Introduction Product description product for other tasks than grass trimming and grass clearing. Use a grass blade or trimmer head to cut This product is a brushcutter with a combustion engine. -
Page 3: Safety
13. Starter rope handle Maximum speed of the output shaft. 14. Fuel tank 15. Air filter cover Keep a minimum distance of 15 m / 50 ft. to 16. Handlebar persons and animals during operation of the 17. Locknut product. 18. - Page 4 General safety instructions • Lock the product in an area that children and unapproved persons cannot access. • The product can eject objects and cause injuries. Obey the safety instructions to decrease the risk of WARNING: Read the warning instructions injury or death.
- Page 5 • Do not operate the product if there are persons in attachment stops. Let the cutting attachment stop the work area. Stop the product if a person goes into before you or an aid remove the cut material. the work area. Personal protective equipment •...
- Page 6 To do a check of the cutting attachment guard correct position. In an emergency, the harness quick release helps you to safely release from the product. The cutting attachment guard stops objects that ejects in the direction of the operator. It also prevents injuries that occur if you touch the cutting attachment.
- Page 7 • To loosen and tighten the locknut, use a socket wrench with a long shaft. The arrow in the picture shows the area where you can operate the socket wrench. • Use the trimmer head to trim grass. WARNING: When you loosen and tighten the locknut, there is a risk of injury from the blade.
-
Page 8: Assembly
• Soak the trimmer line in water for a couple of days the product dry. Remove unwanted fuel from the before use to increase the life length. product. • If you spill fuel on your clothing, change clothing Grass blades and grass cutters immediately. - Page 9 To install the throttle cable and stop 4. Remove the air filter cover and clamp (D). switch wires 1. Remove the 4 screws. 5. Install the throttle cable through the space between the tank and the crankcase. 2. Put the throttle cable through the hole (A), then through the hole (B) on plastic cover.
- Page 10 7. Turn the throttle lever (J) clockwise, adjust the swivel 12. Connect the stop switch wires (H) with the (K). connectors from the engine. Note: Make sure that the larger side of the groove in the swivel (K) is on the top. 13.
- Page 11 To install the handlebar and harness 2. Install the drive disc (B) on the output shaft. 1. Install the handlebar in the handlebar clamp on the shaft. 2. Put on the harness and hang the product from the suspension ring. 3.
- Page 12 2. Install the blades. 5. Turn the trimmer head (H) counterclockwise. 6. To disassemble, do the reverse procedure. To adjust the harness To attach the trimmer guard and the trimmer head WARNING: The product must always be correctly attached to the harness. If not, you cannot control the product safely and this WARNING: Use the correct trimmer guard can result in injury to you or others.
-
Page 13: Operation
• Shake the fuel container before you add the fuel • If Husqvarna two-stroke oil is not available, you can mixture to the fuel tank. use another two-stroke oil of good quality that is intended for air cooled engines. Contact your dealer To start and stop when you select oil. - Page 14 2. Examine the nuts, screws and bolts. 3. Set the choke control to the choke position. 3. Examine the blades. 4. Examine the locknut. Make sure that the locknut has a minimum locking force of 1.5 Nm (1,1 ft lb). Torque the locknut to 35-50 Nm (26-36 ft lb).
- Page 15 To start a warm engine • Clear an open space at one end of the work area, and start the work from there. • Move in a regular pattern across the work area. 1. Set the stop switch to the start position. 2.
- Page 16 3. Use a sideway movement from right to left for a clear 2. Decrease the length of the trimmer line by 10-12 stroke. Use the left side of the blade (between 8 and cm / 4-4.75 in. 12 o'clock) to cut. 3.
-
Page 17: Maintenance
of the trimmer head and clean it if WARNING: Clean the trimmer head cover necessary. each time you assemble new trimmer line to prevent unbalance and vibrations in the To replace trimmer line handles. Also do a check of the other parts Refer to the last page of this operator's manual. - Page 18 Cooling system To adjust the idle speed The cooling system keeps the engine temperature Your Husqvarna product is made to specifications that down. The cooling system includes the cooling fins on decrease harmful emissions. 1221 - 003 - 25.05.2020...
- Page 19 7. Make sure that the air filter is dry. damaged, very dirty or soaked with fuel. 8. Use Husqvarna two-stroke oil to put oil on the air filter. If there is too much oil on the air filter, remove If you use an air filter for a long time, it cannot be fully the unwanted oil before you install the air filter.
- Page 20 4. Push the unwanted oil out of the foam air filter while • Examine the spark plug if the engine is low on in the plastic bag. power, is not easy to start or does not operate correctly at idle speed. •...
-
Page 21: Troubleshooting
Troubleshooting Starting failure Check Possible cause Solution Stop button Stop position Set the stop switch to the start position. Starter pawls Binding pawls Adjust or replace the pawls. Clean around the pawls. Speak to an approved servicing dealer. Fuel tank Incorrect fuel Drain it and use correct fuel. -
Page 22: Technical Data
Technical data Technical data 543RS Engine Cylinder displacement, cm 40.1 Cylinder bore, mm 40.5 Cylinder stroke length, mm 31.1 Idle speed, rpm 3000±200 Recommended max. speed, rpm 12000 Speed of output shaft, rpm 8570 Max. engine output, according to ISO kW/hp @ rpm 1.5/2.01 @ 8500... -
Page 23: Accessories
Accessories Accessories Approved accessories Accessory type Cutting attachment guard, art. no. Grass blade/grass cutter Grass 255-4 1" (Ø 255, 4 teeth) 584 40 43-01 Multi 255-3 (Ø 255, 3 teeth) 584 40 43-01 Grass 275-4 (Ø 275, 4 teeth) 584 40 43-01 Plastic blades Tricut Ø... - Page 24 内容 引言................24 故障排除............... 41 安全性................25 运输及存放..............42 安装................30 技术参数............... 42 操作................33 附件................43 维护................37 引言 产品说明 注意: 本机的使用可能会受到国家或地方法规的管制。 请遵守指定的法规。 本产品是配备内燃机的割灌机。 我们致力于提高您的工作安全性与效率。欲了解更多信 息,请与您的保养代理商联系。 预期用途 本产品可与打草刀片或打草头配合使用,用于修剪多种植 被。本产品仅可用于草坪修剪和草坪清理,切勿用于其他 任务。使用打草刀片或打草头修剪草坪。 产品概览 1. 打草头 7. 风门 2. 斜齿轮润滑脂加注口盖 8. 手柄杆夹持器 3. 斜齿轮 9. 吊环 4. 切割刀片防护罩 10.
- Page 25 13. 启动绳把手 输出轴的极限速度。 14. 燃油箱 15. 空气滤清器外壳 16. 手柄杆 本产品运行期间,应与人员和动物保持至少 17. 锁紧螺母 15 m/50 ft 的距离。 18. 支撑凸缘 19. 支撑杯 如果切割设备接触到其未立即切断的物体, 20. 驱动盘 那么存在甩刀的风险。产品可能会切断身体 部位。本产品运行期间,要与人员和动物保 21. 操作手册 持至少 15 m/50 ft 的距离。 22. 螺丝刀 23. 锁紧销 24. 经检验合格的眼部保护设备 箭头显示手柄杆位置的极限位置。 25. 套筒扳手 26.
- Page 26 一般安全须知 装配安全须知 警告: 请在使用本产品前阅读下面的警告说 警告: 请在使用本产品前阅读下面的警告说 明。 明。 • 请正确使用产品。不正确使用可能导致伤害或死亡。 • 安装产品之前,先拆下火花塞帽。 仅将产品用于本说明书规定的任务。切勿将产品用于 • 在操作本产品之前,请确保已装配正确的手柄杆和切 其他任务。 割刀片防护罩。 • 请遵守本手册中的说明。请遵守安全符号和安全须 • 有故障或不正确的切割刀片防护罩可能会导致伤害。 知。如果操作员不遵守安全须知和安全符号,可能导 切勿在未安装经过批准的切割刀片防护罩的情况下使 致伤害、损坏或死亡。 用切割刀片。 • 切勿丢弃本说明书。请遵循本说明书来安装、操作和 • 在启动本产品之前,请正确安装离合器罩和驱动轴。 妥善保管产品。请遵循本说明书正确安装附件和配 • 驱动盘和支撑凸缘必须正确接合在切割刀片的中心孔 件。仅使用获得批准的附件和配件。 中。切割刀片固定不当可致人受伤或死亡。 • 切勿使用损坏的产品。请遵守维护时间表。仅执行本 • 将背带连接到本产品上,以防止对操作员或他人造成 说明书规定的维护作业。获得批准的服务中心必须执 伤害。 行所有其他维护作业。...
- Page 27 2. 将停止开关移至停止位置,确保引擎停止。 • 操作产品时,确保切割刀片的位置保持在您的腰部以 检查切割刀片防护罩 下。 • 如果引擎启动时风门处于阻风位置,那么切割刀片会 切割刀片防护罩可防止物体弹向操作员。它还可防止因触 开始转动。 碰切割刀片而致人受伤。 • 引擎停止后勿触摸斜齿轮。引擎停止后斜齿轮温度较 1. 停止引擎。 高。高温表面可能会造成烫伤。 2. 目视检查是否存在损坏,如裂纹。 • 移动产品之前,请先关闭引擎。 • 引擎运转期间,切勿放下产品使其无人看管。 • 从产品中移除多余的材料之前,先停止引擎,然后等 待片刻,直到切割刀片停止转动。在您或助手移除切 割材料之前,务必先让切割刀片停止转动。 个人防护装备 警告: 请在使用本产品前阅读下面的警告说 明。 3. 更换损坏的切割刀片防护罩。 • 操作产品时务必使用正确的个人防护装备。个人防护 装备不会消除伤害风险。如果出现事故,个人防护装 检查防振系统 备可降低伤害程度。 防振系统用于最大程度减少手柄上的振动,使操作更简 • 操作产品时,务必使用获得批准的眼部保护装备。 单。...
- Page 28 背带快速脱扣装置 (A) 位于产品前部。背带扣一定要保持 • 要松开和拧紧锁紧螺母,请使用带长轴的套筒扳手。 在正确的位置。在紧急情况下,背带快速脱扣装置可帮助 图中箭头显示了可以操作套筒扳手的区域。 您安全脱离产品。 警告: 松开和拧紧锁紧螺母时,存在刀 片造成伤害的风险。当您这样操作时务必 确保刀片防护罩对您的手进行保护。 注意: 确保您无法用手转动锁紧螺母。如果尼龙衬套没 有最小 1.5 Nm 的阻力,请更换螺母。锁紧螺母安装约 消音器 10 次后必须进行更换。 切割设备 选择正确的切割设备,并对切割设备进行维护: • 获取最佳切割性能。 • 增加切割设备的使用寿命。 警告: 只能安装我们推荐的防护罩来使用切 附件在第 43 页上 。请参照 割刀片!请参阅 切割刀片的相关说明,找到打草绳的正确安 消音器用于最大程度降低噪音并将引擎的废气导离操作人 装方法,以及获取正确的打草绳直径。 员。 • 切勿使用消音器已损坏的引擎。损坏的消音器会增加 噪音水平以及引起火灾的风险。请在附近备有灭火...
- Page 29 • 在切割刀片上开展任何工作之前,请先停止引擎。确 保切割刀片已完全停止转动。断开火花塞的导线。 • 仅使用获得批准的切割刀片或经过正确修磨的刀片。 • 确保正确修磨刀片齿。 • 切勿使用损坏的切割刀片。 • 运输或存放产品时,请将运输防护罩安装到割草刀片 上。 甩刀 • 甩刀是产品突然向侧面、前方或后方移动的现象。当 • 不正确修磨或损坏的刀片会增加发生意外的风险。确 打草刀片击中无法被切割的物体时,就会出现甩刀现 保正确修磨刀片齿。请按照相关说明进行操作并使用 象。在不容易看到被切割材料的区域,甩刀的风险会 建议的锉规。 增加。 • 检查切割刀片是否损坏或有裂痕。更换损坏的切割刀 • 出现甩刀现象时,存在产品或操作员移位的风险。甩 片。 出的刀片可能会击中旁观者,这可能会造成伤害。 附件 • 仅将切割刀片与建议的防护罩配套使用。请参阅 • 如果刀片弯曲、有裂纹、断裂或损坏,请丢弃刀片。 在第 43 页上 。 • 请使用锋利的刀片。当刀片不锋利时,甩刀的风险会 增加。 打草头...
- Page 30 维护安全须知 • 如果不能将怠速调整为使切割刀片停止,请联系服务 中心。在未正确调整或修理产品前,请勿使用产品。 安装 4. 拆下空气滤清器外壳和卡箍 (D)。 警告: 在安装产品之前,请先仔细阅读安全 须知章节。 安装油门线和停止开关导线 1. 拆下 4 颗螺丝。 5. 通过油箱和曲轴箱之间的空间安装油门线。 2. 将油门线穿过孔 (A),然后穿过塑料盖上的孔 (B)。 注意: 确保油门线穿入正确位置。 6. 将油门线 (E) 放入调整套 (F)。 注意: 确保油门线终端衔套 (G) 穿出隔热座 (I)。 注意: 确保孔 (B) 位于手柄杆夹 (C) 的对侧。 3.
- Page 31 安装本产品机体 7. 顺时针转动油门杆 (J),调节旋转接头 (K)。 1. 用 4 个螺丝 (C) 将引擎装置 (A) 与管 (B) 连接起来。 注意: 确保旋转接头 (K) 中凹槽的较大一侧位于顶 部。 8. 将油门线 (L) 放入旋转接头 (K) 的凹槽中,然后将油 门杆 (J) 转动到后侧。 2. 安装卡箍 (D)。 注意: 确保油门线终端衔套 (G) 落入凹槽中。 9. 操作油门扳机,确保可正常使用油门扳机。 10. 调节油门线调整套 (F)。 a) 确保油门杆...
- Page 32 3. 通过背带挂起时,进行最后的调整,以确保产品处于 3. 转动输出轴,直至驱动盘上的其中 1 个孔与齿轮箱中 正确位置。 的相关孔对准。 4. 将锁定销 (C) 插入孔中以将轴锁定。 5. 将刀片 (D)、支撑凸缘 (G) 和支撑杯 (F) 放到输出轴 上。 6. 安装螺母 (E)。在靠近刀片防护罩的位置握住扳手的 轴。要拧紧螺母,必须按与旋转方向相反的方向转动 扳手。将螺母拧紧至扭矩为 35-50 Nm (3.5-5 kpm)。 注意: 这是左旋螺纹。 安装刀片和打草头 警告: 仅使用获得批准的刀片防护罩。请参 附件在第 43 页上 。有故障的防护罩可能 阅 4. 拧紧螺丝。 会导致伤害。...
- Page 33 调节背带 1. 用螺栓 (L) 将割草机防护罩 (A) 安装到驱动轴上。 警告: 产品务必牢固地钩到背带上。如果不 这么做,则无法安全地控制产品,从而可能 对您自己或他人造成伤害。不要使用损坏的 背带。切勿使用快速脱扣装置损坏的背带。 1. 穿上背带。 2. 将本产品与背带相连。 3. 通过调整背带可以获得最佳的工作姿势。 4. 调节边带,使本产品重量均匀分布在双肩。 2. 将驱动盘 (B) 和支撑凸缘 (G) 安装在输出轴上。 5. 调整背带,直至切割刀片与地面平行。 3. 转动输出轴,直至驱动盘的一个孔与齿轮箱中的孔对 准。 4. 将锁定销 (C) 插入孔中以将轴锁定。 5. 安装时逆时针转动打草头 (H)。 6. 将切割刀片轻放在地面上。调整背带夹,以正确平衡 产品。...
- Page 34 • 混合比 50:1 (2%)。 2. 检查螺母、螺丝和螺栓。 • 劣质机油以及较高的机油/燃油比可能缩短催化转换器 的使用寿命。 3. 检查刀片。 • 选择机油时,请咨询您的代理商。 4. 检查锁紧螺母。确保锁紧螺母最小锁紧力为 1.5 Nm • 如果无法获得 Husqvarna 提供的二冲程机油,可以选 (1,1 ft lb)。将锁紧螺母拧紧至 35-50 Nm (26-36 ft 用其它风冷式引擎专用的优质二冲程机油。选择机油 lb)。 时,请咨询您的代理商。 5. 检查空气滤清器。 • 切勿使用水冷式舷外引擎专用的二冲程机油。这种二 6. 检查油门和油门控制。 冲程机油有时也称为舷外机油。 7. 检查停止开关。...
- Page 35 2. 按压注油泵球囊,直至燃油开始注入球囊中。不必注 小心: 切勿完全拉出启动绳,切勿放开 满注油泵球囊。 启动绳把手。缓缓释放启动绳。如果不遵 守这些说明,引擎可能会损坏。 7. 将风门设置在工作位置。 8. 怠速预热 60 秒。 警告: 切勿触摸护罩。否则可能会灼伤 皮肤,并且如果火花塞帽损坏,可能会导 致触电。切勿使用火花塞帽损坏的产品。 启动热引擎 1. 将停止开关设置到开始位置。 2. 按压注油泵球囊,直至燃油开始注入球囊中。不必注 满注油泵球囊。 3. 将风门设在阻风位置。 3. 将风门设置在工作位置。 4. 拉动启动绳把手,直至引擎启动。 4. 用左手将产品按在地上。 停止引擎 1. 将油门扳机推至怠速位置。 2. 将停止开关移至停止位置。 小心: 切勿用脚踩住本产品。 操作割草机 5. 缓缓拉动启动绳把手,直至感觉到一些阻力。感觉到 小心:...
- Page 36 一般工作须知 3. 从右向左侧向移动以完成清理行程。使用刀片的左侧 (8 点钟到 12 点钟位置之间)进行切割。 警告: 切割处于张紧状态的树木时,务必小 心谨慎。它在切断前后可能会弹回原来的位 置,从而击中您或产品并造成伤害。 • 从作业区域的一端清理出一个开阔空间,从该处开始 作业。 • 在作业区域中按常规模式移动。 4. 清理草时,请将刀片向左倾斜。 注意: 草将轻松聚拢成一行。 5. 从左向右侧向移动以完成返回行程。 6. 请有节奏地进行作业。 7. 向前移动,保持双脚在地面上站稳。 8. 停止引擎。 9. 从背带扣中拆下产品。 • 向左向右移动产品,以便每次转身可清理 4–5 m (13-16 ft) 的宽度。 10. 将产品置于地面上。 • 建议在清理...
- Page 37 4. 切割物体附近的草坪时,请用 80 % 的油门。 4. 将产品从一侧移动到另一侧割草时,请全开油门。 割草 吹扫草屑 1. 确保割草时打草绳与地面保持平行。 转动的打草绳所产生的空气流可用于清理从某一区域切割 下的草屑。 1. 使打草头及打草绳与地面保持平行并且高于地面。 2. 全开油门。 3. 将打草头从一侧移动到另一侧并吹扫草屑。 警告: 每次安装新的打草绳时请清洁打草头 护罩,以防止把手出现不平衡和产生振动的 问题。此外,请检查打草头的其他零部件, 并根据需要进行清洁。 2. 切勿将打草头推向地面。否则可能会损坏地面和产 品。 更换打草绳 3. 切勿让打草头持续触碰地面,否则可能会损坏打草 头。 请参考此操作手册的最后一页。 维护 警告: 请仔细阅读和充分理解安全须知章节 的内容,再对产品执行清洁、修理或维护作 业。 维护时间表 维护 每天 每周...
- Page 38 清洁本产品的冷却系统。 清洁消音器。 调整化油器 小心: 如果火花挡网堵塞,产品将会过热。 化油器的基本设置在进行工厂测试时经过调整。必须由经 这会导致气缸和活塞损坏。 过培训的技师进行调整。 检查消音器 1. 确保消音器未损坏。 2. 确保消音器已正确安装在产品上。 调整怠速 警告: 切勿使用消音器出现故障的产品。一 定要更换出现故障的消音器。 Husqvarna 产品按照有助于降低有害废气排放的规范制 造。 1. 在调整怠速之前,确保空气滤清器清洁并且装上空气 警告: 灼伤或火灾风险。带催化转换器的消 滤清器外壳。 音器在运行期间温度会变得非常高。 2. 用带有"T"标记的怠速螺钉调节怠速。 警告: 火灾危险。消音器可降低噪音,同时 将引擎的废气导离操作者。废气温度较高, 并且可能带有火花。 小心: 如果火花挡网损坏,必须进行更换。 如果消音器上的火花挡网缺失或者出现缺 陷,则不得使用产品。 1221 - 003 - 25.05.2020...
- Page 39 上 。 冷却系统 2. 拆下空气滤清器外壳。 冷却系统可保持引擎温度降低。冷却系统包括飞轮 (A) 上 的散热片、汽缸 (B) 上的散热片、汽缸罩 (C) 和消音器板 (D)。 3. 拆下空气滤清器。 4. 用温肥皂水清洁空气滤清器。 5. 如果空气滤清器过于玷污而无法完全清洁,应予以更 换。务必更换损坏的空气滤清器。 6. 清洁空气滤清器外壳的内表面。使用压缩空气或刷 子。 7. 确保空气滤清器干燥。 8. 在空气滤清器上涂抹 Husqvarna 二冲程机油。如果空 气滤清器上的机油太多,请在安装空气滤清器之前清 除多余的机油。 清洁冷却系统 警告: 冷却系统脏污或堵塞会造成过热。这 会导致活塞和气缸损坏。 1221 - 003 - 25.05.2020...
- Page 40 在海绵空气滤清器上涂抹机油 向斜齿轮添加润滑脂 • 确保向斜齿轮加注斜齿轮润滑脂至 ¾ 满。 小心: 务必使用 Husqvarna 专用空气滤清器 机油。切勿使用其他类型的机油。 警告: 戴上保护手套。空气滤清器机油对皮 肤有刺激性。 1. 将海绵空气滤清器放入塑料袋中。 2. 将机油加入塑料袋中。 3. 搓揉塑料袋,确保机油均匀渗入海绵空气滤清器中。 检查火花塞 4. 在塑料袋中将海绵空气滤清器中多余的机油挤出。 小心: 务必使用建议的火花塞类型。火花塞 类型不正确可能导致产品损坏。 • 如果引擎动力不足,请检查火花塞是否不容易启动或 者怠速时是否运行不正确。 • 为降低在火花塞电极上出现多余物质的风险,请遵循 这些说明: a) 确保已正确调节怠速。 b) 确保混合燃油正确。 燃油滤清器 c) 确保空气滤清器清洁。 如果引擎在运行时燃油供给不足,请确保燃油箱盖和燃油...
- Page 41 修磨割草刀和割草刀片 • 均匀地修磨割草刀和割草刀片的所有刀刃,以保持均 衡。使用单纹扁锉。 故障排除 启动故障 检查 可能原因 解决方案 停止按钮 停止位置 将停止开关设置到开始位置。 启动器棘爪 棘爪固定 调节或更换棘爪。 清洁棘爪四周。 请联系获得批准的保养代理商。 燃油箱 燃油类型不正 排空并使用正确的燃油。 确。 化油器 调节怠速。 通过螺钉 T 调节怠速。 火花(无火花) 火花塞脏污或受 确保火花塞干燥清洁。 潮。 清洁火花塞。检查跳火间距是否适当。确保火花塞安装有抑制器。 火花塞间隙不 当。 正确的跳火间距请参考技术资料。 火花塞 火花塞松动。 拧紧火花塞。 引擎启动但不保持运转 检查 可能原因 解决方案...
- Page 42 • 运输期间请固定好设备,以免造成损坏或导致发生事 • 更换或维修受损组件。 故。 • 使用正确的防护罩遮住产品,以防止受潮。 • 将产品和设备存放在干燥、防冻的区域。 • 在运输期间请确保产品可靠固定。 • 清洁本产品。 技术参数 技术资料 543RS 引擎 汽缸排量 (cm 40.1 缸径 (mm) 40.5 汽缸行程长度 (mm) 31.1 空转速度 (rpm) 3000±200 建议的最大转速 (rpm) 12000 输出轴速度 (rpm) 8570 最大引擎输出(按照 ISO kW/hp @ rpm)...
- Page 43 543RS 振动水平 手柄的等效振动水平 (a ), 根据 EN ISO 11806 和 ISO 22867 测量得出 hv,eq 配有打草头(原装),左/右,单位为 m/s 6.3/4.9 附件 附件 经批准使用的附件 附件类型 切割刀片防护罩,货号 割草刀片/割草刀 Grass 255-4 1"(Ø 255,4 齿) 584 40 43-01 Multi 255-3(Ø 255,3 齿) 584 40 43-01 Grass 275-4(Ø 275,4 齿)...
- Page 44 Tri Cut Tri Cut 6 Nm x 10...
- Page 45 Super Auto II 4,0 m 15 cm ~2,0 m 6 " 6,5 ' 15 cm 6 "...
- Page 46 6,0 m 10 cm 4" 3,05 m "Clic" 15 cm 6"...
- Page 47 T35, T35X 8,5 m 10 cm 4" 4,3 m "Clic" 15 cm 6"...
- Page 48 T45, T45X 10 m 10 cm 4" 4,3 m 15 cm "Clic" 6"...
- Page 49 PT104...
- Page 52 Original instructions 原始说明 1141488-94 2020-05-25...
Need help?
Do you have a question about the 543RS and is the answer not in the manual?
Questions and answers