Table of Contents
Advertisement
Quick Links
Advertisement
Table of Contents

Related Manuals for EqualLogic PS3000 Series


Summary of Contents for EqualLogic PS3000 Series
- Page 1 Hardware Maintenance Hardware Maint...
- Page 2 Possession, use, or copying of the documentation or the software described in this publication is authorized only under the license agreement. EqualLogic, Inc. will not be held liable for technical or editorial errors or omissions contained herein. Information in this document is subject to change.
-
Page 3: Table Of Contents
Table of Contents Preface ......................v Introduction to PS Series Storage Arrays ...........1 Steps for Setting Up and Using an Array ...........2 Step 1. Set Up the Array Hardware ............3 A. Unpack Shipping Box and Gather Hardware ......3 B. Mount Array in a Stable Rack ..........6 C. -
Page 5: Preface
Preface This QuickStart describes how to set up EqualLogic PS Series 3000 storage array hardware and create a PS Series group—a self-managing, iSCSI storage area network (SAN) that is affordable and easy to use, regardless of scale. After setting up the group, see the PS Series Group Administration manual for information about managing the group. - Page 6 In addition, the Host Integration Tools for Windows systems are available on the EqualLogic website and on a CD-ROM that is shipped with the product. Technical support on EqualLogic products is available for customers with arrays under warranty and customers with a valid support contract. You can obtain technical support in the following ways: •...
- Page 7 • In the United States, call 877-887-7337. International customers should call +00 1 919-767-5729. If the issue is urgent, ask to speak with a member of the EqualLogic Customer Support team. • Send e-mail to and clearly describe the issue or support@equallogic.com...
-
Page 9: Introduction To Ps Series Storage Arrays
Introduction to PS Series Storage Arrays EqualLogic PS Series storage arrays deliver the benefits of consolidated storage in a storage area network (SAN) that is affordable and easy to use—regardless of its size. With intelligent, automated management and fast, flexible scalability, PS Series arrays greatly reduce storage acquisition and management costs. -
Page 10: Steps For Setting Up And Using An Array
PS Series 3000 QuickStart Steps for Setting Up and Using an Array At a minimum, a group consists of one array with one network connection, but you can configure three network interfaces for maximum array bandwidth. Data and network I/O are automatically load balanced across disks and interfaces—with no impact on data availability. -
Page 11: Step 1. Set Up The Array Hardware
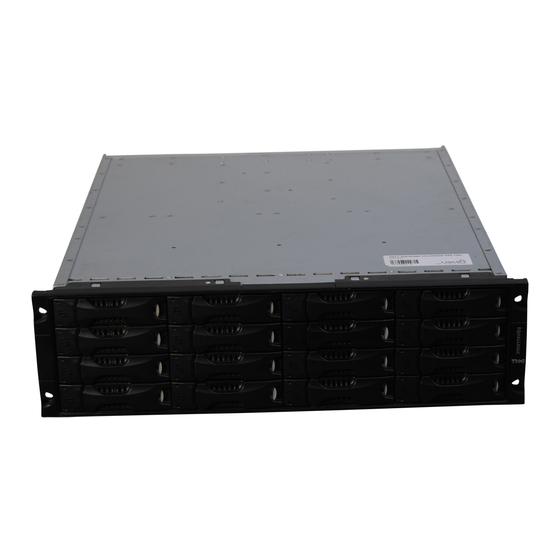
PS Series 3000 QuickStart Step 1. Set Up the Array Hardware Step 1. Set Up the Array Hardware A. Unpack Shipping Box and Gather Hardware The order in which you unpack the shipping box is important for safety: 1. Open the outer shipping box and remove the accessory box. 2. - Page 12 PS Series 3000 QuickStart Step 1. Set Up the Array Hardware Description of Shipping Box Contents Component Description 3U storage array Contains one or two control modules, two power chassis supply/cooling modules, and eight or 16 disks. Power cables Connects an array to one or more power sources. The shipping box may contain multiple power cables to meet the electrical requirements of the country in which the array will reside.
- Page 13 PS Series 3000 QuickStart Step 1. Set Up the Array Hardware Array installation also requires the hardware described in Required Hardware – Not Supplied. This hardware is not provided with your array. Required Hardware – Not Supplied Component Description Standard 19” two- Provides easy access to storage arrays and other hardware in your or four-pole rack computing environment.
-
Page 14: Mount Array In A Stable Rack
PS Series 3000 QuickStart Step 1. Set Up the Array Hardware B. Mount Array in a Stable Rack A PS Series array must be mounted in a two-pole or four-pole 19” rack. Instructions for rack assembly and mounting an array are included with the two-pole assembly kit and the four-pole assembly kit in the array shipping box. - Page 15 PS Series 3000 QuickStart Step 1. Set Up the Array Hardware Four-Pole Rack Example Be sure to support the array until it is completely mounted in the rack. Two-Pole, Mid-Mount Rack Example...
-
Page 16: Connect Power Cables For Grounding
PS Series 3000 QuickStart Step 1. Set Up the Array Hardware C. Connect Power Cables for Grounding A PS Series array includes two power supply/cooling modules. It is recommended that you connect both power supplies to different sources of power, preferably on separate circuits for increased availability. -
Page 17: Connect Array To A Network Switch
PS Series 3000 QuickStart Step 1. Set Up the Array Hardware D. Connect Array to a Network Switch A PS Series array includes one or two control modules. Only one control module is active (serving network traffic) at one time. The secondary (redundant) control module mirrors cache data from the active control module. - Page 18 PS Series 3000 QuickStart Step 1. Set Up the Array Hardware Network Recommendations (Continued) Recommendation Description Access to the group In a multi-subnet group, each configured network interface should IP address have access to the subnet on which the group IP address resides. Redundant network Using a multipathing solution helps to ensure that no single point paths...
- Page 19 PS Series 3000 QuickStart Step 1. Set Up the Array Hardware The minimum network configuration for a single control module array is one network connection to PORT 0. The minimum network configuration for a dual control module array is one network connection to PORT 0 on each control module, as shown in the figure Minimum Dual Control Module Network Configuration.
-
Page 20: Turn On Power To Array And Check Leds For Errors
PS Series 3000 QuickStart Step 1. Set Up the Array Hardware E. Turn on Power to Array and Check LEDs for Errors Before turning on power, be sure the array is at room temperature. If an LED indicates a problem, contact the support provider for your PS Series array. Disk LEDs Backpanel LEDs Disk LED Descriptions... - Page 21 PS Series 3000 QuickStart Step 1. Set Up the Array Hardware Operations Panel LED Descriptions (Continued) Operations LEDs Color Description Array locator (upper No power or normal condition. left) Flashing orange Administrator enabled the array locator function. Warning condition No power or normal condition. (lower left) Flashing orange One or more of the following has occurred: •...
- Page 22 PS Series 3000 QuickStart Step 1. Set Up the Array Hardware Control Module LED Descriptions Control Module LEDs Color Description No power, secondary control module is not synchronized with active control module, or error condition. Green Active control module (serving network I/O). Orange Secondary control module;...
-
Page 23: Connect Array To A Console Terminal
® ® Note: If you have a Microsoft Windows system, you can use the EqualLogic Remote Setup Wizard to configure an array and create a group instead of using the utility. The wizard does not require the serial cable. setup The serial connection must have the following characteristics: •... -
Page 24: Step 2. Configure The Array And Create A Group
PS Series 3000 QuickStart Step 2. Configure the Array and Create a Group Step 2. Configure the Array and Create a Group utility enables you to configure a storage array on the network and setup create a PS Series group with the array as the first member. The utility prompts for the array’s network configuration and the group configuration, including the group IP address. - Page 25 Login: grpadmin Password: grpadmin Welcome to Group Manager Copyright 2001-2006 EqualLogic, Inc. It appears that the storage array has not been configured. Would you like to configure the array now? (y/n) [n] y C. If you respond by typing y and pressing the key, the following dialog appears.
- Page 26 PS Series 3000 QuickStart Step 2. Configure the Array and Create a Group An example of running the utility is shown next. There may be a short setup delay after entering the group IP address as the array searches the network. Example of Configuring an Array and Creating a Group Group Manager Setup Utility The setup utility establishes the initial network and storage...
-
Page 27: Step 3. Set The Raid Policy
PS Series 3000 QuickStart Step 3. Set the RAID Policy Step 3. Set the RAID Policy After you create the group, use the Group Manager GUI or CLI to set the RAID policy for the member. This will configure the disks automatically according to the selected RAID policy, with the appropriate number of spare disks. - Page 28 PS Series 3000 QuickStart Step 3. Set the RAID Policy If you place the mouse over the unconfigured member, the following pop-up is displayed, indicating a normal health status. Not Configured Pop-Up To set the RAID policy for the member, expand in the far left panel and Members select the member name.
- Page 29 PS Series 3000 QuickStart Step 3. Set the RAID Policy Click to continue. The Configure Member – RAID Set Configuration dialog Next box appears. Configure Member – RAID Set Configuration (RAID-50) Specify the RAID policy by selecting one of the buttons under RAID policy: •...
- Page 30 PS Series 3000 QuickStart Step 3. Set the RAID Policy Configure Member – RAID Set Configuration (RAID-10) Select the desired RAID policy and click to continue. The Configure Next Member – Summary dialog box appears. Configure Member – Summary If the member configuration is satisfactory, click .
-
Page 31: Using The Cli To Set The Raid Policy
PS Series 3000 QuickStart Step 3. Set the RAID Policy Group Summary – Completed Member Configuration Using the CLI to Set the RAID Policy To access the CLI, establish a telnet or SSH connection to the group IP address or use a serial connection to the array, as described in Step 1-F on page 15. - Page 32 PS Series 3000 QuickStart Step 3. Set the RAID Policy • Striping on top of multiple RAID 1 sets, with no raid10-nospares — spares, if possible. This policy should be used only at installations where extra disks and personnel are available at all times to replace failed disks. Note: This option is available only with the CLI.
-
Page 33: Step 4. Create A Volume
PS Series 3000 QuickStart Step 4. Create a Volume Step 4. Create a Volume After setting the RAID policy for a member, you can create one or more volumes. For each volume, you must specify: • Name. Unique name used to manage the volume, up to 64 characters. Valid characters include letters, numbers, periods, hyphens, and colons. -
Page 34: Using The Gui To Create A Volume
The Group Summary window appears, displaying the current group configuration and storage pool capacity. Group Summary – No Volumes Note: To obtain GUI and CLI help from the EqualLogic website, click Tools the bottom left corner of the GUI and then click . - Page 35 PS Series 3000 QuickStart Step 4. Create a Volume Create Volume – General Settings Click to display the Create Volume – iSCSI Access dialog box. Specify the Next IP address, CHAP user name, or iSCSI initiator name to which the volume will be restricted.
- Page 36 PS Series 3000 QuickStart Step 4. Create a Volume Click to display the Create Volume – Summary dialog box. If the volume Next configuration is satisfactory, click to create the volume. Finish Create Volume – Summary Once you create a volume, you can create snapshots of the volume or perform other tasks.
-
Page 37: Using The Cli To Create A Volume
PS Series 3000 QuickStart Step 4. Create a Volume Using the CLI to Create a Volume To access the CLI, establish a telnet or SSH connection to the group IP address or use a serial connection to the array, as described in Step 1-F on page 15. When prompted, log in to the group by entering the account name and the grpadmin... -
Page 38: Step 5. Connect To The Volume From A Host System
Hardware and software initiators are available from a variety of vendors. Configure your initiator using the instructions provided by the vendor. Note: It is strongly recommended that you visit the EqualLogic Customer Support website to obtain important information about using initiators to access PS Series group volumes. -
Page 39: Advanced Operations And More Information
PS Series 3000 QuickStart Advanced Operations and More Information Advanced Operations and More Information After getting started, you can customize a PS Series group and also utilize the full set of product features and host-based solutions. You can also obtain technical support. For more information, see Product Documentation and Technical Support on page vi. - Page 40 PS Series 3000 QuickStart Advanced Operations and More Information Advanced Operations (Continued) Description Volume Task Create access control An access control record specifies the criteria that a host records for a volume. must meet in order to access the volume. Create snapshots of a Snapshots are point-in-time copies of volume data that can volume.
-
Page 43: Index
Index console connection (serial) 15 control modules access control records, using 25 connecting cables 9 array network connections 9 adding to a group 16 configuration prompts 16 configuring 16 default gateway (member) 16 console connection 15 creating a group 16 documentation, array vi documentation vi environment requirements 6... - Page 44 PS Series 3000 QuickStart Index hardware member console connection 15 adding to a group 16 environment requirements 6 configuring 16 LED descriptions 12 defined 1 network connections 9 increasing bandwidth 9 power supply connections 8 increasing capacity 2 powering on array 12 multipath I/O recommendation 10 rack mounting array 6 network address 16...
- Page 45 PS Series 3000 QuickStart Index storage pools, defined 1 switches, recommendations passwords Flow Control 10 for adding a member 17 Jumbo Frames 10 for logging in to group 17 Spanning-Tree 10 power supplies unicast storm control 10 connecting array 8 VLAN 10 turning on 12 using UPS systems 8...
Need help?
Do you have a question about the PS3000 Series and is the answer not in the manual?
Questions and answers