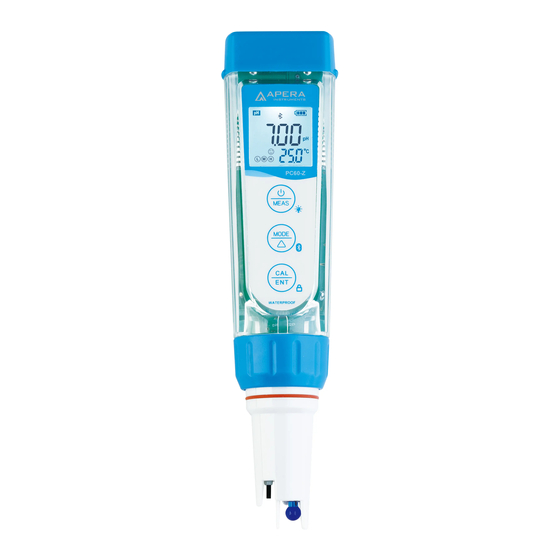
Apera PC60-Z Instruction Manual
Smart multi-parameter tester
Hide thumbs
Also See for PC60-Z:
- Quick start manual (2 pages) ,
- User manual (2 pages) ,
- Quick start manual (2 pages)
Summary of Contents for Apera PC60-Z
- Page 1 SKU:AI3719 PC60-Z Smart Multi-Parameter Tester pH/Cond./TDS/Salinity/Resistivity/ORP/Temp.) Instruction Manual APERA INSTRUMENTS (Europe) GmbH www.aperainst.de V1.03 - 1 -...
-
Page 2: Table Of Contents
Contents Introduction ........................- 3 - Battery Installation ......................- 4 - Keypad Functions ......................- 4 - Complete Kit ........................- 5 - Things to Know Before Use ....................- 5 - pH Calibration ........................- 5 - pH Measurement ......................- 7 - Conductivity Calibration .................... -
Page 3: Introduction
Int rodu ct ion Dear Customer, Thank you for choosing Apera Instruments PC60-Z Smart Multi-Parameter Tester. Please carefully read this manual before using the product in order to have a reliable testing experience. 1.1 This product is designed with a two-way control on both the tester and ZenTest Mobile App. Please refer to the functions available on each platform in the following table. -
Page 4: Battery Installation
Bat t e r y I nst a ll at i on Please install batteries according to the following steps. *Please note direction of batteries: All POSITIVE SIDES (“+”) FACING UP. (Wrong installation of batteries will cause damage to the tester and potential hazards) ①... -
Page 5: Complete Kit
Co mpl et e Kit T hings t o Know Bef o re U s e A few drops of water are added to the probe cap to keep the pH electrode in an activated state before the tester leaves factory. Generally, users can start using the tester directly. If the measuring response is slow, users can soak the pH electrode for 30 minutes in the 3M KCL storage solution (fill to the fill-line) before using it;... - Page 6 Long press to enter calibration mode; Short press to exit. Place the probe in pH7.00 buffer solution, shake it for a few seconds, and allow it to stand still in the buffer solution until a stable reading is reached. When stable icon stays on the LCD screen, short press to complete 1 point calibration and the tester returns to measurement mode.
-
Page 7: Ph Measurement
Symbol Self-Diagnosis information Potential problems and how to fix Make sure the probe is fully immersed in the calibration solution. Check if calibration solution is expired or polluted. 1st point of pH calibration must be pH 7.00 or 6.86. See 6.2 (1). Please check whether pH electrode is damaged or The pH calibration solution cannot be broken. -
Page 8: Conductivity Calibration
Condu ct iv it y Ca li br at ion How to calibrate Press key to switch to conductivity measurement mode (Cond). Rinse the probe in distilled water and dry it. Pour certain amount of 1413μS/cm and 12.88mS/cm conductivity calibration solution into corresponding calibration bottles (to about half volume of the bottle). -
Page 9: Conductivity Measurement
ORP. Power on the PC60-Z tester, unscrew the original probe, and install the ORP60-DA probe, then the tester will automatically switch to ORP measurement mode (Refer to Section 14 for how to replace a probe). -
Page 10: Parameter Setting
P ar am et e r S et t i ng Table of Settings Symbol Parameter Setting Contents Content Factory Default ˚C – ˚F ˚F Temperature Unit 5-20 seconds – Off Select automatic lock 1-8 minutes – Off Automatic Backlight Off 10-20 minutes –... -
Page 11: Technical Specifications
there will be a pop-up reminder. After calibration is finished or the reminder setting is cancelled in the ZenTest App, the Er6 icon will disappear. pH Back to Factory Default (P08) and Conductivity Back to Factory Default (P12) – Select “Yes” to recover instrument calibration to theoretical value. -
Page 12: Probe Replacement
APERA INSTRUMENTS (Europe) GmbH, any malfunctioned or damaged product attributable to responsibility of APERA INSTRUMENTS (Europe) GmbH for a period of TWO YEARS (SIX MONTHS for the probe) from the delivery. This limited warranty does NOT cover any damages due to: accidental damage, unauthorized repair, normal wear and tear, or external causes such as accidents, abuse, or other actions or events beyond our reasonable control.


Need help?
Do you have a question about the PC60-Z and is the answer not in the manual?
Questions and answers