Advertisement
Advertisement

Related Manuals for Halo Compact Bolt


Summary of Contents for Halo Compact Bolt
- Page 1 PLEASE READ BEFORE OPERATING THIS EQUIPMENT...
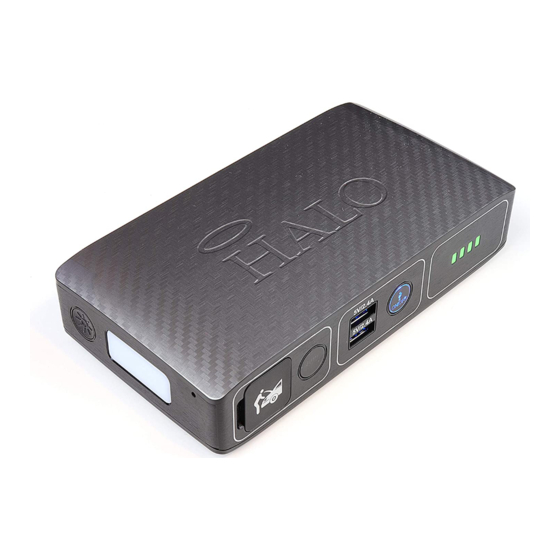
- Page 2 HALO BOLT COMPACT Thank you for choosing HALO! Powerful, compact and easy to use, the HALO BOLT COMPACT can safely jump start your car. In addition, you can use it to charge your phone, tablet or other electronic devices with 44,400 mWh of power! The HALO BOLT COMPACT also features a convenient LED oodlight.
-
Page 3: Table Of Contents
TABLE OF CONTENTS Included Items Operating Instructions 6-12 Troubleshooting Guide Speci cations Safety Precautions 13-14 Warranty and Contact Information 15-17 3 | POWER YOUR LIFE... -
Page 4: Included Items
INCLUDED ITEMS - HALO BOLT COMPACT - Jumper Cables - USB to Micro USB Cable - Carrying Pouch - Wall Charging Adapter | Jump Start Output | Charging Input | Jump Start Button | Floodlight ON/OFF Button | USB Outputs... - Page 5 5 | POWER YOUR LIFE...
-
Page 6: Operating Instructions
OPERATING INSTRUCTIONS CHARGING YOUR HALO BOLT COMPACT IMPORTANT: Before using your HALO BOLT COMPACT for the rst time, fully charge it (so that pressing any button lights up all four LEDS on the LED Battery Indicators). To charge your HALO BOLT COMPACT, use the provided Wall Charging Adapter, and plug the AC adapter plug into the charge input. - Page 7 HALO BOLT COMPACT POWER LEVEL INDICATORS WHILE CHARGING: INDICATOR LIGHTS HOW TO READ AMOUNT OF CHARGE First light blinking 0%-25% First light solid, 26%-50% second light blinking First two lights solid, 51%-75% third light blinking First three lights solid, 76%-100%...
- Page 8 If the jump start button ashes red, the jumper cables have been connected incorrectly. If this ashing red condition occurs, disconnect the jumper cables from the HALO BOLT COMPACT and vehicle battery and restart the process from Step 1.
- Page 9 You must allow up to 15 seconds between each jump start attempt. During the 15 seconds, the jump start button will ash green while the HALO BOLT COMPACT performs its safety checks. Once the jump start button illuminates solid green, the HALO BOLT COMPACT is ready for the next jump start attempt.
-
Page 10: Troubleshooting Guide
(-) The Jump Start Check the jumper cables and ensure The HALO BOLT COMPACT is waiting to button ashes green they are properly connected to the be connected to a battery. battery. - Page 11 HALO BOLT COMPACT USB 5V/2.4A Output ports. NOTE: If your electronic device does not have a Micro USB Input, your HALO BOLT COMPACT is also compatible with the charging cable provided with your electronic device. To use, plug the Standard USB end of the cable into either one of the two 5V/2.4A USB Output ports located on...
- Page 12 TECHNOLOGY to achieve higher compatibility for charging standard 5V USB electronic devices. The HALO SMART CHARGE TECHNOLOGY will allow the HALO BOLT COMPACT to communicate with your electronic device and provide the fastest and safest charge for that device. COMPATIBILITY Standard 5V USB electronic devices including: Mobile phones, Tablets, PSP, NDS, MP3, MP4, MP5, Bluetooth, GPS, Cameras, and more.
-
Page 13: Speci Cations
• Do not disassemble your HALO BOLT COMPACT. There are no user-serviceable parts inside. Incorrect reassembly may result in shock or re hazard. • Do not drop or subject to strong impacts. Do not operate your HALO 13 | POWER YOUR LIFE... - Page 14 • Do not expose your HALO BOLT COMPACT to moisture, water, rain, or snow. • Do not insert any object into the ports or openings of your HALO BOLT COMPACT. • Only charge your HALO BOLT COMPACT by the speci ed method with the speci ed charging adapter provided with the unit.
-
Page 15: Warranty And Contact Information
Conditions are as follows: • During the rst 90 days from date of purchase, HALO will repair or replace the defective product. • HALO will, subject to inspection, repair the defective product or... - Page 16 HALO shall not be held responsible for the improper use of its products. • In no event shall HALO be liable for any incidental, special, consequential or punitive damages arising out of the use of HALO’s products.
- Page 17 FOR TECHNICAL SUPPORT PLEASE EMAIL US AT: SUPPORT BESTHALO.COM CALL US AT: 888 907 6274 HALO 6 CENTRAL ROW HARTFORD, CT 06103 WWW.BESTHALO.COM Designed by HALO. 6 Central Row, Hartford, CT 06103 Made in China.
Need help?
Do you have a question about the Compact Bolt and is the answer not in the manual?
Questions and answers