Table of Contents
Advertisement
Introduction ........................................................................................................ 3
Components ...................................................................................................... 3
Chapter 1: JDI-800 Introduction ......................................................................... 5
Product Introduction ........................................................................................... 5
Chapter 2: Installation ........................................................................................ 6
Installation Introduction ...................................................................................... 6
Chapter 2: Operation ....................................................................................... 10
Basic Introduction ............................................................................................ 10
Keys: ......................................................................................................... 10
Capacity Setting and Calibration ............................................................... 10
WEIGHT FUNCTION ................................................................................ 15
TARE FUNCTION ..................................................................................... 16
PRETARE FUNCTION .............................................................................. 17
GROSS/NET WEIGHT FUNCTION .......................................................... 18
AUTO TARE FUNCTION: ......................................................................... 19
WEIGHT CK ............................................................................................. 20
ACCUMULATION SET ............................................................................. 21
Serial Number Setting: .............................................................................. 23
Dual Scale Switch: .................................................................................... 24
Dual Scale Display: ................................................................................... 24
SAMPLE ................................................................................................... 25
Unit Weight, Store UW, UW Lookup: ........................................................ 27
Clear Count: .............................................................................................. 29
Quantity Check: ........................................................................................ 29
Chapter 4:Scale Setup .................................................................................. 30
Parameter setting ........................................................................................... 30
Weight CK ................................................................................................. 31
QYT CK .................................................................................................... 32
Auto Tare .................................................................................................. 33
Serial Set: ................................................................................................. 33
UnitsSet .................................................................................................... 34
Acc Set ..................................................................................................... 34
CommPort................................................................................................. 35
SW Setting ................................................................................................ 36
Accuracy ................................................................................................... 37
Zero Range ............................................................................................... 37
FilterSet .................................................................................................... 38
Stable level ............................................................................................... 38
Minus value print ....................................................................................... 38
ACC ToZero .............................................................................................. 39
Weight recording ....................................................................................... 39
Content
1
Advertisement
Table of Contents

Related Manuals for Jadever JDI-800


Summary of Contents for Jadever JDI-800
-
Page 1: Table Of Contents
Content Introduction ......................3 Components ...................... 3 Chapter 1: JDI-800 Introduction ................. 5 Product Introduction ................... 5 Chapter 2: Installation ..................6 Installation Introduction ..................6 Chapter 2: Operation ..................10 Basic Introduction .................... 10 Keys: ......................10 Capacity Setting and Calibration ............... 10 WEIGHT FUNCTION ................ - Page 2 Edit ......................48 Input designed label into printer ..............50 Chapter 8: Advanced Applications ..............51 Expanding Usage..................... 51 Material system ..................51 System Initialization .................. 51 Touch screen adjustment ................51 Error message and troubleshooting ............53 JADEVER ▍...
-
Page 3: Introduction
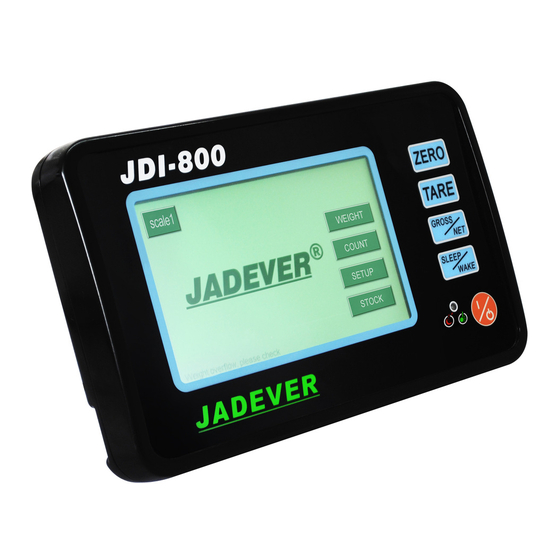
Introduction Thank you for deciding to purchase a JDI-800 weighing indicator, and it is recommended to read this manual in full before using it for good function application. Components Front Sides: 1)7 inches Touch screen 2)Zero button 3)Tare button 4)Gross/Net button 5)Sleep/Wake button... - Page 4 Right Side: 1) USB interface 2)RS-232 interface 3)RS-232 interface ------------------------------------------------------------ Back Side: 1)load cell interface for Scale 1 2)load cell interface for Scale 2 3)stylus JADEVER ▍...
-
Page 5: Chapter 1: Jdi-800 Introduction
Chapter 1: JDI-800 Introduction Product Introduction Specification: ------------------------------------------------------------ Model JDI-800 Resolution Up to 1/300000 Unit Kg/g/lb/oz/台两/港两/ton Excitation Voltage DC:5V; Up to 8 pcs 350ohm Load Cell Load Cell Dimension(mm) 265×165×102 7 inches LCD display, Resolution: 800×3 ( RGB) ×480, Display Display Area: 152.4(W)×91.44(H)mm... -
Page 6: Chapter 2: Installation
( u n a v a i l a b l e W i - F i s i g n a l n o w ) Chapter 2: Installation Installation Introduction Precautions ------------------------------------------------------------ JADEVER ▍... - Page 7 The package should contain: ◎ JDI indicator ◎ Adaptor ◎ U disk ◎ User manual Power Supply: ------------------------------------------------------------ Adapter Input: 100-240~50/60Hz 800mA Output: DC 6.0V, 2.5A Load Cell Connection: ------------------------------------------------------------ LOAD-CELL CONN Shield SIGNAL LOAD CELL CONNECTION SHIELD JADEVER ▍...
- Page 8 2) Connection with SH-24 Printer: 3) Connection with PC: (1) Using the cable shown in the following picture to connect the PC and Indicator. (2) Set the printing mode to CONTINUE. (3) Ensure there is receive program in the PC. JADEVER ▍...
- Page 9 Note:The hollow dots represent male connectors and the black dots represents female connectors. 4) Connection with alarming light tower: Universal 25 pin (male) to 25 pin (female) connecting cable. Note:The hollow dots represent male connectors and the black dots represent female connectors. JADEVER ▍...
-
Page 10: Chapter 2: Operation
Note: Scale will turn black when download data at the beginning of power on the scale. Capacity Setting and Calibration ------------------------------------------------------------ ▍Capacity and Resolution: 1. Press Key SETUP → Set Weight → Advanced Param → Accuracy , you will see the following screen: JADEVER ▍... - Page 11 Return , if you don’t need to calibrate scale. ▍ Calibration I: Press SETUP → CAL you will enter the calibration screen. Or you could calibrate scale once finishing the Accuracy and Max CAP setting. There are two Calibration method as following: JADEVER ▍...
- Page 12 Please enter the calibration value by numeric key, and press OK , for example:enter 1kg(the unit should corresponds the unit set before), then press OK . ↓ 3. Please put 1kg weight on the weighing pan: JADEVER ▍...
- Page 13 Repeat the STEP 6 to continue several points calibration(n3,on4 and on5). 7. Then press Return to finish calibration steps. ▍ Calibration method II: 1. Pleas press Cal Setup to enter the calibration method II: JADEVER ▍...
- Page 14 Current CAL value, then enter the value you need and press OK , the left screen value will change according to your setting. 4. Press OK to return the calibration screen, then press Multi-point to continue the calibration: JADEVER ▍...
-
Page 15: Weight Function
Multi-point calibration, and the screen will show: “Calibrate OK!” when finish calibration of each point. The screen will back to the calibration screen when finish all points of calibration. WEIGHT FUNCTION ------------------------------------------------------------ ▍WEIGHT Press WEIGHT on the main screen and put weight on the weighing pan: ↓ JADEVER ▍... -
Page 16: Tare Function
TARE FUNCTION ------------------------------------------------------------ 1. Put the container on the weighing pan, and when the screen show stable icon , press TARE : ↓ 2. Then put weight in the container, the screen will show the net weight of weight. JADEVER ▍... -
Page 17: Pretare Function
4. Please Press TARE again after cleaning the weighing pan to cancel tare. PRETARE FUNCTION ------------------------------------------------------------ 1. Enter the weighing screen and hold on TARE for 3 second, and enter the pre tare value as following: 2. Press OK to save value (10g for example) and back to weighing screen: JADEVER ▍... -
Page 18: Gross/Net Weight Function
4. Please Press TARE again after cleaning the weighing pan to cancel tare. GROSS/NET WEIGHT FUNCTION ------------------------------------------------------------ 1. Put the container on the weighing pan, and press TARE , when the stable icon appear: 2. Press GROSS/NET to switch gross/net weight: JADEVER ▍... -
Page 19: Auto Tare Function
1. Press SETUP → Set Weight → General Param → Auto Tare : 2. Enter the Max. Tare and Min Tare value, for example: 3. Active the Auto tare function ON function, and enter the weighing or counting mode screen: JADEVER ▍... -
Page 20: Weight Ck
4. Put the weight in the setting range, the scale will tare automatically as following: 5. Clean the weighing pan, the tare will be cancelled automatically. WEIGHT CK ------------------------------------------------------------ 1. Press SETUP → Set Weight → General Param → Weight CK JADEVER ▍... -
Page 21: Accumulation Set
4. Back to the weighing screen, and put the weight on the weighing pan, then the screen will show the High/Low/OK weighing condition. ACCUMULATION SET ------------------------------------------------------------ ▍ Accumulation 1. Press SETUP → Set Weight → General Param → AccSet JADEVER ▍... - Page 22 Press MR to check all accumulation data, if it is needed: Export :Connect U-disk and press Export to save the data to U-disk. :Please choose the item you need to delete and press DelOne to DelOne delete it. JADEVER ▍...
-
Page 23: Serial Number Setting
2. Enter the Current SN, Max. SN, the SN increase way, and so on. ( for example: Weighing SN 、 Manual ACC as following:) 3. Press OK to active SN function, and enter the weighing screen, you will see JADEVER ▍... -
Page 24: Dual Scale Switch
4. Put weight on the pan, and the weight data is stable, then press SN ACC , the ACC number will increase one by one: Dual Scale Switch: ------------------------------------------------------------ Connect Scale 1 and 2, you could see on the top left sidefor switch scales: Dual Scale Display: JADEVER ▍... -
Page 25: Sample
2. Press Dual , the weighing data of two platforms will appear in the screen at the same time: ▍ COUNTING FUNCTION Note:Counting and Weighing mode share same function of tare, pre-tare, auto-tare Weigh CK, ACC, SN, and Dual channel. SAMPLE ------------------------------------------------------------ 1. Press COUNTING and enter the norm counting mode: JADEVER ▍... - Page 26 Repeat the sample modification, in order to get a more accurate unit weight. 5. ACAI is activated once input a sample quantity, and hold on SAMPLE button to disable it. JADEVER ▍...
-
Page 27: Unit Weight, Store Uw, Uw Lookup
2. Press UW to input the unit weight: 3. Press OK , after enter the UW, and return the counting mode: 4. Put the weight and count automatically: ▍ Store UW: 1. Put the weight and get a unit weight under the counting mode: JADEVER ▍... - Page 28 1. Enter the counting mode, and press UW Lookup : Export :Press this button to export the data to U disk. :Choose the needed ID item and press Modify to alter the info of Modify this UW record. JADEVER ▍...
-
Page 29: Clear Count
Quantity Check: ------------------------------------------------------------ 1. Press SETUP → Set Weight → General Param → QYT CK : 2. Enter the upper and lower limit and choose the alarming mode(for example, Beep in ), and active the Quantity check function ON. JADEVER ▍... -
Page 30: Chapter 4:Scale Setup
6. “Low” indication appears, when the item on the weighing pan is smaller than lower limit: Note: the item on the weighing pan should be more than or equal to 20e. Chapter 4:Scale Setup Parameter setting Press SETUP and Set Weight to enter General Param or Advanced Param : JADEVER ▍... -
Page 31: Weight Ck
Note: the item on the weighing pan should be more than or equal to 20e. ▍Unit Weight Save and Calling-out 1. Press Save Record to save the upper/lower limit setting, and enter the record title as following: JADEVER ▍... -
Page 32: Qyt Ck
Press Last and Next to choose the item needed or enter the page number directly to check the item list as following: 5. Press the need item No. and press OK or press Exit to return last level. QYT CK ------------------------------------------------------------ JADEVER ▍... -
Page 33: Auto Tare
Weight CK and QYT CK have the same function in Save Record and Record Recall. Auto Tare ------------------------------------------------------------ Activate or Disable this function: Auto Tare and QYT CK have the same function in Save Record and Record Recall. Serial Set: ------------------------------------------------------------ JADEVER ▍... -
Page 34: Unitsset
Manual ACC:Serial number plus 1 (+1) or minus 1 (-1 ) when press SN ACC . Weighing SN:Activate Serial number function under weighing mode. Counting SN:Activate Serial number function under counting mode. Note:Max. Serial number up to 99999 pcs. UnitsSet ------------------------------------------------------------ Option:g, kg, lb, oz, tl, hl, t Acc Set ------------------------------------------------------------ JADEVER ▍... -
Page 35: Commport
Manual: Accumulate manually by pressing。 Note: the max. ACC number up to 20000. CommPort ------------------------------------------------------------ Optional external devices: Printer:Choose the RS-232 port needed. Press Set to choose the printer and the printing mode. The printer:GODEX、ZEBRA、BP545D、SH-24 The printing mode:Manual, Stable, Print after OK JADEVER ▍... -
Page 36: Sw Setting
Press Set to choose its sending mode: Manual send, Stable, Continuous Wireless LC:JOW wireless module optional. SW Setting ------------------------------------------------------------ The max single weight number up to 50 pcs. ▍ Advanced Param Press SETUP → Set Weight → Advanced Param : JADEVER ▍... -
Page 37: Accuracy
Scale Accuracy and Max. Capacity setting, and the unit switch. Zero Range ------------------------------------------------------------ Choose the zero range rank: D0、D1、D2、D3、D4、D5 according to the actual using surrounding. D0:Zero point indication appears when variation is ±0e D1-D5:Zero point indication appears when variation is ±1e, 2e…±5e JADEVER ▍... -
Page 38: Filterset
L3:the common working condition L4:the unstable working condition with the slower reaction. L5:the vibrative working condition. Stable level ------------------------------------------------------------ Select the stable level as Rapid, Middle, and Slow to set the condition for appearance of stable indication. Minus value print ------------------------------------------------------------ JADEVER ▍... -
Page 39: Acc Tozero
Set whether enable minus value print To enable or disable minus value print. ACC ToZero ------------------------------------------------------------ Set whether to accumulate after the display goes back to zero. Yes :Accumulate after return to zero No :Accumulate without returning to zero Weight recording ------------------------------------------------------------ JADEVER ▍... -
Page 40: Trans. Speed
Yes :Turn off and turn on the scale, the scale will show the last weighing data. Trans. speed ------------------------------------------------------------ Choose the data transmission speed of scale, when worked with weighing management software. AD Gain ------------------------------------------------------------ Rapid :Suitable to low resolution scale Slow :Suitable to high resolution scale JOW Param ------------------------------------------------------------ JADEVER ▍... -
Page 41: Units
OK to save parameter. Units ------------------------------------------------------------ choose the unit needed, and press OK to save parameter. Chapter 5: Network Setting Network Press SETUP → Network , there are two choice for network: EthNet and WifiConn . Cable Network ------------------------------------------------------------ JADEVER ▍... -
Page 42: Wifi Connection
Activate the function of Auto-get IP to connect network. Note:MAC Address use decimal system. 3. Press OK to save setting and connect the network. Wifi Connection ------------------------------------------------------------ 1. Press WifiConn to set the wifi connection: 2. Then insert the WLAN card and press SearchNetwork after identification: JADEVER ▍... - Page 43 5. The screen will show the following screen after connecting the network successfully: 6. Press WifiSet to enter the IP, Netmak and Gatewayor activiate Auto-get IP to connect the wifi network as following: 7. Press DisconnNetwork to disconnect the network anytime needed. JADEVER ▍...
-
Page 44: Chapter 6: System Setting
Chapter 6: System Setting System Setting Press SETUP → System Set : Auto-off ------------------------------------------------------------ Sets the period of inactivity (the weight is less than 9d of gross weight) before the scale automatically turns off. Sound ------------------------------------------------------------ JADEVER ▍... -
Page 45: Manual Update
Note:It is prohibit changing the file name of JDI, after copy to the U disk and should save this file to the root directory. Theme ------------------------------------------------------------ Press to select your favor theme: blue style for default. Note:The system will restart automatically after choose a new theme. Language JADEVER ▍... -
Page 46: Time
Set the time of system according to the local time. AutoSleep ------------------------------------------------------------ Set the period of inactivity before the scale automatically turns to standby mode. Note: The way to wake up the scale ◎Press key Sleep/Wake ◎Click the screen JADEVER ▍... -
Page 47: Setting Password
Chapter 7: Printing Label Setting Label Edit Press SETUP → Set Label the screen shows folloing: New Label ------------------------------------------------------------ 1. Press to create a new label and enter the size needed and press OK to save the setting: JADEVER ▍... -
Page 48: Edit
2. Enter the style name(label name) and press Enter to save the name of label and go to the label edit: Edit ------------------------------------------------------------ Press to go to the edit screen directly, but you also have to enter the label size firstly as following: Then press OK to enter the edit screen: JADEVER ▍... - Page 49 Label adjustment 1. Settable bar code with 6 printing style and 13 parameter optional. 2. The date and time on the label is based on the scale time setting. 3. Readable bar code printing: yes or no optional JADEVER ▍...
-
Page 50: Input Designed Label Into Printer
Input designed label into printer ------------------------------------------------------------ 1. Choose the needed label, and connect to printer. 2. Press to input designed label into printer. 3. Enter the weighing or counting mode, put the item on the weighing pan and press Print . JADEVER ▍... -
Page 51: Chapter 8: Advanced Applications
Press and hold key ZERO while powering on the scale. Do not release it unless there is a beep sound which means the initialization is finished. Note: All the setting parameters including accuracy, capacity and calibration are cleared after initialization. Touch screen adjustment ------------------------------------------------------------ JADEVER ▍... - Page 52 ZERO key to start screen calibration. During the procedure, press Sleep/Wake key to wake up the device if it enters the standby mode. 2. The icon will disapear once the screen calibration is finished: 3. Then press the touch screen to return the main screen. JADEVER ▍...
-
Page 53: Error Message And Troubleshooting
… 1.Recalibrate Can’t enter the weighing or Overspill… 2.Ensure to empty the weighing … counting mode. pan. Serial number Check if the current SN is larger Error accumulation function than the Max. number. error. JADEVER ▍...
Need help?
Do you have a question about the JDI-800 and is the answer not in the manual?
Questions and answers