Advertisement
Quick Links
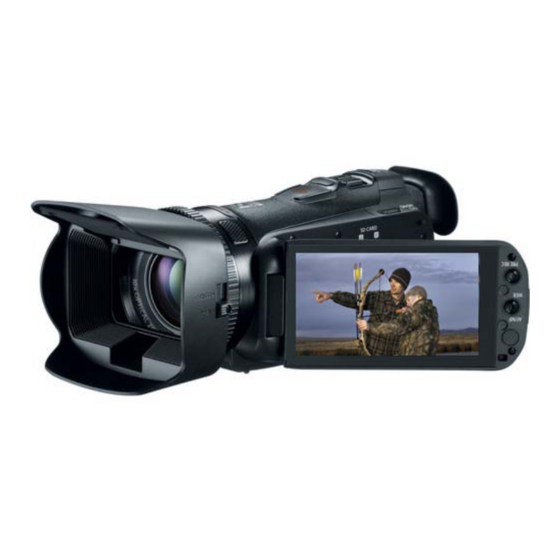
Guide To Using The Canon VIXIA HFG20 and the Canon VIXIA HFG10
This has been adapted from the Guide to using the Canon VIXIA HFG10
shop now
About this tutorial:
This is a © Copyrighted Blog, pictures and information from Canon and
should not be used without their permission, by email Johanna@Campbelloutdoorchallenge.com,
by phone: 618 -382 -7939 or by mail:
Campbell Cameras
Attn: Johanna Campbell
1327 Co. Rd. 800 N.
Carmi, IL 62821
Everything written in
RED
are KEY things that you should remember and pay extra attention too.
Everything written in
BLUE
are ways to use the camera for hunting situations, learning material,
and/or recommendations by Johanna.
If you have any questions about this blog, camera, or anything else feel free to comment below
or contact us using the information provided above.
Charging the Battery Pack:
The supplied battery charges while in the camera using the supplied battery pack. When you first
get the camera, press the battery pack softly into the back of the camera until it clicks into place.
Make sure that the camera is turned off (to charge), and plug the compact power adapter to the
camcorder's DC IN Terminal(on the back of the camera).
*When you first charge your battery, charge it all the way. Wait until you fully exhaust the battery
to re-charge it again.
Using the Viewfinder:
In some situations, it might be easier to use the viewfinder to view what you are recording. You
can also use the viewfinder when you rotate the LCD screen 180 degrees, so that your subject can
see what is being recorded.
to the hunter without words. The hunter can see what is being recorded and you can keep track
while using the viewfinder.
LCD Backlight:
When recording in bright places it may be difficult to use the LCD
screen. Turn on the LCD backlight to make it brighter.
With the camcorder on, hold DISP. pressed down for more than 2
seconds.
• Repeat this action to switch the LCD backlight between off (normal)
and on (bright)
Wireless Controller:
First, insert the supplied CR2025 lithium button battery in the wireless controller.
To use the controller:
1. Point the wireless controller at the camcorder's remote sensor when you press the buttons.
• You can rotate the LCD panel 180 degrees to use the wireless controller from the front of the
camcorder.
file:///Volumes/Untitled/Camera%20Info/HFG20/guide%20to%20the%20hfg20.html[4/15/13 1:15:17 PM]
Campbell Cameras
This could be helpful in hunting situations as a way to communicate
To use the Viewfinder, you pull it out.
and
Advertisement

Subscribe to Our Youtube Channel
Related Manuals for Canon VIXIA HFG20


Summary of Contents for Canon VIXIA HFG20
- Page 1 Guide To Using The Canon VIXIA HFG20 and the Canon VIXIA HFG10 This has been adapted from the Guide to using the Canon VIXIA HFG10 shop now About this tutorial: This is a © Copyrighted Blog, pictures and information from Canon and Campbell Cameras should not be used without their permission, by email Johanna@Campbelloutdoorchallenge.com,...
- Page 2 The supplied wireless controller is going to be a basic controller. The remote must be facing the sensor for the controls to work. Also, the wireless controller may not work properly when the remote is situated under strong light sources or direct sunlight. For a wireless controller with more features and not these constrictions check out our Remote Controllers for more options.
- Page 3 to scroll menus, to browse through index screen pages or to adjust slider controls like the volume. * I like using my thumb for the actions that require scrolling. *Here is a link to Freehands Gloves that are designed to be used with touch screen electronics. Operating Modes: Recording: In recording mode, the camcorder's operating is determined by the position of the mode switch located on the top right of the camera.
- Page 4 FUNC. Panel : The FUNC. panel shows a convenient overview of frequently used shooting functions. Touch [FUNC] to access the FUNC. panel and then touch the function you want to set or adjust. You may need to drag your finger up and down the screen to find the control button of the desired function.
- Page 5 SDXC Memory Cards: You can use SDXC memory cards with this camcorder. When using memory cards with other devices such as digital recorders, computers and card readers, make sure that the external device is compatible with SDXC cards. *When choosing a computer or a laptop make sure that if it has a Card Slot reader that it is SDXC compatible.
- Page 6 for Movies] > The Internal Memory Icon (to go from internal to card slot A, or both) or [A] (to go from A to B slots). 3. Touch the desired option and then touch [X] Any of the following actions will deactivate the relay recording function: •...
- Page 7 1. Power the camcorder using the compact power adapter. (not necessary if you are initializing a card for the first time). *Do not disconnect the power source or turn off the camcorder until the initialization is complete. 2. Open the initialization screen for the desired memory. Touch [FUNC.] > [MENU] > Wrench icon >...
- Page 8 The Camera offers 5 recording modes. Changing the recording mode will change the recording time available on the memory. Select MXP or FXP mode for better movie quality; select LP mode for longer recording time. The following table gives approximate recording times. 1.
- Page 9 camcorder focus for you by using autofocus. With autofocus, you can set the autofocus speed. The camcorder also features two more focusing functions, face detection and Touch & Track. I do not recommend using Auto focus while out in the field hunting. The camera will want to Auto Focus on whatever is in front of the camcorder, instead of focusing on the animal.
- Page 10 2. Touch the wrench symbol 3. To turn on the black & white setting : Touch [ON] of [OFF] 4. For the peeking color: Touch [Red], [Blue], or [Yellow] 5. Touch the return symbol 6. Touch [PEAK] • Peaking is activated and the edges are highlighted. You can turn the focus ring on this screen or touch [X] to hide the focus controls.
- Page 11 • Touch [Cancel ] to remove the frame and cancel the tracking. *Touching somewhere with a color or pattern unique to the subject will make it easier to track. However, if there is another subject in the vicinity that shares similar characteristics to the selected subject, the camcorder may start tracking the incorrect subject.
- Page 12 Automatic Exposure Recording Programs: With the automatic exposure (AE) recording programs, the camcorder will adjust the shutter speed and/or aperture value to obtain the optimal exposure. When using the AE recording programs, you can change functions like the white balance and image effects. 1.
- Page 13 3. Touch [<] or [>] to set the desired value. *Notice in the images how the picture is changed by increasing/decreasing each setting. Using the Zebra Pattern: You can use the zebra pattern as a nice rug, just kidding. You can use it to identify areas that might be overexposed, so you can correct the exposure appropriately.
- Page 14 To set the color temperature [K Color Temperature]: Touch the [<] or [>] to set the desired value or drag your finger along the dial. Showing the Change in color with K To Set a custom White Balance [Set 1] or [Set 2]: Point the camcorder at a white object, so it fills the whole screen, and touch [Set WB].
- Page 15 [Cloudy]: To record on a cloudy day. [Fluorescent]: To record under warm white, cool white, or warm- white-type (3-wavelength) fluorescent lighting. [Fluorescent H]: To record under daylight or daylight-type (3- wavelength) fluorescent lighting. [Tungsten]: To record under tungsten and tungsten-type (3- wavelength) Fluorescent lighting.
- Page 16 [Set 1] or [Set 2] : Use the custom white balance settings to make white subjects appear white under colored lighting. Remember to reset your white balance when you change locations. Also, if your out in the field and you white balanced in the morning, you will need to change the white balance throughout the day as the sun and lighting conditions change.
- Page 17 To display the audio level indicator: Usually, the audio level indicator will be displayed only after activating the manual adjustment of the audio recording level. You can choose to display it also when the audio level is adjusted automatically. 1. Go to [FUNC.] > [Mic. Level] > [A Automatic] 2.
- Page 18 [Off]: Does not assign a function to the assignable button. *** On the Canon VIXIA HFG20 the assignable button number 2 is pre selected for Pre Record. This Pre Record allows you to capture 3 seconds of video before the record button is pushed *** If you have any questions on this camera or the features mentioned, feel free to comment below! file:///Volumes/Untitled/Camera%20Info/HFG20/guide%20to%20the%20hfg20.html[4/15/13 1:15:17 PM]...
Need help?
Do you have a question about the VIXIA HFG20 and is the answer not in the manual?
Questions and answers