Advertisement
Quick Links
®
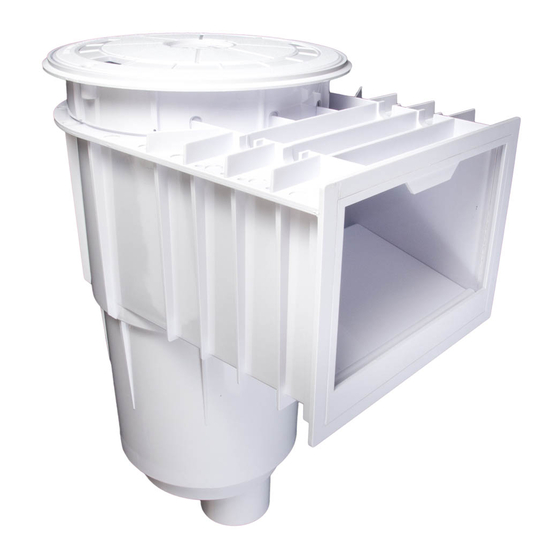
INGROUND POOL SKIMMER INSTRUCTIONS
CMP 25100, 25120, 25140 SKIMMERS
OPERATION FOR ALL SKIMMERS
Water is pulled through the skimmer by the suction of the pump. Water flow carries
floating debris into the skimmer where it is collected in the skimmer basket. The
floating weir creates a better water flow and increases efficiency. The water level of the
pool should be kept at least 2" above the bottom of the mouth of the skimmer to ensure
proper operation. To adjust the skimmer flow rotate the diverter plate on the float valve
or in the skimmer until the desired flow is achieved. In the instance of multiple
skimmers, rotate the diverter plate in each skimmer over the pump port to restrict and
balance the flow from each skimmer. To vacuum the pool, remove the float valve and
close the diverter plate over the main drain. Install the skimmer vacuum in the skimmer
and connect to vacuum hose.
OPERATION WITH DIVERTER PLATE
For full flow, rotate diverter plate completely open. To adjust flow, rotate over the
pump port until desired flow is achieved. To vacuum, either remove cover and basket.
Screw the hose adapter into the pump port. Fill hose with water and insert over the
hose adapter. OR insert the skimmer vacuum into skimmer on top of the basket.
OPERATION WITH FLOAT VALVE
If the water level drops below the mouth of the skimmer or if the basket is clogged and
no water can flow through it, then the float valve will automatically close over the flow
DIVERTER PLATE
ports. This diverts all water flow to the pump from the main drain line. It prevents
possible air lock. When the pump is shut off the float valve will float back to the top of
the cavity, allowing normal operation to resume.
TO SWEEP/BRUSH: Divert all suction to
the main drain by holding the weir above normal operating level and allowing the float
to snap shut. Or remove the float valve assembly, close the diverter plate, and replace.
To reset the float valve assembly, turn off the pump for 10-15 seconds. The float valve
will rise to the top of the skimmer cavity.
TO VACUUM: Remove cover, basket and float
valve assembly. Screw the hose adapter into the pump port, fill the hose with water, and
HOUSING
insert over adapter. OR insert the skimmer vacuum into skimmer on top of the basket.
FLOAT
O-RING
DIVERTER
PLATE
SCREW
O-RING
OPERATION WITH FLOAT VALVE & EQUALIZER CHECK VALVE
The Equalizer Check Valve Assembly screws into the main drain port and is used in
tandem with the float valve assembly. If the water level drops or if flow is restricted,
the float valve will snap down and the equalizer valve will open. This diverts all flow to
the pump from the equalizer line and prevent airlock in the pump. When the pump
is turned off, and the problem is corrected, the float valve will rise to the top of the
skimmer cavity and the equalizer will close, allowing for normal operation to resume.
TO VACUUM: Remove cover and float valve from the selected skimmer. Place the
vacuum plate over the basket. Fill the hose with water and insert over the hose adapter.
Adjust the flow from the other skimmers until desired suction is achieved through the
vacuum.
EQUALIZER CHECK VALVE
Advertisement

Subscribe to Our Youtube Channel
Related Manuals for CMP 25100


Summary of Contents for CMP 25100
- Page 1 ® INGROUND POOL SKIMMER INSTRUCTIONS CMP 25100, 25120, 25140 SKIMMERS OPERATION FOR ALL SKIMMERS Water is pulled through the skimmer by the suction of the pump. Water flow carries floating debris into the skimmer where it is collected in the skimmer basket. The floating weir creates a better water flow and increases efficiency.
- Page 2 REPLACEMENT PARTS & ACCESSORIES GUIDE TILE COLD JOINT DECK WATER LEVEL CONCRETE 1- COVER RETAINING SCREW TO PUMP 2- ADJUSTING COLLAR 3- COLLAR SCREW 4- COVER 5- FLOAT VALVE O-RING 6- DIVERTER PLATE 7- RETAINING SCREW 8- FLOAT VALVE ASSEMBLY O-RING TO MAIN DRAIN 9- FLOAT VALVE ASSEMBLY 10- RETAINING SCREW...
- Page 3 WATER BOND & ZINC ANODE SKIMMER GUIDE Water bond copper wire inside skimmer is over 9in² surface area and meets NEC section 680.2 C. WATER BOND COPPER WIRE Attach to equipotential bonding line with split bolt connector SPLIT BOLT CONNECTOR Inside skimmer zinc anode plate replacement P/N 25810-140-000.
Need help?
Do you have a question about the 25100 and is the answer not in the manual?
Questions and answers