
Subscribe to Our Youtube Channel
Related Manuals for Champion Classic Series

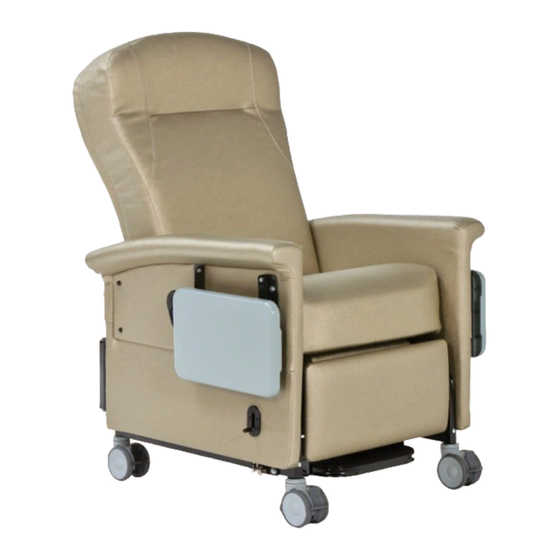
Summary of Contents for Champion Classic Series
- Page 1 OPERATING INSTRUCTIONS AND SERVICE MANUAL classic, ascent & ascent II SERIES MEDICAL RECLINER/TRANSPORTER 1-800-998-5018 CHAMPIONCHAIR.COM...
-
Page 2: Table Of Contents
Return authorization Storage In-service procedures Operating instructions 7-11 For safe recliner operation Champion recliner operation poster Chair positions (Upright, TV and Full Recline) Trendelenburg operation 10-12 Setting the Trendelenburg feature poster Operation of the swing arms (if equipped) Proper use of foot tray... -
Page 3: In-Service Information
In-Service Information It is very important to Champion that our customers review all the materials in the in-service package they receive. By reviewing the in-service materials provided, you increase the useful life of the products by helping to prevent their improper use, which may lead to premature damage and wear. You are also helping to validate your warranty, as warranties cover material and workmanship failures, not misuse or abuse. -
Page 4: Special Notes
WELCOME! Champion Manufacturing, Inc. would like to thank you for selecting our products. We take great care in making certain that our products leave the factory in flawless condition. Our products are properly packaged to arrive in that same condition. -
Page 5: Chair Capacity Information
CHAIR CAPACITY INFORMATION STANDARD RECLINERS: 54 series 300 lbs. 59 series 300 lbs. 65 series (Ascent) 300 lbs. 67 series (Ascent II) 300 lbs. 85 series 300 lbs. 87 series 300 lbs. 89 series 300 lbs. XL RECLINERS: 56 series: 500 lbs. -
Page 6: Receiving New Chairs
2. Call Champion’s customer service immediately to report the damage: 800-998-5018. 3. All claims must be filed by the consignee and reported to Champion Manufacturing, Inc. within 5 days of receipt of the shipment. -
Page 7: In-Service Procedures
Before chairs are put into service, all personnel should review this manual. In the belief that an actual demonstration of the product is more effective than written instructions, an on-site in-service by a Champion representative may be available depending upon the delivery circumstances. -
Page 8: Operating Instructions
OPERATING INSTRUCTIONS For safe recliner operation: 1. Always set the caster brakes before allowing your patient to get in or out of the chair. Release the caster brakes only when the chair is being relocated; and reset the caster brakes upon arriving at your destination. -
Page 9: Champion Recliner Operation Poster
Quality Healthcare Seating Products www.championchair.com © 2011 Champion Manufacturing, Inc. Litho in USA CM-109 02/11... -
Page 10: Chair Positions (Upright, Tv And Full Recline)
OPERATING INSTRUCTIONS Chair positions (Upright, TV and Full Recline) WARNING: NEVER place your hands near or on a recliner mechanism when it is in motion. DO NOT put your hands where you cannot see. WARNING: A caregiver can control the motion of a leg rest as the chair moves from upright to “TV”. -
Page 11: Trendelenburg Operation
OPERATING INSTRUCTIONS WARNING: DO NOT put your hands where you cannot see. To assist a patient in closing the leg rest; place your palm against the upholstered top surface and press downward in the center well away from the recline mechanism at the sides. To return to a full upright position from “TV”... - Page 12 OPERATING INSTRUCTIONS CAUTION: DO NOT overload chair. Observe the specified maximum weight limit for the recliner model that you have selected. CAUTION: DO NOT attempt to force the chair into position; permanent damage may result. The chair works with normal effort when operated properly. CAUTION: DO NOT attempt to close leg rest unless the chair is in “TV”...
-
Page 13: Setting The Trendelenburg Feature Poster
PreSS FooT reST down FInal uPrIghT PoSITIon mechanism, the foot rest should never be pushed down until the backrest is returned to the fully- upright/TV position. Quality Healthcare Seating Products www.championchair.com © 2011 Champion Manufacturing, Inc. Litho in USA CM-108 02/11... -
Page 14: Operation Of The Swing Arms (If Equipped)
OPERATING INSTRUCTIONS Operation of the swing arms (if equipped) WARNING: Your recliner has moving parts that create pinch points. When the swing arms are open, those points are fully exposed. Patients should NEVER be left in a chair with the arms in the opened position. THE CHAIR SHOULD NOT BE LEFT UNATTENDED, WITH THE ARMS UNLATCHED. -
Page 15: Proper Use Of Foot Tray
PROPER USE OF FOOT TRAY The foot tray is a feature available on many Champion recliner models. The foot tray is useful as an assist for patients getting into or out of the recliner, re-positioning in the recliner, and as a foot support while sitting fully upright or being transported in the recliner. - Page 16 Right-hand mounting bracket for use with your selected monitor/television system. Accessories are features that may be ordered for your Champion chairs at any time. Some installation may be required. Accessories can be installed in the factory or in the field by the facility.
-
Page 17: Use Of Iv Pole
TO INSERT: PLACE IV POLE OVER CENTER, PUSH INTO POSITION IN OPENING AND TURN TO LOCK TO REMOVE: HOLD BASE IN POSITION WITH FOOT TWIST TO UNLOCK LIFT IV POLE TO REMOVE Note: Some components may have a different appearance than shown in the picture due to multiple models of chairs. -
Page 18: General Maintenance And Care Of Chairs
GENERAL MAINTENANCE AND CARE OF CHAIRS WARNING: Place chair in a fully upright and securely latched position or a fully reclined position when cleaning or maintaining your chair. Your recliner has moving parts that create pinch points. WARNING: Never clean or maintain your chair with an occupant in the chair. WARNING: Before cleaning or disinfecting, always unplug the chair from the wall outlet. -
Page 19: Use Of Quick Release Seat Feature
Note: Some components may have a different appearance than shown in the picture due to multiple models of chairs. The serial number of the chair informs Customer Service of the proper components for that chair. (18) OM00REC Recliner Manual REV 8 080119... - Page 20 Note: Some components may have a different appearance than shown in the picture due to multiple models of chairs. The serial number of the chair informs Customer Service of the proper components for that chair. (19) OM00REC Recliner Manual REV 8 080119...
-
Page 21: General Safety For Chairs With Powered Options
GENERAL SAFETY FOR CHAIRS WITH POWERED OPTIONS (Heat, Heat/Massage) Please advise your cleaning staff to keep in mind these safety instructions. WARNING: To reduce the risk of electric shock, always unplug this product from the wall outlet before cleaning, disinfecting, or replacing any parts. WARNING: Never operate the chair if it has a damaged cord or plug, if it is not working properly, if it has been damaged, or is not dry. -
Page 22: General Cleaning Precautions
GENERAL CLEANING PRECAUTIONS WARNING: NEVER mix ammonia, or a cleaner with ammonia, with bleach as dangerous compounds may result. WARNING: When solvent type cleaners are being used, care should be exercised. KEEP AWAY from fire or flame and use in a well-ventilated area. CAUTION: Treat all stains immediately to prevent it becoming a permanent stain. -
Page 23: General Cleaning - Upholstery
GENERAL CLEANING - UPHOLSTERY REGULAR CLEANING: Remove excess soil with a damp non-abrasive cloth. Use a soft white cloth and solution of mild liquid soap or water based cleaner and water. Rinse all cleaning agents thoroughly with water and dry with a soft cloth. IMPORTANT: For specific cleaning instructions, please see manufacturer’s cleaning instructions. -
Page 24: Warranty Procedure
Warranty Coverage Your coverage is per the Champion warranty. A copy of the current warranty was provided with this manual for your convenience. Please read this document. Warranty Does Not Apply If: ●... -
Page 25: Service Information
This number is required to process your request. The serial number is located in the back of the chair on the lower left side on the label entitled Champion Manufacturing -Serial #xxxxxx. No parts will be shipped without a Serial Number to which they will be installed. -
Page 26: Service Parts Form
Elkhart, IN 46516 Phone: 800-998-5018 fax: 574-293-5760 *If your chair is over eight (8) years old, no part orders will be processed without documented inspection by a Champion approved technician and an extended life certificate. (25) OM00REC Recliner Manual REV 8 080119... -
Page 27: Medical Recliner Schematics
Note: Some components may have a different appearance than shown in the picture due to multiple models of chairs. The serial number of the chair informs Customer Service of the proper components for that chair. (26) OM00REC Recliner Manual REV 8 080119... -
Page 28: Arm, Table, Base W/ Upholstery (Swing Arm Series Only)
Note: Some components may have a different appearance than shown in the picture due to multiple models of chairs. The serial number of the chair informs Customer Service of the proper components for that chair. (27) OM00REC Recliner Manual REV 8 080119... -
Page 29: Back Frame And Mechanism
Note: Some components may have a different appearance than shown in the picture due to multiple models of chairs. The serial number of the chair informs Customer Service of the proper components for that chair. (28) OM00REC Recliner Manual REV 8 080119... -
Page 30: Base Explosion
MEDICAL RECLINER-TRANSPORTER SCHEMATICS FRAME BASE FOOT TRAY CASTERS Exploded Base Rev REL 06/15/19 CHAIR FRONT FACES Note: Some components may have a different appearance than shown in the picture due to multiple models of chairs. The serial number of the chair informs Customer Service of the proper components for that chair. -
Page 31: Parts Listing
MEDICAL RECLINER- TRANSPORTER PAGE-PART DESCRIPTION PAGE- DESCRIPTION NUMBER PART NUMBER 26-01 COMPLETE FRAME BASE ASSEMBLY 28-01 FOOT REST UPHOLSTERED 26-02 RECLINE MECHANIMS ACTUATOR 28-02 CENTER BOARD ASSEMBLY CABLE ASSEMBLY 26-03 TABLE BRACKET SET 28-03 SEAT ASSEMBLY 26-04 TABLE TOP 28-04 BACK PILLOW ASSEMBLY 26-05 RECLINE MECHANISM ACTUATOR... -
Page 32: Actuation Adjustment
APPENDIX A ACTUATION ADJUSTMENT: TOOLS REQUIRED: 1/2” WRENCH, OPEN END/BOX END – 2 Please read all directions before making adjustment. Refer back to directions and illustrations as you make the adjustment. Call Customer Service if you have any questions or problems. CAUTION: This adjustment requires tightening or loosening fasteners that effect the chair operation. - Page 33 Note: Some components may have a different appearance than shown in the picture due to multiple models of chairs. The serial number of the chair informs Customer Service of the proper components for that chair. (32) OM00REC Recliner Manual REV 8 080119...
-
Page 34: Appendix B - Heated And Heat/Massage Recliners
APPENDIX B – Heated and Heat/Massage Recliners HEAT RECLINER GENERAL INFORMATION WARNING: Do not operate this product without reviewing the operating instructions along with any attachments that demonstrate proper operation of the basic functions of your chair. WARNING: The comfort item may trap heat and when the item is removed the occupant may experience elevated temperatures. -
Page 35: Chair Specifications
APPENDIX B (continued) – Heated and Heat/Massage Recliners CHAIR SPECIFICATIONS Please reference previous chair specification pages for all load and dimensional specifications of your heated chair. All chairs with heat are built to properly handle the specified load for that model chair. -
Page 36: Heater Operation
APPENDIX B (continued) – Heated and Heat/Massage Recliners HEATER OPERATION The Champion heated recliner continues to have the same occupant-controlled positioning with the added benefit of heated pads in the seat and back. The heat/massage recliner has massage motors built into the back cushion along with the heat system. This allows for additional occupant comfort at the push of a button. - Page 37 APPENDIX B (continued) – Heated and Heat/Massage Recliners CAUTION: Make sure all staff involved in the use of the chair has viewed the in- service instruction pages prior to operating the chair. Incorrect use can damage the chair and void your warranty. CAUTION: Prevent damage to the power cord, do not allow power cord or handset cord to end up under the wheels or other heavy objects.
- Page 38 If a connector is unhooked reconnect it, plug in the power cord, and check the switch again. If all connections appear ok and the lights still flash, unplug your chair and contact Champion’s customer service. This does not affect the basic functions of the chair.
-
Page 39: Massage Operation
If a connector is unhooked reconnect it, plug in the power cord, and check the switch again. If all connections appear ok and the lights still flash, unplug your chair and contact Champion’s customer service. This does not affect the basic functions of the chair. -
Page 40: Maintenance
APPENDIX B (continued) – Heated and Heat/Massage Recliners MAINTENANCE WARNING: Before performing any cleaning or maintenance to the heat or heat/massage chair make sure that it is unplugged from the outlet. This will prevent a shock hazard while working inside the chair. CAUTION: DO NOT allow moisture to pool on top of the switch. -
Page 41: Heat And Heat/Massage Chair Parts View
APPENDIX B (continued) HEAT AND HEAT/MASSAGE CHAIR COMPONENTS LIST PG/PART DESCRIPTION PG/PART DESCRIPTION BACK FOAM W/ HEAT OR HEAT 40-01 40-06 CORD CLEAT &MASSAGE 40-02 CONTROL BOX 40-11 POWER CORD (NOT SHOWN) 40-03 SEAT FOAM W/ HEAT 40-12 SWITCH CABLE (NOT SHOWN) MASSAGE MOTOR EXTENSION CBL 40-04 SWITCH ASSEMBLY...
Need help?
Do you have a question about the Classic Series and is the answer not in the manual?
Questions and answers