
Related Manuals for Pelgrim PFI8160WIT


Summary of Contents for Pelgrim PFI8160WIT
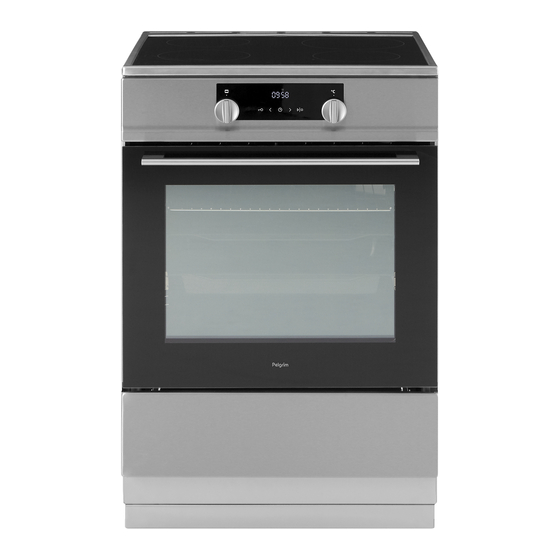
- Page 1 PFI8160WIT PFI8265WIT PFI8265RVS Gebruiksaanwijzing Fornuis Instructions for use Cooker...
- Page 2 Handleiding NL 3 - NL 33 Manual EN 3 - EN 33 Gebruikte pictogrammen - Pictograms used Belangrijke informatie - Important information Tip - Tip...
-
Page 3: Table Of Contents
INHOUD Uw fornuis Inleiding Bedieningspaneel Oven beschrijving Geleiderails/telescoopgeleider Toebehoren Deur Inductiekookplaat beschrijving Eerste gebruik Om te beginnen Oven gebruiken Oven gebruiken Ovenfuncties Kookplaat gebruiken Kookduurbegrenzer Gezond koken Meldingen op de display Geluiden bij inductie Pannen Vermogen instellen Pandetectie Oven bedienen Oven bedienen Timer Extra functies kiezen... -
Page 4: Uw Fornuis
UW FORNUIS Inleiding Gefeliciteerd met de aankoop van dit fornuis. Dit product is ontworpen voor optimale gebruiksvriendelijkheid. Het fornuis heeft vele verschillende instellingen, waardoor u telkens de juiste bereidingswijze kunt kiezen. In deze handleiding leest u hoe u het fornuis optimaal kunt gebruiken. Naast informatie over de bediening van de oven vindt u hier ook achtergrondinformatie die van pas kan komen als u het apparaat gebruikt. -
Page 5: Bedieningspaneel
UW FORNUIS Bedieningspaneel 4 5 6 7 1. Ovenfunctieknop 2. Display (bereidingsinformatie en timer) a. bediening oven b. symbool bereidingstijd c. symbool eindtijd d. symbool keukenwekker e. symbool klok f. symbool verwarming/temperatuur 3. Kinderslot (voor de oven) 4. Minder 5. Timertoets 6. -
Page 6: Oven Beschrijving
UW FORNUIS Beschrijving oven Niveau 4 Niveau 3 Niveau 2 Niveau 1 1. Bedieningspaneel 2. Geleiderails 3. Ovendeur 4. Handvat 5. Opberglade/klapdeurtje (afhankelijk van model) 6. Stelvoetjes Geleiderails/telescoopgeleiders • Afhankelijk van het model beschikt de oven over vier of vijf geleiderails (niveau 1 tot 4/5). Niveau 1 wordt voornamelijk gebruikt in combinatie met onderwarmte. -
Page 7: Toebehoren
UW FORNUIS Toebehoren Het apparaat wordt geleverd met een reeks toebehoren. Welke dit zijn, is afhankelijk van het model. Gebruik alleen originele toebehoren; deze zijn speciaal geschikt voor gebruik met het apparaat. Zorg ervoor dat alle gebruikte toebehoren bestand zijn tegen de temperatuurinstellingen van de ovenfunctie die u hebt gekozen. -
Page 8: Inductiekookplaat Beschrijving
UW FORNUIS Beschrijving inductiekookplaat 1. Kookzone linksachter (1,4 kW Ø 160 mm) 2. Kookzone rechtsachter (2,3 kW Ø 200 mm) 3. Kookzone linksvoor (1,4 kW nominaal, 2 kW super boost, Ø 180 mm) 4. Kookzone rechtsvoor (1,4 kW Ø 160 mm) 5. -
Page 9: Eerste Gebruik
EERSTE GEBRUIK Eerste gebruik Huidige tijd instellen Wanneer u het apparaat voor het eerst aansluit op het lichtnet, licht de display op. Na drie seconden licht het kloksymbool op en op de display knippert de aanduiding '12:00'. 1. Druk op de toetsen voor minder of meer om de huidige tijd in te stellen. U stelt waarden op de display sneller in als u de toetsen langer ingedrukt houdt. - Page 10 EERSTE GEBRUIK Ovengerei • In principe kunt u elk type ovengerei gebruiken dat hittebestendig is. • Reinig glazen ovengerei na gebruik niet direct met koud water. Door het plotselinge temperatuurverschil kan het glas breken. • Gebruik zwarte of donkere bakblikken. Die geleiden de warmte beter, zodat het voedsel gelijkmatiger wordt gebakken.
-
Page 11: Ovenfuncties
OVEN GEBRUIKEN Ovenfuncties Het apparaat beschikt over een aantal ovenfuncties die per model verschillen. Kies de gewenste functie aan de hand van de tabel. Raadpleeg ook de bereidingsinstructies op de verpakking van het gerecht. Ovenfuncties (symbolen staan op de ovenfunctietoets) Symbool Beschrijving Snel voorverwarmen... - Page 12 OVEN GEBRUIKEN Onderwarmte + ventilator • Deze combinatie wordt gebruikt voor het bakken van laagrijzend gistdeeggebak en voor het conserveren van groenten en fruit. • Plaats de bakplaat of het ovenrooster op niveau 2. Verwarmen • Met deze functie verwarmt u serviesgoed (borden, kommen) voor, voordat u het eten serveert.
-
Page 13: Kookplaat Gebruiken
KOOKPLAAT GEBRUIKEN Kookduurbegrenzer De kookduurbegrenzer is een veiligheidsfunctie van uw kookplaat. Deze wordt geactiveerd als u vergeet de kookplaat uit te schakelen. Afhankelijk van de gekozen stand wordt de kookduur als volgt begrensd: Vermogen instellen Uren verstreken voorafgaand aan: 8 uur 1 en 2 6 uur 3 en 4... -
Page 14: Meldingen Op De Display
KOOKPLAAT GEBRUIKEN Meldingen op de display Op display Status Vermogen van kookzone: 1 = lage stand, 9 = hoge stand Boost-functie actief. Geen (geschikte) pan op de kookzone (symbool voor pandetectie). Kinderslotfunctie geselecteerd. Foutcode: zie de tabel voor probleemoplossing. Restwarmte-indicator: de kookplaat heeft voor elke kookzone een restwarmte-indicator waarmee wordt aangegeven welke kookzone nog warm is. -
Page 15: Pannen
KOOKPLAAT GEBRUIKEN Pannen • Plaats een pan altijd in het midden van een kookzone. • Voor inductiekoken zijn pannen van een bepaalde kwaliteit vereist. Pannen waarmee al eerder op een gaskookplaat is gekookt, zijn niet meer geschikt voor een inductiekookplaat. •... -
Page 16: Vermogen Instellen
KOOKPLAAT GEBRUIKEN Snelkookpannen • Inductiekoken is bij uitstek geschikt voor het gebruik van snelkookpannen. De kookzone reageert zeer snel, waardoor de snelkookpan ook snel op druk is. Het kookproces stopt zodra u een kookzone uitschakelt. Vermogen instellen • Het vermogen kan op 9 verschillende niveaus worden ingesteld. De kookplaat heeft ook de instelling 'boost'. -
Page 17: Oven Bedienen
OVEN BEDIENEN Oven bedienen 1. Kies de gewenste ovenfunctie met de ovenfunctieknop. Kies aan de hand van de tabel in het hoofdstuk Ovenfuncties de gewenste functie. Raadpleeg ook de bereidingsinstructies op de verpakking van het gerecht. 2. Stel, indien nodig, een bereidingstijd in door op de timertoets te drukken en de 'meer'-toets of de 'minder'-toets te gebruiken om de gewenste tijd in te stellen. -
Page 18: Extra Functies Kiezen
OVEN BEDIENEN Eindtijd instellen Met deze instelling geeft u aan hoe laat de oven moet worden uitgeschakeld. Zorg dat de klok nauwkeurig is ingesteld op de huidige tijd. 1. Druk tweemaal op de timertoets. Op de display licht het pictogram voor de eindtijd op. 2. - Page 19 OVEN BEDIENEN Als het kinderslot is geactiveerd en er geen timerfunctie is ingesteld (alleen de klok wordt weergegeven), werkt de oven niet. Wanneer het kinderslot wordt geactiveerd nadat er een timerfunctie is ingesteld, zal de oven gewoon werken; de instellingen kunnen dan echter niet worden gewijzigd.
-
Page 20: Kookplaat Bedienen
KOOKPLAAT BEDIENEN Inschakelen en vermogen instellen Het vermogen kan op 9 verschillende niveaus worden ingesteld. De kookplaat heeft ook de instelling 'boost'. Deze wordt met een 'P' weergegeven op de display (zie 'Boost'). De kookzone linksvoor beschikt over een 'Power Boost' (SP). •... -
Page 21: Indicator Voor Restwarmte
KOOKPLAAT BEDIENEN Kinderslot gedeactiveerd • Druk op de aan-uittoets. Op de kookzonedisplays wordt enkele seconden lang een 'L' weergegeven. • Druk gedurende drie seconden gelijktijdig op de toets – en de toets voor kookzone LA. Op de kookzonedisplay wordt 'L' weergegeven. Het kinderslot is nu gedeactiveerd. Activeer het kinderslot voordat u de kookplaat gaat reinigen. - Page 22 KOOKPLAAT BEDIENEN Timer inschakelen, activeren en uitschakelen 1. Druk de toetsen – en + tegelijk in. • Als u eerder een kookzone hebt ingeschakeld, licht de bijbehorende display meer op. De timer die u nu hebt ingesteld, is van toepassing op deze kookzone. De decimale punt naast het vermogensniveau betekent dat voor deze zone de tijd is geactiveerd.
-
Page 23: Let Op
REINIGING Let op! Koppel het apparaat los van de stroomvoorziening voordat u een reparatie gaat uitvoeren. Haal de stekker van het apparaat uit het stopcontact, schakel de zekeringen uit of zet in de meterkast de schakelaar in de nulstand. Draai de hoofdgaskraan dicht. Gebruik geen stoomreiniger of hogedrukstoomreiniger om het apparaat te reinigen. -
Page 24: Oven Reinigen
REINIGING Oven reinigen Reinig de oven regelmatig om te voorkomen dat vet en voedselresten zich ophopen, vooral op de interne en externe oppervlakken, de deur en de afdichting. • Reinig de oppervlakken aan de buitenkant met een zachte doek en warm zeepwater. Neem vervolgens de oppervlakken af met een schone, vochtige doek en maak ze droog. -
Page 25: Ovendeur Demonteren
REINIGING Ovendeur demonteren 1. Open eerst de deur volledig (zo ver mogelijk). 2. Draai de blokkeerhendels 90° terug. 3. Sluit de deur langzaam totdat de blokkeerhendels zich op één lijn bevinden met de scharnieruitsparingen. Til bij een hoek van 15° (ten opzichte van de positie van de gesloten deur) de deur enigszins op en trek hem los uit beide scharnieruitsparingen op het apparaat. -
Page 26: Aqua Clean-Functie
REINIGING Voer bovenstaande procedure in omgekeerde volgorde uit om de ovenruit te vervangen. De markeringen (halve cirkels) op de deur en de ovenruit moeten overlappen. Aqua Clean-functie Met Aqua Clean en een vochtige doek verwijdert u eenvoudig vet en vuil van de ovenwanden. Aqua Clean-functie gebruiken Gebruik het reinigingsprogramma alleen als de oven koud is. - Page 27 REINIGING Achterwandlamp (afhankelijk van het model) 1. Draai het afdekplaatje naar links om het te verwijderen. Verwijder de lamp. Gebruik een lamp met dezelfde specificaties. Zijwandlamp (afhankelijk van het model) 1. Maak het afdekplaatje van de lamp los met een platte schroevendraaier en verwijder het plaatje. Verwijder de lamp.
-
Page 28: Problemen Oplossen
PROBLEMEN OPLOSSEN Algemeen Wanneer u een barst in het glas ziet (hoe klein ook), schakelt u de kookplaat onmiddellijk uit, haalt u stekker uit het stopcontact, zet u de (automatische) zekering(en) in de meterkast uit of, bij een permanente aansluiting, zet u de stroomvoorziening op nul. Neem contact op met de servicedienst. -
Page 29: Oven
PROBLEMEN OPLOSSEN Symptoom Mogelijke oorzaak Oplossing Foutcode E2. Het apparaat is oververhit geraakt. Het apparaat is uitgeschakeld vanwege oververhitting. Foutcode E6. Het apparaat is verkeerd aangesloten Laat uw aansluiting wijzigen. of de netspanning is te hoog. Als alle vier de kookzones met een Het apparaat is aangesloten op een Stel het apparaat in op 'Lo' hoog vermogen worden gebruikt,... - Page 30 Reparaties mogen uitsluitend worden uitgevoerd door een erkend servicemonteur. ▷ Als er onderhoud nodig is, haalt u de stekker uit het stopcontact en neemt u contact ▷ op met de klantenservice van Pelgrim. • Zorg dat u het volgende bij de hand hebt als u belt: ▷...
-
Page 31: Algemeen
Defecte onderdelen mogen alleen worden vervangen door originele Pelgrim-onderdelen. Alleen van die onderdelen garandeert Pelgrim dat ze voldoen aan de veiligheidsvoorschriften. Een beschadigd elektriciteitssnoer kan voor gevaarlijke situaties zorgen. Daarom mag het alleen worden vervangen door de fabrikant, de serviceorganisatie van de fabrikant of door een erkend vakman. -
Page 32: Installatie
INSTALLATIE Dit apparaat kan worden aangesloten volgens een • 3-fasenaansluiting (3 N ~ 380 V - 415 V / 50 Hz - 3 x 16 A). • 2-fasenaansluiting (2 N ~ 230 V - 240 V / 50 Hz - 2 x 16 A)*. *2-fasenaansluiting Als uw thuisinstallatie niet is uitgerust met een 3-fasenvoeding (3 x 16 A), kan het totale stroomverbruik van het apparaat worden begrensd (door middel van een vermogensbegrenzer) -
Page 33: Oven En Milieu
OVEN EN MILIEU Afvoeren apparaat en verpakking Bij de vervaardiging van dit apparaat is gebruik gemaakt van duurzame materialen. Dit apparaat moet aan het einde van zijn levenscyclus op verantwoorde wijze worden afgevoerd. De overheid kan u hierover informatie verschaffen. De verpakking van het apparaat is recyclebaar. - Page 35 CONTENTS Your cooker Introduction Control panel Oven description Guide rails/Telescopic guide rails Accessories Door Induction hob description First use Initial use Using the oven Using the oven Oven functions table Using the hob Cooking-time limiter Healthy cooking Indications in the display Induction noises Pans Power level setting...
-
Page 36: Your Cooker
YOUR COOKER Introduction Congratulations on the purchase of this cooker. This product is designed to offer optimum user- friendliness. The cooker has a wide range of settings, so you can always select the correct cooking method. Read this manual to learn how to get the most out of your cooker. In addition to information about operating the oven, you will also find background information that may be useful when using the appliance. -
Page 37: Control Panel
YOUR COOKER Control panel 4 5 6 7 1. Oven function knob 2. Display (cooking information and timer) a. oven operation b. cooking time symbol c. end time symbol d. minute minder symbol e. clock symbol f. heating / temperature symbol 3. -
Page 38: Oven Description
YOUR COOKER Oven description Level 4 Level 3 Level 2 Level 1 1. Control panel 2. Guide rails 3. Oven door 4. Handle 5. Storage drawer/flap door (depending on model) 6. Leveling feet Guide rails/Telescopic guide rails • The oven has four or five guide rails (Level 1 to 4/5), depending on the model. Level 1 is mainly used in combination with bottom heat. -
Page 39: Accessories
YOUR COOKER Accessories Your appliance is accompanied by a range of accessories, depending on the model. Only use original accessories; they are specially suited to your appliance. Be sure that all the accessories that are being used are able to withstand the temperature settings of the chosen oven function. Not all accessories are suitable/available for every appliance (it may also differ by country). -
Page 40: Induction Hob Description
YOUR COOKER Induction hob description 1. Cooking zone left rear (1.4 Kw Ø 160 mm) 2. Cooking zone right rear (2.3 Kw Ø 200 mm) 3. Cooking zone left front (1.4 Kw Nominal, 2 kW super boost, Ø 180 mm) 4. -
Page 41: First Use
FIRST USE Initial use Set the current time When you connect the appliance to the mains electricity for the first time, the display lights up. After three seconds the clock symbol lights up and ‘12:00’ will flash on the display. 1. - Page 42 FIRST USE Ovenware • In principle, you can use any type of heat-resistant ovenware. • Do not rinse glass ovenware with cold water immediately after use. The sudden temperature difference can cause the glass to crack. • Use black or dark baking tins. These conduct heat better and allow the food to cook more evenly.
-
Page 43: Oven Functions Table
USING THE OVEN Oven functions table Your appliance is accompanied by a range of oven functions, depending on the model. Consult the table to select the preferred function. Also, consult the instructions for preparation on the dish packaging. Oven functions (symbols are on the oven function knob) Symbol Description Fast preheat... - Page 44 USING THE OVEN Bottom Heat with fan • This is used for baking leavened but low-rising pastry and for preserving fruit and vegetables. • Place the baking tray or oven rack on level 2. Warming • Use this function to reheat your dinnerware (plates, cups) before serving food in it to keep the food warm longer.
-
Page 45: Using The Hob
USING THE HOB Cooking-time limiter The cooking-time limiter is a safety function of your cooking appliance. It will operate if you forget to switch off your hob. Depending on the setting you have chosen, the cooking time will be limited as follows: Power setting Hours lapse prior: 8 hours... -
Page 46: Indications In The Display
USING THE HOB Indications in the display In display Status Power setting cooking zone; 1 = low setting / 9 = high setting Boost function active. No (suitable) pan on cooking zone (pan detection symbol). Child lock function selected. Fault code; See ‘Troubleshooting table’. Residual heat indicator;... -
Page 47: Pans
USING THE HOB Pans • Always place a pan in the middle of a cooking zone. • Induction cooking requires a particular quality of pan. Pans that have already been used for cooking on a gas hob are no longer suitable for use on an induction hob. -
Page 48: Power Level Setting
USING THE HOB Pressure cookers • Induction cooking is very suitable for cooking in pressure cookers. The cooking zone reacts very quickly, and so the pressure cooker is quickly up to pressure. As soon as you switch a cooking zone off, the cooking process stops immediately. Power level setting •... -
Page 49: Operation The Oven
OPERATION THE OVEN Operating the oven 1. Turn the oven function knob to select an oven function. Consult the table in chapter ‘Oven functions table ‘to select the preferred function. Also consult the instructions for preparation on the dish packaging. 2. -
Page 50: Selecting Additional Functions
OPERATION THE OVEN Setting the ‘end time’ In this setting you can set the time the oven should switch off. Ensure that the clock is set precisely to the current time. 1. Press the timer button twice. The pictogram for the ‘end time’ lights up on the display. 2. - Page 51 OPERATION THE OVEN Once the child lock is activated and no timer function has been set (only the clock is displayed), the oven will not work. If the child lock is activated after a timer function has been set, the oven will work; however, the settings cannot be changed. When the child lock is activated, oven functions or additional functions cannot be changed.
-
Page 52: Operation The Hob
OPERATION THE HOB Switching on and power setting The power can be set to 9 different levels. The hob also has a ‘boost’ setting which is indicated by a ‘P’ on the display (see ‘Boost’). The front left cooking zone has a ‘Power Boost’ (SP). •... -
Page 53: Residual Heat Indicator
OPERATION THE HOB Child lock deactivated • Press the on/off button. The cooking zone displays will display ‘L’ for a few seconds. • Press simultaneously for a minimum of three seconds the RL cooking zone button and the – button. The cooking zone display will display ‘L’. - Page 54 OPERATION THE HOB Switching on the cooking-timer, activating and switching off 1. Press simultaneously the – and + button. • If you have switched on a cooking zone prior to this, the accompanying display will be brighter. The cooking-timer that you have now set applies to this cooking zone. The decimal point next to the power level means that the time has been activated for this zone.
-
Page 55: Please Note
CLEANING Please note! Disconnect the appliance from the power supply before beginning repairs. Preferably unplug the appliance, switch off the fuses, or set the switch in the meter cupboard to zero. Turn off the gas tap on the supply line. Do not use steam cleaners or high-pressure steam cleaner to clean the device. -
Page 56: Cleaning The Oven
CLEANING Cleaning the oven Clean the oven regularly to prevent fat and leftover food from accumulating, especially on interior and exterior surfaces, the door and seal. • Clean exterior surfaces with a soft cloth and soapy warm water. Wipe afterwards with a clean, damp cloth and dry the surfaces. -
Page 57: Removing The Oven Door
CLEANING Removing the oven door 1. First, fully open the door (as far as it will go). 2. Rotate the stoppers back by 90°. 3. Slowly close the door until the stoppers are aligned with the hinge beds. At the angle of 15°... -
Page 58: Aqua Clean Function
CLEANING To replace the glass pane, observe the reverse order. The markings (semicircle) on the door and the glass pane should overlap. Aqua Clean function With the Aqua Clean function and a damp cloth, you can easily remove grease and dirt from the oven walls. - Page 59 CLEANING Rear wall lamp (depending on the model) 1. Turn the cover to the left to remove it. Remove the lamp. Fit a new lamp with the same specifications. Side wall lamp (depending on the model) 1. Use a flat screwdriver to release the bulb cover and remove it. Remove the lamp.
-
Page 60: Solving Problems
SOLVING PROBLEMS General If you notice a crack in the glass top (however small), switch the hob off immediately, unplug the hob, turn off the (automatic) fuse switch(es) in the meter cupboard or, in the event of a permanent connection, set the switch in the power supply lead to zero. Contact the service department. Troubleshooting table When in doubt on the proper operation of your appliance, this does not automatically mean there is a defect. -
Page 61: Oven
SOLVING PROBLEMS Symptom Possible cause Solution Error code E3. Unsuitable pan used. Use a pan suitable for induction cooking. Error code E2. Appliance over heated. The appliance has been switched off because of over heating. Fault code E6. The appliance has been connected Have your connection changed. - Page 62 • Storing and repairing the oven Repairs may only be performed by a qualified service technician. ▷ If maintenance is required, remove the plug from the socket and contact Pelgrim ▷ customer services. • Have the following information to hand when you call: ▷...
-
Page 63: General
The main switch of the domestic electrical system is switched off, the fuse of the domestic electrical system has been completely removed, or the plug has been pulled out of the socket. Faulty parts may only be replaced by original Pelgrim parts. Only those parts are guaranteed by Pelgrim to meet the safety requirements. -
Page 64: Installation
INSTALLATION This appliance can be connected in accordance with a • 3 phases connection (3 N~ 380 V - 415 V / 50 Hz - 3 x 16 A). • 2 phases connection (2 N~ 230 V - 240 V / 50 Hz - 2 x 16 A)*. *2 phase connection If your home installation is not fitted with a 3 phase power supply (3 x 16 A), the appliance’s total power consumption can be limited (power limiter) so that the power consumption doesn’t rise... -
Page 65: Technical Specifications
YOUR OVEN AND THE ENVIRONMENT Disposal of the appliance and packaging This product is made from sustainable materials. However, the appliance must be disposed of responsibly at the end of its useful life. The government can provide you with information about this. - Page 66 EN 34...
- Page 67 EN 35...
- Page 68 Zorg dat u het volledige typenummer bij de hand hebt wanneer u contact opneemt met de serviceafdeling. When contacting the service department, have the complete type number to hand. U vindt de adressen en telefoonnummers van de serviceorganisatie op de garantiekaart. You will find the addresses and phone numbers of the service organisation on the guarantee card.
Need help?
Do you have a question about the PFI8160WIT and is the answer not in the manual?
Questions and answers