
Related Manuals for ITW Mima ECOMAT EASY


Summary of Contents for ITW Mima ECOMAT EASY
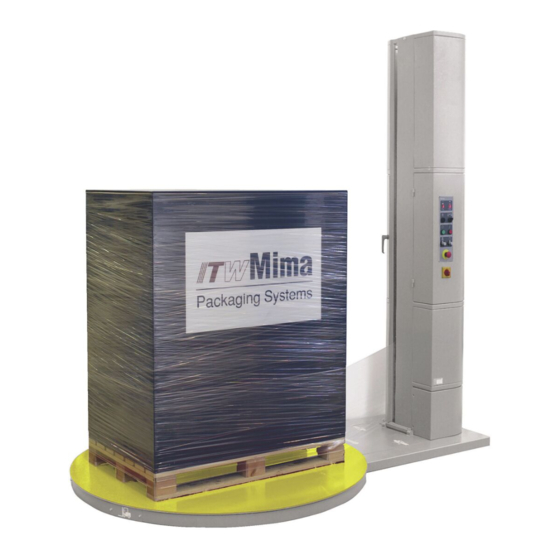
- Page 1 MAINTENANCE INSTRUCTIONS ECOMAT EASY / GIROTEC WRS Version G0101 ECOMAT EASY H / GIROTEC WRS H Version G0301 ECOMAT PLUS / ECOMAT PLUS H Versions G0503 / G0603 V 2.0...
-
Page 2: Table Of Contents
(Ecomat Plus) ………………………………………………… 1.1.5 Adjusting the dancing roller tension (Ecomat Plus) ………………………………………………… 1.1.6 Changing the brake roller, brake roller tension spring and brake plate (Ecomat Easy) ………………………………………………… 1.1.7 Changing the guide rollers ………………………………………………… 1.2 Vertical motion …………………………………………………... - Page 3 1.3.5. Changing the roller chain and centre bearing ………………………………………………… 1.3.6. Changing the V-belt and transmission pulley bearing ………………………………………………… 1.3.7 Changing the table bearing rollers ………………………………………………… 1.4 Load stabilizer (Ecomat Easy H / Ecomat Plus H) ………………………………………………… 1.4.1 Check list ………………………………………………… 1.4.2 General maintenance actions …………………………………………………...
- Page 4 Table of contents 1.4.4 Changing the carriage rollers, roller chain and sprocket. ………………………………………………… Maintenance table ………………………………………………… …………………………………………………...
-
Page 5: Maintenance Of Turn Table Machine
1. Maintenance of turn table machine 1.1 Film distributor maintenance 1.1.1 Check list All film distributor types: - Folding rollers fasteners and bearings - Film distributor fastening to the lifting chain - Looseness between film distributor and guide profile (Condition of guiding rollers and bearings) - Energy transfer chain and cables... - Page 6 - Photocell and cable...
- Page 7 Ecomat Easy film distributor - Brake roll - roll surface - brake plate - tensioning spring - lever - Pendulum roll - surface - spring - Function of the film reel holder mechanism...
- Page 8 Ecomat Plus film distributor: - Pre-stretch rollers - surface and bearing system - Pre-stretch gears and toothed belt - Dancing roller mechanism - Spring - Inductive sensor...
- Page 9 - Easy load mechanism - locking system - hinge system...
-
Page 10: General Maintenance Actions
- Wipe off dust using a clean/dry cloth - Clean the surface of the folding rollers using cloth with cleaning spray (except the pre-stretch rollers) - Lubricate the film reel holder mechanism (Ecomat Easy) - Lubricate the Easy load locking mechanism and hinge (Ecomat Plus) -
Page 11: Tensioning The Pre-Stretch Toothed Belt (Ecomat Plus)
1.1.3 Tensioning the pre-stretch toothed belt (Ecomat Plus) Phase 1 Open the service hatch by opening two fastening screws Phase 2 Loosen the fastening screw of tensioning unit and pull the tensioning unit Phase 3 Tight the screw when belt is tense... -
Page 12: Changing The Pre-Stretch Toothed Belt, Pre-Stretch Rollers And Bearings, And Pre-Stretch Ratio (Ecomat Plus)
1.1.4. Changing the pre-stretch toothed belt, pre-stretch rollers and bearings, and pre-stretch ratio (Ecomat Plus) Phase1. Remove the electric motor and motor bed, by opening four fastening screws Now the pre-stretch gears are accessible Phase 2. Loosen the toothed belt tensioning system by opening fastening screw You can now lift of the toothed belt and replace if necessary Phase 3. - Page 13 Phase 4. You can now lift off the smaller gearwheel, and replace it. NOTE: If you are changing the pre-stretch ratio, this is the only gearwheel which you have to change, together with a correct toothed belt. SET 150% SET 260% Pre.Stretch options: 150% 260% (default, assembled to standard machine)
- Page 14 Phase 5. Open the fastening screw of aluminium gearwheel, and lift it off Phase 6. Open the four fastening screws of the upper bearing unit and lift it off. Now you can replace the groove ball bearing of upper bearing unit (picture in next page) Phase 7.
-
Page 15: Adjusting The Dancing Roller Tension (Ecomat Plus)
On left: Upper bearing unit of the pre-stretch roller On right: Lower bearing unit of the pre-stretch roller (bearing bushing) 1.1.5 Adjusting the dancing roller tension (Ecomat Plus) Loosen the fastening nut (1) by turning it to anti clockwise direction Turn the adjustment screw (2) to clockwise direction, to increase dancing roller tension Turn the adjustment screw (2) to anti clockwise direction, to... -
Page 16: Changing The Brake Roller, Brake Roller Tension Spring And Brake Plate (Ecomat Easy)
1.1.6 Changing the brake roller, brake roller tension spring and brake plate (Ecomat Easy) You can first remove the photocell unit to make following steps easier After removing the tension level adjustment nut, you can lift off the bushing and replace the tension spring After removing the lever fastening disc and pulling out the lever, you can lift off the parts above the carriage frame. -
Page 17: Vertical Motion
1.2 Vertical motion maintenance 1.2.1 Check list - Roller chain, pulley wheel and pulley wheel fastening mechanism - Gear motor, bearing housing and sprocket - Guide profile of film distributor - Limit switches of film distributor positioning 1.2.2 General maintenance actions - Wipe off the dust from the guide profile using a clean/dry cloth If necessary, use a silicon spray to lubricate guide profile. -
Page 18: Changing Vertical Motion Roller Chain
1.2.3. Changing vertical motion roller chain. Phase1 Open the tower fastening screws and tilt the tower to the horizontal position. Use a piece of wood between tower and turn table to avoid damages on the tower (door handle) as shown in the example. - Page 19 Phase2 Open the film distributor fastening screws Phase3 Move the film distributor to its upper most position inside the mast Phase4 Remove the photocell and fastening screws of the energy transfer chain Phase5 Slide the film distributor out of the mast...
- Page 20 Because the film distributor is now fully accessible, it is good opportunity to change guide rollers, and do all other maintenance acts. Picture below shows construction of guide roller...
- Page 21 Phase6 Remove the connection plate by opening the fastening screw Phase7 Open the joint link of the roller chain You can now remove the old roller chain Phase8 Replace the sprocket wheel and pulley if necessary. Phase 9 Insert new roller chain and fix the joint link.
-
Page 22: Turn Table
1.3 Turn table maintenance 1.3.1 Check list - Roller chain and sprockets - Chain tensioning mechanism - V-belt and belt pulleys - Electric motor and cable - Table bearing rollers - Centre bearing - Table home proximity switch and cable 1.3.2 General maintenance actions - Remove the turn table disc and vacuum all dust and dirt - Lubricate the roller chain and sprocket using chain spray... -
Page 23: Removing The Turn Table Disc And Cover Plate
1.3.3. Removing the turn table disc and cover plate Phase1 Open three fastening screws of disc Phase2 If you have the possibility to use forklift or crane, attach the lifting eye with a lifting belt to lift off the disc Otherwise just slide the disc enough to the side that it is easy to do maintenance Phase 3... -
Page 24: Tensioning Of V-Belt And Roller Chain
1.3.4 Tensioning of V-Belt and roller chain V-Belt - Open the motor bed attachment screws (3 pci) - Loose the other nut by turning it to clockwise direction (1) - Tight with other nut by turning it to clockwise direction (2) - Tight both nuts when belt is tense Roller Chain - Loose the other nut by turning it to clockwise direction (3) -
Page 25: Changing The Roller Chain And Centre Bearing
1.3.5. Changing the roller chain and centre bearing Phase1 Loosen the chain tensioning system (see page 23) Phase2 Open the joint link of the roller chain, remove the chain and replace if necessary Phase3 Open the fastening screw of the centre bearing system You can now lift off the whole system from the axis. -
Page 26: Changing The V-Belt And Transmission Pulley Bearing
1.3.6. Changing the V-belt and transmission pulley bearing Before replacing of V-belt is possible, you must remove the roller chain. See page 24 Phase1 Open the motor bed fastening screws (3pci) and belt tensioning nuts. Phase2 Lift off the electric motor and motor bed Now you can remove the old V-belt and replace it if necessary... - Page 27 Phase3 Open the fastening screw You can now lift off the whole system and replace the bearings (2pc)
-
Page 28: Changing The Table Bearing Rollers
1.3.7 Changing the table bearing rollers Just lift of the roller and replace it with new one. If you change one roller it would be best to change all rollers at the same time to avoid unbalancing the table. -
Page 29: Load Stabilizer (Ecomat Easy H / Ecomat Plus H)
1.4 Load stabilizer maintenance (Ecomat Easy H / Ecomat Plus H) 1.4.1 Check list - Press plate up-down movement - Limit switch and cable - Movable bushing - Flange bearing - Electric motor - Roller chain, sprocket and pulley - Carriage rollers... -
Page 30: General Maintenance Actions
1.4.2 General maintenance actions - Wipe off all dust with a clean cloth - Lubricate the press plate movable bushing (1) and the flange bearing - Use chain spray to lubricate the roller chain and sprockets - If necessary, use silicon spray to lubricate the plastic rollers of the carriage 1.4.3 Tensioning of load stabilizer roller chain - Turn the tensioning screw clockwise to tighten the roller chain... - Page 31 1.4.4 Changing the carriage rollers, roller chain and sprocket. Phase1 Remove the movable parts of press plate system by opening fastening screws Phase2 Disconnect the multi-pole plug Phase3 Open the load stabilizer frame fastening screws (2pc) and remove the whole system to somewhere where it is easy to do the maintenance Phase4 Remove the chain tensioning system...
Need help?
Do you have a question about the ECOMAT EASY and is the answer not in the manual?
Questions and answers