Advertisement
Quick Links
Advertisement

Related Manuals for Hanover BRIGDN5PCBR-SU


Summary of Contents for Hanover BRIGDN5PCBR-SU
- Page 1 Page 2 of 7...
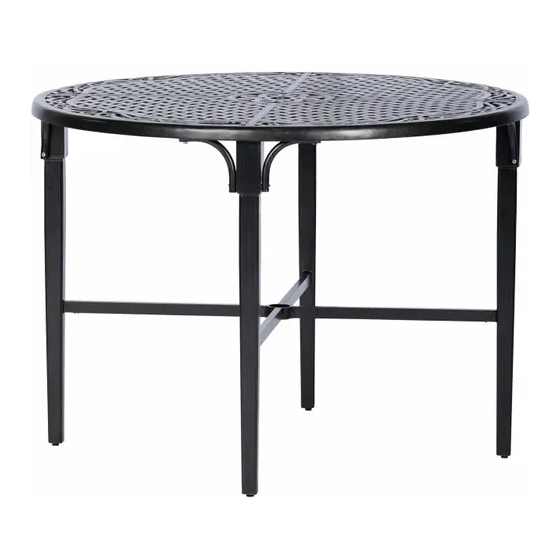
- Page 2 High Dining Table Owner's Manual If you have any problems with this product, DO NOT RETURN IT TO THE STORE CALL OUR CUSTOMER SERVICE HOT-LINE AT 1-866-851-8438 Between 9 A.M. - 5 P.M. Eastern Time, Monday through Friday Page 1of 7...
- Page 3 Page 3 of 7...
- Page 4 Page 4 of 7...
-
Page 5: Parts List
PARTS LIST PART# DESCRIPTION PICTURE Table top Table leg Support Tube Connector M6 x15mm Bolt M6 x18mm Bolt M6 x 35mm Washer Bolt Cover Wrench Page 5 of 7... - Page 6 Assembly Steps: Note: Do not fully tighten bolts until assembly is completed and alignment is correct. Step 1. Assemble the connector (D) to the table leg (B) with bolts (AA) and washer (DD) as shown in figure 1. Figure 1 Step 2.
- Page 7 Step 4. Loosely attach the support tube (C) to the table leg (B) and table top (A) with bolts (CC) and washer (DD) as shown in figure 3. Step 5. Check the alignment and adjust if necessary. Once the alignment is correct, tighten all bolts with wrench (FF) .
- Page 8 High Dining Swivel Chair Owner's Manual If you have any problems with this product, DO NOT RETURN IT TO THE STORE CALL OUR CUSTOMER SERVICE HOT-LINE AT 1-866-851-8438 Between 9 A.M. - 5 P.M. Eastern Time, Monday through Friday Page 1 of 7...
- Page 9 PARTS LIST PART# DESCRIPTION PICTURE Chair Frame T Rocker Base Steel Panel Bolt M8 x 45mm M8 Washer M8 Spring Gasket M8 Nut M8 Bolt Cover Bolt Cover For M8 Open Wrench Page 5 of 7...
- Page 10 Assembly Steps: Note: Do not fully tighten bolts until assembly is completed and alignment is correct. Step 1. Carefully place the chair frame (A) upside down on a non-abrasive surface. Assemble the T rocker(B) to the chair frame(A) with steel panel(D) and Bolts(AA) and Washer(BB) and M8 Spring gasket (CC) and M8 Nut(DD) by using open wrench(GG), then cover the bolts with bolt covers (EE and FF) as shown in Figure 1.
- Page 11 Step 3. Your chair is now ready to use. (Figure 3). Figure 3 Page 7 of 7...
Need help?
Do you have a question about the BRIGDN5PCBR-SU and is the answer not in the manual?
Questions and answers