Table of Contents
Advertisement
Quick Links
Advertisement
Table of Contents

Related Manuals for DT SWISS RATCHET EXP


Summary of Contents for DT SWISS RATCHET EXP
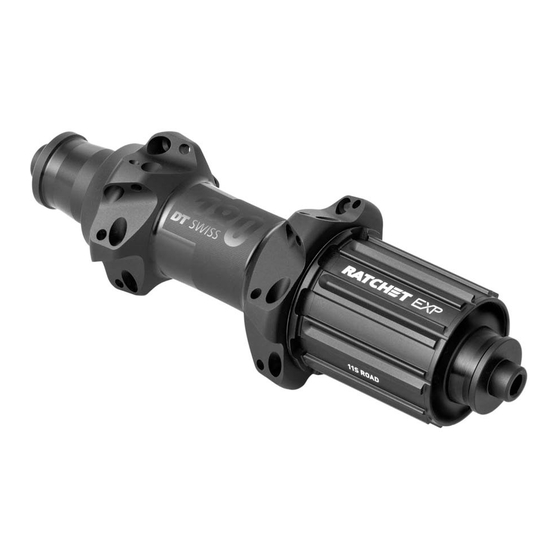
- Page 1 RATCHET EXP HUBS TECHNICAL MANUAL V2020.07...
-
Page 2: Table Of Contents
Using this manual ....................... 4 General maintenance information ................4 Environmental protection .................... 4 Exclusion of liability ..................... 4 1.10 Warranty ........................4 2. MAINTENANCE OF THE REAR WHEEL HUB WITH RATCHET EXP SYSTEM ..5 ® Overview ........................5 Required Tools ......................6 Required wearing parts and materials ............... -
Page 3: General
The cover page and the footing provide information about the type of product and manual as well as the version of the manual. On the back you will find the DT Swiss contact details. A list of all DT Swiss service centers can be found at www.dtswiss.com. -
Page 4: Using This Manual
DT Swiss special tools are precision tools. Damage-free mounting and dismounting of the components can only be ensured if the tools are working properly and if the conditions of the tools are perfect Always keep the tools in their original packaging or adequate devices to save them from damages. -
Page 5: Maintenance Of The Rear Wheel Hub With Ratchet Exp
2. MAINTENANCE OF THE REAR WHEEL HUB WITH RATCHET EXP SYSTEM ® 2.1 OVERVIEW end cap non drive side threaded ratchet 11 washer bearing non drive side sealing 12 freewheel body axle spacer 13 end cap drive side hub shell... -
Page 6: Required Tools
2.2 REQUIRED TOOLS Tool Specification Quantity Article number tool kit*, consisting of: HWTXXX00N2544S installation cylinder Ø15 x 24 x 60 mm (only required for ball bearings on the HXTXXX00N5025S non drive side of 180 hubs) installation cylinder Ø15 x 26 x 40 mm HXTXXX00N5314S mounting / dismounting tool for the HXTXXX00N8387S... -
Page 7: Required Wearing Parts And Materials
• threaded ratchet 36T HWYXXX00N0042S • spring • spacer • DT Swiss special grease service kit 54 teeth consisting of: • loose ratchet 54T • threaded ratchet 54T HWYXXX00N9376S • spring • spacer • DT Swiss special grease Ratchet EXP - Technical Manual... -
Page 8: Removing End Caps, Freehub Body And Freewheel System
2.4 REMOVING END CAPS, FREEHUB BODY AND FREEWHEEL SYSTEM 1. Pull off both end caps by hand. If the end caps cannot be pulled off by hand, clamp the end caps carefully into a vice with ground clamping jaws and pull the hub / wheel upwards. -
Page 9: Dismounting The Bearing On The Non Drive Side
2.5 DISMOUNTING THE BEARING ON THE NON DRIVE SIDE 1. Tap out the bearing on the non drive side with slight hammer strokes onto the axle using a nylon hammer. 2. Remove the bearing from the axle. Ratchet EXP - Technical Manual... -
Page 10: Dismounting The Threaded Ratchet
2.6 DISMOUNTING THE THREADED RATCHET Due to the torque which acts on the threaded ratchet during pedaling, the threaded ratchet tightens during riding. We recommend loosening the ratchet only when the wheel is complete as the lever is much larger. 1. -
Page 11: Dismounting The Bearing From The Threaded Ratchet
3. Push the disassembly tool onto the axle and tap the bearing out of the ratchet with slight hammer strokes using a nylon hammer. 4. Remove the ratchet and the bearing from the tool. Ratchet EXP - Technical Manual... -
Page 12: Checking The Sealing
2.8 CHECKING THE SEALING The sealing must only be dismounted and changed when it is damaged. 1. Check the sealing for damages. 2. If there is clearly visible damage, replace the sealing: To replace the sealing, there is a notch in the hub shell. -
Page 13: Pressing The Bearing Into The Threaded Ratchet
HXTXXX00N8387S → The toothing of the threaded ratchet must face downwards. 4. Slide the axle with its long end through the bearing. 5. Put the hub or the wheel onto the mounting / dismounting tool. Ratchet EXP - Technical Manual... -
Page 14: Mounting The Bearing On The Non Drive Side
6. Put the installation cylinder onto the non drive side of the hub. → By using the axle and the installation cylinder, the hub shell is guided when the ratchet is screwed on. The ratchet HXTXXX00N5314S / cannot cant. HXTXXX00N5025S 7. - Page 15 → It must be possible to turn the hub with slight resistance. → The hub must not have axial play. 9. Tap the bearing on the non drive side in or out and repeat previous steps until the hub is turning smoothly. Ratchet EXP - Technical Manual...
-
Page 16: Mounting The Sealing
2.13 MOUNTING THE SEALING 1. Put the sealing onto the mounting tool. HXTXXX00N5026S 2. Make sure that the axle is in the hub with the short side first. 3. Put the mounting tool with the sealing onto the axle. HXTXXX00N5314S / 4. -
Page 17: Mounting The Freewheel System
• Only apply a thin, even layer of grease. • Only use the red DT Swiss special grease. 1. Apply DT Swiss special grease evenly to the outer and the inner toothing of the star ratchets using a fine brush. - Page 18 3. Put the spring onto the washer and put the ratchet onto the spring. 4. Put the washer, spring, and ratchet into the freewheel body.
-
Page 19: Putting On The Freewheel Body And The End Caps
The ratchets engage audibly and perceptibly. → The freewheel body cannot be turned clockwise. 2. Check the end caps for tight fit. → The end caps are firmly seated on the axle and are completely pushed on. Ratchet EXP - Technical Manual... - Page 20 USA - Grand Junction, CO 81505 D-33378 Rheda–Wiedenbrück info.us@dtswiss.com Germany info.de@dtswiss.com DT SWISS (FRANCE) S.A.S. DT SWISS POLSKA Sp. z o.o. Parc d‘Activites de la Sarrée ul. Towarowa 36 Route de Gourdon PL-64-600 Oborniki F - 06620 Le Bar sur Loup Poland info.fr@dtswiss.com...
Need help?
Do you have a question about the RATCHET EXP and is the answer not in the manual?
Questions and answers