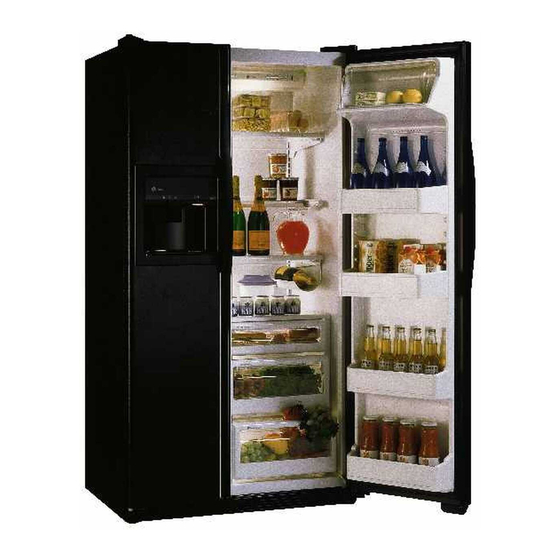
GE TFK Series Technician Manual

GE TFK Series Technician Manual

New generation sxs

Advertisement

g
GE Appliances
TECHNICIAN
MANUAL
1997 INTERNATIONAL REFRIGERATORS
NEW GENERATION SxS G/K LINES
Pub. No. 31-45703

Advertisement

Table of Contents
loading

Summary of Contents for GE TFK Series

  • Page 1 GE Appliances TECHNICIAN MANUAL 1997 INTERNATIONAL REFRIGERATORS NEW GENERATION SxS G/K LINES Pub. No. 31-45703...
  • Page 2: Table Of Contents

    1997 REFRIGERATORS GLOBAL NEW GENERATION TABLE OF CONTENTS Page NEW GEN MODELS SUMMARY NEW GEN G/K2 IMPROVEMENTS RATING PLATES KOREAN ENERGY LABEL MINI MANUAL CABINET STRUCTURE ICEMAKER DISPENSER User Operation 12-15 Service 16-26 Electronic System Diagnosis 27-28 ICEMAKER COMPLAINTS/DIAGNOSIS DISPENSER COMPLAINTS/DIAGNOSIS AIR FLOW SYSTEM 31-32 REFRIGERATION SYSTEM...
  • Page 3 (77 cm) (67 cm) (85 cm) (88 cm) MODEL NOMENCLATURE BRAND / PRODUCT ENGINEERING DESIGN / REVISION T = GE Refrigerator A = Initial Design B = First Revision CONFIGURATION MODEL YEAR F = Side-by-Side Z = 1997 P = Built-In Style...
  • Page 4 1997 REFRIGERATORS GLOBAL NEW GENERATION NEW GEN (24’, 28’, 30’) - TFK / TPG PRODUCT LINE FRONT VIEW IMPROVEMENT CODING (ES): EXTERNAL SWEAT (C): CORROSION (N): NOISE (E): ENERGY (F): FEATURE & APPEARANCE (CB): CODE BOARD © General Electric Company 1997...
  • Page 5 1997 REFRIGERATORS GLOBAL NEW GENERATION (V): VOLTAGE/THERMAL NEW GEN (24’, 28’, 30’) - TFK / TPG PRODUCT LINE REAR VIEW IMPROVEMENT CODING (ES): EXTERNAL SWEAT (C): CORROSION (N): NOISE (E): ENERGY (F): FEATURE & APPEARANCE © General Electric Company 1997...
  • Page 6: Rating Plates

    1997 REFRIGERATORS GLOBAL NEW GENERATION (CB): CODE BOARD (V): VOLTAGE/THERMAL RATING PLATE The rating plate is located at the top of the fresh food liner, near the right front corner. In addition to the refrigerator model and serial numbers, the rating plate specifies the minimum installation clearances;...
  • Page 7: Cabinet Structure

    1997 REFRIGERATORS GLOBAL NEW GENERATION after the refrigerator has been installed in the consumer’s home, it is not necessary to reinstall the fastener. After using the Mini-Manual, it should be returned to its original location for future use. CABINET STRUCTURE The outer case (top and sides) is made of prepainted steel with a textured finish.
  • Page 8 1997 REFRIGERATORS GLOBAL NEW GENERATION Base Grille The base grille is attached to the cabinet with two spring steel retainers that grip into elongated openings of the base channel. To remove the grille, pull it straight forward. Door Closure Mechanism Door closure mechanisms assist in closing the fresh food and freezer doors.
  • Page 9 1997 REFRIGERATORS GLOBAL NEW GENERATION Rollers Rollers at the base of the cabinet enable the consumer to easily move the refrigerator. The front rollers are adjustable to permit leveling the cabinet. The adjustment screws, located behind the base grille, have 3/8-inch hex-heads that are also slotted (for use of a large blade screwdriver). The rear rollers are not adjustable.
  • Page 10 1997 REFRIGERATORS GLOBAL NEW GENERATION Door Hinges Torx head (T-20) screws are used to mount the top and bottom hinges for both doors. Mounting holes in all four hinges are not elongated. Accordingly, the hinges are not adjustable. When reinstalling the hinges, tighten the screws to 60 in-lbs.
  • Page 11 1997 REFRIGERATORS GLOBAL NEW GENERATION Tape residue on the retainer strips and screws is difficult to remove and will prevent new tape from adhering satisfactorily. Thus, new retainer strips and screws are required when replacing a gasket. Replace the retainer strips one-at-a-time. When removing the retainer strips, do not remove the inner door locator screws near the center of all 4 strips.
  • Page 12: Icemaker

    1997 REFRIGERATORS GLOBAL NEW GENERATION Carefully position the gasket back on the door, aligning the outer skirt with the edges of the door, and press the corners to tack them to the exposed tape. Then, pull the ribbon slowly from between the tacked corners, pausing to press (not rub) the gasket into the exposed tape at about 2-inch intervals.
  • Page 13 1997 REFRIGERATORS GLOBAL NEW GENERATION DISPENSER In 1993, a completely new recess assembly in the freezer door was introduced in all side-by- side dispenser model refrigerators. These models have a single pad (rather than cradles) for dispensing water, crushed ice, or cubes. The selection of water, crushed ice, or cubes is made at the control console.
  • Page 14: Dispenser User Operation

    1997 REFRIGERATORS GLOBAL NEW GENERATION Dispenser User Operation On non-electronic models, water and ice selections are made by positioning the selector switch knob which is located at the lower left side of the console. The switch has a detent at each selection to ensure positive positioning.
  • Page 15 1997 REFRIGERATORS GLOBAL NEW GENERATION Dispenser User Operation - Electronic System A new control console was introduced on all 1993 models that had the electronic system. However, the electronic monitor and diagnostic feature was similar to previous models. 1. Touch pads provide for the selection of “chilled water”, “crushed ice”, or “cubed ice”. A beep will sound each time either pad is touched.
  • Page 16 1997 REFRIGERATORS GLOBAL NEW GENERATION 4. A red signal light will appear when the freezer temperature is above normal. The signal light will turn off when the temperature returns to normal. NOTE: The freezer temperature sensor, located on the inner door, quickly responds to changes in air temperature within the freezer compartment.
  • Page 17: Service

    1997 REFRIGERATORS GLOBAL NEW GENERATION DISPENSER SERVICE All electrical components (except the recess heater) are easily accessible from the front of the door. Accordingly, there is no service opening provided in the freezer inner door. Caution: disconnect the power source to prevent an electrical shock hazard and/or inadvertent dispensing of water or ice while servicing the dispenser.
  • Page 18 1997 REFRIGERATORS GLOBAL NEW GENERATION Control Housing To remove the control housing -- first remove the pad, the pad support and the escutcheon. Then, remove the screws at the front of the housing. Pull the housing forward about 1-inch and disconnect the 6-wire harness connector from the left end of the control module (printed circuit board).
  • Page 19 1997 REFRIGERATORS GLOBAL NEW GENERATION Lamp Socket To remove the lamp socket -- first remove the control housing. Then, disconnect the wiring harness from the lamp socket. Compress the tabs at the sides of the socket and withdraw the socket and lamp reflector from the bottom of the control housing.
  • Page 20 1997 REFRIGERATORS GLOBAL NEW GENERATION Pad Switch Actuator To remove the pad switch actuator-- first remove the control housing. Then, press the actuator out of the notch and hole at the rear of the control housing. To reinstall the pad switch actuator-- position it into the hole and notch at the rear of the control housing so that the actuator paddle is behind the switch...
  • Page 21 1997 REFRIGERATORS GLOBAL NEW GENERATION the deflector until it is firmly seated. Reinstall the pad switch actuator, control housing, escutcheon, pad support and pad. Ice Funnel To remove the ice funnel-- first remove the control housing. Using a small blade screwdriver, release the funnel support locking tabs that engage the control housing.
  • Page 22 1997 REFRIGERATORS GLOBAL NEW GENERATION To remove the duct door crank -- first remove the control housing. Then, remove the screw and retainer at the left end of the crank. Grasp the right end of the crank, at the lower end of the crank spring, and disengage the crank from the solenoid armature at the left and from the pivot hole at the right.
  • Page 23 1997 REFRIGERATORS GLOBAL NEW GENERATION solenoid, reinstall the lower mounting screws and tighten the upper mounting screw. Reattach the ground wire and the wiring harness. Caution: ensure the crank is engaged into the slot of the armature. Reinstall the control housing, escutcheon, pad support and pad.
  • Page 24 1997 REFRIGERATORS GLOBAL NEW GENERATION channels with a soft rubber mallet. Recess Assembly To dismount the recess assembly -- first, remove the recess trim. Then, remove the screws at the perimeter of the recess housing. Gently pull the recess assembly at the left side until it is out of the opening in the freezer door.
  • Page 25 1997 REFRIGERATORS GLOBAL NEW GENERATION that secure the water tubing nozzle to the rear of the recess housing and pull the nozzle out of the housing. Pull the tubing out of the freezer door. To reinstall the water tubing -- first, insert the lower end of the tubing into the conduit and feed it through the door until it exits at the lower hinge thimble.
  • Page 26 1997 REFRIGERATORS GLOBAL NEW GENERATION Control Console - electronic models To remove the control console -- insert a small blade screwdriver behind the console at the bottom, near the center, and pry forward to disengage the tabs from the control housing. Then, pull the console downward and disconnect the wiring harness connectors from the rear of the control board.
  • Page 27 1997 REFRIGERATORS GLOBAL NEW GENERATION Light Switch - electronic models To remove the light switch -- first remove the control console and dismount the control housing. Then, disconnect the wiring harness from the switch. Compress the tabs at the end of the switch and press it out of the control housing.
  • Page 28 1997 REFRIGERATORS GLOBAL NEW GENERATION Door Alarm Sensor - electronic models The door alarm sensor consists of a reed switch mounted on the right edge of the freezer door and a magnet mounted on the left edge of the fresh food door, (opposite the reed switch).
  • Page 29: Electronic System Diagnosis

    1997 REFRIGERATORS GLOBAL NEW GENERATION Current Sensors - electronic models The icemaker and defrost current sensors are integral components of the cabinet wiring harness. Both sensors are located above the evaporator at the rear of the freezer liner. The icemaker current sensor consists of a small transformer that has primary and secondary windings.
  • Page 30 1997 REFRIGERATORS GLOBAL NEW GENERATION Icemaker/Defrost Current Check ICEMAKER/DEFROST CURRENT CHECK The electronic system also provides a means for checking icemaker and defrost TOUCH & HOLD SIMULTANEOUSLY: current flow by touching and holding the “system check/reset” and “cubed ice” pads simultaneously. If current is detected in either the icemaker or defrost circuits, the corresponding diagnostic code can be observed on the...
  • Page 31 1997 REFRIGERATORS GLOBAL NEW GENERATION “system check/reset” and “crushed ice” pads simultaneously. Then, observe: One beep will be sounded then, for five seconds, the “normal” indicator and all other red and green indicators will be illuminated and the display will show 8E. After five seconds, the display will show a flashing PF, the “normal”, crushed OBSERVE:...
  • Page 32 1997 REFRIGERATORS GLOBAL NEW GENERATION COMMON COMPLAINTS / DIAGNOSIS FOR ICEMAKER © General Electric Company 1997...
  • Page 33 1997 REFRIGERATORS GLOBAL NEW GENERATION COMMON COMPLAINTS / DIAGNOSIS FOR DISPENSER © General Electric Company 1997...
  • Page 34: Air Flow System

    1997 REFRIGERATORS GLOBAL NEW GENERATION AIR FLOW SYSTEM Freezer Compartment Cold air from the evaporator, forced against the back of the icemaker mounting plate by the evaporator fan, is discharged into the freezer compartment through slots along the top of the mounting plate and through openings below the ice shelf.
  • Page 35 1997 REFRIGERATORS GLOBAL NEW GENERATION Machine Compartment The condenser fan, located at the rear of the machine compartment, draws room air through the base grille at the front of the cabinet. Ambient air entering the grille passes through openings in the base channel and then through the condenser, picking up heat.
  • Page 36: Refrigeration System

    1997 REFRIGERATORS GLOBAL NEW GENERATION REFRIGERATION SYSTEM The major components of the refrigeration system are a reciprocating type compressor, an auxiliary condenser, a main condenser, a condenser loop, and a spine-fin evaporator. These components, except for the condenser loop, are all replaceable separately. Compressor The compressor is a reciprocating type.
  • Page 37 1997 REFRIGERATORS GLOBAL NEW GENERATION evaporator end-frames. The replacement evaporator is furnished as a complete Lo-Side™, which includes the heat-exchanger (capillary/suction tube assembly). © General Electric Company 1997...
  • Page 38: Defrost System

    1997 REFRIGERATORS GLOBAL NEW GENERATION To remove the evaporator cover, first remove the ice bin, icemaker, ice shelf, and all freezer shelves. Disconnect the wiring harness plug at the upper left corner of the evaporator cover. Next, remove the return air grille at the bottom of the evaporator cover and the shelf tracks at the left and right sides.
  • Page 39 1997 REFRIGERATORS GLOBAL NEW GENERATION Control Console The control console is located at the upper rear of the fresh food compartment. Sliding knobs at the front of the console permit the consumer to regulate the temperature of both compartments. The freezer control knob is located at the left and the fresh food control knob is at the right.
  • Page 40 1997 REFRIGERATORS GLOBAL NEW GENERATION Bezel To dismount the bezel, first position both control knobs to the extreme left positions; then pull the knobs from the shafts. Grasp the two ribs of the bezel and pull the bezel out of the mounting cleats. To reinstall the bezel, first position the knob shafts to the extreme left positions.
  • Page 41 1997 REFRIGERATORS GLOBAL NEW GENERATION Module Disassembly The freezer temperature control and the fresh food air damper are operated by rack and pinion gears. To disassemble the control module, the two gear racks must be removed from the control channel. First, slide the damper rack off at the right end.
  • Page 42 1997 REFRIGERATORS GLOBAL NEW GENERATION Air Damper Control To remove the air damper, remove both gear racks, the damper gear, and the two mounting screws. Using a putty knife, carefully pry the foam nozzle and gasket from the air damper. Press the wiring harness and temperature control capillary from the slot in the air damper housing.
  • Page 43 1997 REFRIGERATORS GLOBAL NEW GENERATION Module Reinstallation When reinstalling the control module, make sure the vinyl sleeve is fully positioned over the temperature control capillary and the foam gasket is positioned over the end of the foam nozzle. Carefully insert the capillary and wiring harness through the foam insert in the compartment divider.
  • Page 44: Inadequate Cooling Diagnosis

    1997 REFRIGERATORS GLOBAL NEW GENERATION INADEQUATE COOLING DIAGNOSIS FLOW CHART -- R134a © General Electric Company 1997...
  • Page 45 1997 REFRIGERATORS GLOBAL NEW GENERATION SCHEMATIC WIRING DIAGRAM (This schematic wiring diagram is a typical example of a SxS dispenser model.) © General Electric Company 1997...
  • Page 46 1997 REFRIGERATORS GLOBAL NEW GENERATION © General Electric Company 1997...

This manual is also suitable for:

Tpg seriesTfg20Tfg22Tfg25Tpg24Tfk28 ... Show all

Table of Contents