Advertisement
Quick Links
Thank you for purchasing a Sealey Product. Manufactured to a high standard this tool will, if used according to these instructions and
properly maintained, give years of trouble free performance.
IMPORTANT: PLEASE READ THESE INSTRUCTIONS CAREFULLY. NOTE THE SAFE OPERATIONAL REQUIREMENTS, WARNINGS AND CAUTIONS.
USE THIS PRODUCT CORRECTLY AND WITH CARE FOR THE PURPOSE FOR WHICH IT IS INTENDED. FAILURE TO DO SO MAY CAUSE
DAMAGE AND/OR PERSONAL INJURY AND WILL INVALIDATE THE WARRANTY. PLEASE KEEP INSTRUCTIONS SAFE FOR FUTURE USE.
1.
SAFETY
WARNING! DO NOT use the torque wrench if
damaged or thought to be faulty.
Ensure all workshop safety rules, regulations and
conditions are complied with.
Maintain correct balance and footing. Ensure the
floor is not slippery and wear non-slip shoes.
Keep children and unauthorised persons away
from the working area.
Avoid over-torquing the wrench; 110% of
maximum torque range; as this will cause loss of
accuracy. "----" will be displayed when this
occurs.
Keep the wrench away from magnetic fields.
On first usage training by a qualified person is
recommended.
In operation when you hear a continuous tone,
cease activity, especially in the case of target
torque/angle is low.
Ensure all sockets, extensions, drivers are rated
correctly and are of flawless construction. Avoid
using adaptors/extensions for best safety and
best accuracy.
DO NOT use on electrical circuits, the plastic
handle of the wrench is not insulated.
DO NOT subject the wrench to excessive force,
drops, shakes, shocks or knocks.
DO NOT operate the wrench in damp conditions.
DO NOT operate the wrench in dusty conditions.
DO NOT press or grip on the LCD or control
panel area.
DO NOT use the torque wrench if the batteries
are low, torque accuracy will be affected.
2.
INTRODUCTION
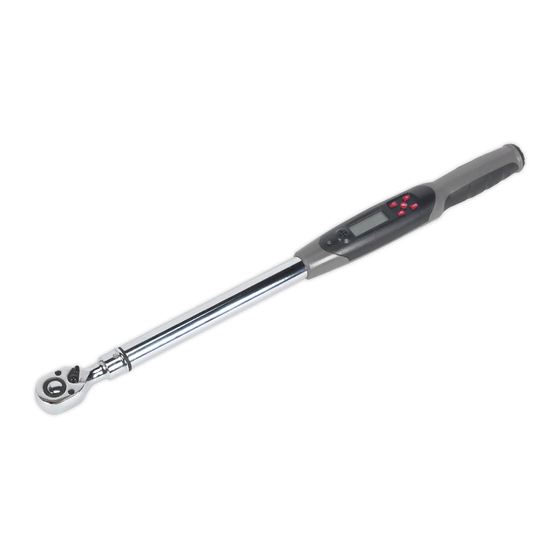
Rugged and resilient digital torque wrench suitable
for workshop and factory use. LCD read-out with
LED, vibration and audible alarms to indicate
achieved and target torque levels. Features angle
mode, eliminating the need for angle gauges and
protractors providing an accurate and fast way to
measure torque plus angle tightening sequences. It
will also accumulate angle measurement when
multiple turns are required, ideal for use where
access is limited. Selectable track or peak modes
and up to 5 user preset memories available. Read-
outs in Nm, lb.in, lb.ft, kgf.m or degrees. Reversible
Chrome Vanadium 72-tooth ratchet allows torque
reading in either direction. Accurate to ±2% between
10% and 100% of wrench's stated capacity. Supplied
with test certificate and storage case.
© Jack Sealey Limited
INSTRUCTIONS FOR:
1/2" SQUARE DRIVE DIGITAL ANGLE TORQUE
WRENCH 20 - 200Nm
STW306.V2
MODEL No:
3.1
3.2
3.3
4.1
4.1.1 Unscrew the battery compartment cap
4.1.2 Insert four new AAA size batteries (positive
Note: DO NOT mix types of battery, or used and new
Original Language Version
3.
SPECIFICATION
Specification.
Drive: . . . . . . . . . . . . . . . ½"Sq
Overall Length:. . . . . . . . 610mm
Angle Range: . . . . . . . . . 1° - 360°
Angle Accuracy: . . . . . . . ±2%
Torque Range: . . . . . . . . 20 - 200Nm
Torque Range: . . . . . . . . 14.7 - 147.5lb.ft
Torque Range: . . . . . . . . 176.5 - 1770lb.in
Torque Range: . . . . . . . . 2 - 20kgf.m
Torque Accuracy: . . . . . . ±2%
Battery Qty x Type:. . . . . 4 x AAA (Supplied)
(Clockwise and anti-clockwise of reading,
10% - 100% of full scale)
Re-calibration.
We recommend, to ensure continued
accuracy, the calibration of each wrench
should be checked annually, beginning one
year after first use. Calibration should also be
checked after any impact, over torquing or
other misuse. Contact your Sealey Dealer to
arrange recalibration.
Repair Kit available.
Part No: STW306.RK
Contact your authorised Sealey dealer.
4.
OPERATION
Installing batteries.
anti-clockwise
end first) into the compartment. Push the
battery cap on against the spring and screw
clockwise to lock.
ones. Keep battery terminals clean. If the
battery voltage is low, the battery symbol will
be displayed on the screen and soon
afterwards, the wrench will turn off. Replace
with a new set of 4 batteries.
Replacing/removing batteries
STW306.V2 Issue: 2(I) - 13/06/16
Advertisement

Summary of Contents for Sealey STW306.V2
- Page 1 STW306.V2 MODEL No: Thank you for purchasing a Sealey Product. Manufactured to a high standard this tool will, if used according to these instructions and properly maintained, give years of trouble free performance. IMPORTANT: PLEASE READ THESE INSTRUCTIONS CAREFULLY. NOTE THE SAFE OPERATIONAL REQUIREMENTS, WARNINGS AND CAUTIONS.
- Page 2 Press to confirm. 4.7.5 After confirmation, the screen will return to the main screen. Original Language Version © Jack Sealey Limited STW306.V2 Issue: 2(I) - 13/06/16...
- Page 3 (M1-M5). 4.11.3 Place the wrench onto a nut/bolt and begin to and switch to torque measurement mode. tighten, use a smooth motion and avoid jerky movements. Original Language Version © Jack Sealey Limited STW306.V2 Issue: 2(I) - 13/06/16...
- Page 4 Refer to section 4.1 for battery removal. Dispose of batteries according to local authoriy guidelines. Under the Waste Batteries and Accumulators Regulations 2009, Jack Sealey Ltd are required to inform potential purchasers of products containing batteries (as defined within these regulations), that they are registered with Valpak’s registered compliance scheme.


Need help?
Do you have a question about the STW306.V2 and is the answer not in the manual?
Questions and answers