Table of Contents
Advertisement
Quick Links
Trademarks
Windows 95/98/Me and Windows NT/2000/XP are
registered trademarks of Microsoft Corporation. All other
brands and product names are trademarks of their
respective companies.
Copyright
No part of this publication may be reproduced in any form
or by any means or used to make any derivative (such as
translation, transformation or adaptation) without the
express written consent of the manufacturer as stipulated
by the United States Copyright Act of 1976.
FCC Compliance Notice: Radio Frequency
Notice
This device complies with part 15 of the FCC Rules.
Operation is subject to the following two conditions:
1. This device may not cause harmful interference.
2. This device must accept any interference received,
including interference may cause undesired operation.
Note: This equipment has been tested and found to comply
with the limits for a Class B digital device, pursuant to Part
15 of the FCC Rules. These limits are designed to provide
reasonable protection against harmful interference in a
residential installation. This equipment generates, uses
and can radiate radio frequency energy and, if not installed
and used in accordance with the instructions, may cause
harmful interference to radio communications. However,
there is no guarantee that interference will not occur in a
particular installation. If this equipment does cause harmful
interference to radio or television reception, which can be
determined by turning the equipment off and on, the user is
i
Advertisement
Table of Contents

Related Manuals for Longshine LCS-883R-DSL-4FN


Summary of Contents for Longshine LCS-883R-DSL-4FN
- Page 1 Trademarks Windows 95/98/Me and Windows NT/2000/XP are registered trademarks of Microsoft Corporation. All other brands and product names are trademarks of their respective companies. Copyright No part of this publication may be reproduced in any form or by any means or used to make any derivative (such as translation, transformation or adaptation) without the express written consent of the manufacturer as stipulated by the United States Copyright Act of 1976.
- Page 2 encouraged to try to correct the interference by one or more of the following measures: (1). Reorient or relocate the receiving antenna, (2). Increase the separation between the equipment and receiver, (3). Connect the equipment into an outlet on a circuit different from that to which the receiver is connected, (4).
-
Page 3: Table Of Contents
Table of Contents 1. INTRODUCTION..............1 .............. 1 BOUT ANUAL ..............2 ACKING ........2 ETWORK OFTWARE EQUIREMENTS ROADBAND IREWALL OUTER MBEDDED PORT 10/100M ............. 3 WITCH 2. HARDWARE INSTALLATION .......... 5 ................. 5 REPARATION DSL/C NSTALL IREWALL OUTER TO THE ABLE ODEM (WAN).................. - Page 4 ............31 DVANCED FUNCTION REPARATION ONNECTING TO THE ROADBAND DSL/C ........... 32 ABLE IREWALL OUTER DHCP S ..............33 ERVER DMZ S ..............38 OFTWARE ..............41 TATIC OUTING ..............44 OCAL ERVER DDNS (D DNS) ............46 YNAMIC DMZ PHY (DMZ P ) ..........
-
Page 5: Introduction
1. Introduction ongratulations on your purchase of this Broadband DSL/Cable Firewall Router. During the design process, we have given much thought to making this device as convenient to use as possible. The end result is the Broadband DSL/Cable Firewall Router that can be set up in minutes, allowing network users to access the Internet via either the high-speed DSL or Cable connection. -
Page 6: The Packing List
Basic functions in any Telnet program TCP/IP and related issues This manual details procedures for Windows 95/98/Me or Windows NT/2000/XP operating systems. For other operating systems, please refer to your operating system’s documentation for networking and other information. The Packing List The following items should be included in the Broadband DSL/Cable Firewall Router package: One Broadband DSL/Cable Firewall Router unit... -
Page 7: Broadband Firewallr
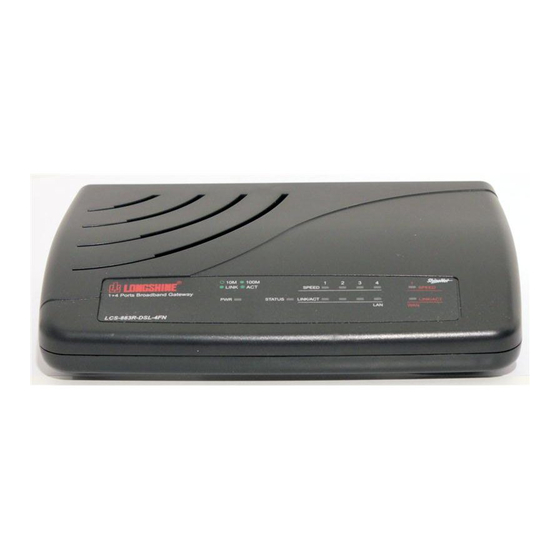
Broadband Firewall Router Embedded 4-port 10/100Mbps Switch The Broadband DSL/Cable Firewall Router with embedded 4-port 10/100Mbps Switch features auto-negotiation switch ports and provides the flexibility to fit into your operational space and network environment. Connect one external DSL/Cable Modem an RJ-45 Interface 4-Port 10/100Mbps Switch Note: Prepare twisted-pair cables with RJ-45 plugs. - Page 8 LED Indicators State Indication Broadband DSL/Cable On (Green) Firewall Router’s power is on. Power Broadband DSL/Cable Firewall Router’s power is off. When power is first switched Status On (Red) on, the Status indicator will flash five times. Port has a valid network On (Green) connection at 100Mbps.
-
Page 9: Hardware Installation
2. Hardware Installation Preparation The following items are needed in order to install the Broadband DSL/Cable Firewall Router unit: The Broadband DSL/Cable Firewall Router unit One AC power adapter UTP cable (Cat.5 Twisted-pair) One DSL/Cable modem with RJ-45 LAN interface Install Firewall Router to the DSL/Cable Modem (WAN) Turn off the modem’s power. - Page 10 Connect one end of the UTP cable to the Broadband DSL/Cable Firewall Router. Connect the other end of the UTP cable to any network computer. Connect the power adapter to the Broadband DSL/Cable Firewall Router’s AC power adapter jack. Plug the AC power adapter into a power outlet. Turn the modem’s power on.
-
Page 11: Power O N Self Test
Power On Self Test (POST) The Broadband DSL/Cable Firewall Router automatically performs a Power On Self Test (POST) when powered on. Successful powering up of the Broadband DSL/Cable Firewall Router is indicated by five flashes of the red LED marked Status on the topside of the Broadband DSL/Cable Firewall Router. -
Page 12: Getting Started
3. Getting Started Preparation In general, using a Broadband DSL/Cable Firewall Router for Internet access requires at least the DSL or Cable service. We assume you have obtained DSL/Cable service from your local telephone company or Internet Service Provider (ISP). Please have your connection information ready, including: a. -
Page 14: Setting Up The Firewall
Setting up the Firewall Router using the Web browser he Broadband DSL/Cable Firewall Router comes with a pre-set default IP address, 192.168.1.1. It also features a DHCP server. To configure it over your TCP/IP network, please follow the directions listed below. Note: If you’re installing the Broadband DSL/Cable Firewall Router in a pre-existing IP network, please see the Configuring... - Page 15 Double-click the Network icon.
- Page 16 Check to see if the TCP/IP protocol is installed. If not, please add this protocol before proceeding to the next step. Select TCP/IP protocol and click Properties.
- Page 17 Click Obtain an IP address automatically. Click OK. Click OK. 10. Restart your computer. You are now ready to use your Web browser or other Internet applications. 11. After the computer restarts, open your browser.
- Page 18 12. Type the default IP address (192.168.1.1) in the Location box and press Enter. The device’s Home Page will then appear. 13. It then displays an authentication dialog for the Broadband DSL/Cable Firewall Router. Type the default administration user name, admin, and type the default configuration password 0000 and click OK button as shown in following figure.
- Page 19 15. Click the Connection Setup in the left-hand column, and the following box will appear. 16. Choose either DSL or Cable modem as your connection method. 17. Complete the following settings: (The example shown is for Static-IP ADSL) In “Select your internet connection type”, click “Select”...
- Page 20 Choose “static-IP ADSL”, and the following image will appear. a. In “IP Address Assigned by the ISP” type the IP address provided by your ISP. b. In “Subnet Mask” type the Subnet Mask IP address provided by your ISP. c. In “Gateway’s IP Address” type the Default Gateway IP address provided by your ISP.
-
Page 21: Configuring Broadband
Configuring Broadband DSL/Cable Firewall Router Pre-existing Networks he Broadband DSL/Cable Firewall Router is easily added to an existing network that already has IP addresses assigned. The following assumes that you have configured TCP/IP for your network (and on each computer) and are now adding the Broadband DSL/Cable Firewall Router for Internet access. - Page 22 Open the Network properties dialog box of the computer, and write down its current IP settings, including IP address and DNS Server IP address (provided by your ISP). Next, check (tick) the Specify an IP Address option in the TCP/IP properties dialog box and enter 192.168.1.2 for the IP address and 255.255.255.0 for the subnet mask.
- Page 23 Click Administration Setup in the left-hand column. It then enters the sub-menu. In LAN Setting in the right-hand column. The LAN TCP/IP configuration page appears. In the TCP/IP Settings, enter the IP address you selected in Step 1 (such as 192.168.1.1) in the LAN IP Address field.
- Page 24 14. Now open the Network properties dialog box of the computer again and select TCP/IP protocol. 15. Change the computer’s IP address, subnet mask, and DNS Server IP address (provided by your ISP) back to their original settings. 16. Next, enter the IP address of the Broadband DSL/Cable Firewall Router as the computer’s gateway IP address (see Step 1).
-
Page 25: Configuring Non -Dhcp C
Configuring Non-DHCP Computers he Broadband DSL/Cable Firewall Router can be used with computers that do not support DHCP. Follow these steps to identify and configure non-capable DHCP computers. 1. Determine if any computers on your network are not DHCP capable. An example of a non-DHCP capable computer would be a DOS/Windows 3.x computer running an older version of TCP/IP software from a third-party vendor. - Page 26 Selecting an IP Address If your networked computers do not support DHCP or you would like to manually specify IP addresses, you need to manually set the IP address on each computer. The Broadband DSL/Cable Firewall Router is pre-configured with an IP address of 192.168.1.1 and a subnet mask of 255.255.255.0.
-
Page 27: Password Setting
Password Setting You may use a password to restrict who is able to change the Broadband DSL/Cable Firewall Router’s settings. To do so, please follow the procedure below: Click the Administration Setup button in the left-hand column, and then choose “Password”. Type the current password into Current Password. -
Page 28: Setting Date And Time
Setting Date and Time One function of Broadband DSL/Cable Firewall Router is that it allows you to set the initial time when you install the device. This enables the time of any hacker activity in your network to be recorded. To setup this function, follow the procedure below: Click the Administration Setup button in the left-hand column, and then choose “Date &... -
Page 29: Monitor Status
Monitor Status You can view all the setting for the Broadband DSL/Cable Firewall Router’s WAN and LAN status. Click the Status button in the left-hand column, and then choose “Status”. The following box will appear. Network Access Monitor You can use this function to monitor all the connections from LAN to WAN. - Page 30 PC’s IP Address: User’s LAN IP. Internet Activities: User browses Public IP. Port No.: User uses the Port number. Tools The Broadband DSL/Cable Firewall Router provides two tools. 1. PPPoE Diagnosis: This tool allows you to connect to an ISP and will disconnect yourself if necessary.
- Page 31 2. Ping: This tool could make sure that you could ping WAN IP or not. 3. CFG Save/Load: The Broadband DSL/Cable Firewall Router includes a function that enables the user to set the router once only, with no reset option. The function is “Save/Load CFG Setting”.
- Page 32 Please follow these steps to setup Save/Load CFC Setting. To “save” setting: Click the “Save Configure” button, it saves the current setting to a file “cfg.bin”. To “restore” setting: Click the “Browse” button, and select the cfg.bin file. Then, click the “Reload Configure” button, to restore the setting.
-
Page 33: Loading The Defaultv
Loading the Default Values If you make any errors while configuring the Broadband DSL/Cable Firewall Router, or if you wish to reset the Broadband DSL/Cable Firewall Router to default settings, please follow the steps below. This procedure will reset the settings to factory defaults. - Page 34 Click the “Yes” button twice for the all default settings to take effect. The Default Values have now been loaded. Now that the Broadband DSL/Cable Firewall Router’s defaults are loaded, please re-configure the Broadband DSL/Cable Firewall Router by following the steps given in the previous sections of this chapter.
-
Page 35: Advanced Configuration
Advanced Configuration Advanced function Once you've finished the basic setup (in Chapter 3) of the Broadband DSL/Cable Firewall Router, the Broadband DSL/Cable Firewall Router should be able to function properly. This chapter provides directions configuring the Broadband DSL/Cable Firewall Router’s advanced features, including: DHCP Server DMZ Software... -
Page 36: Router
Preparation: Connecting to the Broadband DSL/Cable Firewall Router In order to proceed with the advanced configuration of the Broadband DSL/Cable Firewall Router, you need to have completed the Broadband DSL/Cable Firewall Router’s basic setup detailed in Chapter 3. Open the web browser in your Windows 95/98/Me or Windows NT/2000/XP computer. -
Page 37: Dhcp Server
DHCP Server Please follow these steps to set up the DHCP Service. Click Advanced Setup in the left-column. The sub-menus then appear. Click DHCP Server, and the following picture will appear. Enable DHCP Server: This option allows you to enable or disable the Broadband DSL/Cable Firewall Router’s DHCP feature. - Page 38 Primary DNS IP: This option allows you to set the IP address of the Domain Name Server. The information is provided form your ISP. Secondary DNS IP: If the Primary DNS IP is not available, the Secondary DNS IP will start. WINS IP: This option allows you to set the IP address of the server that provides the Windows Internet Name Service (WINS), if available on your network.
- Page 39 Show Fixed-IP Table: This option allows you to set aside the fixed IP address of a computer and its associated network interface card address. This is usually used to set aside the IP addresses for devices such as servers, mail hosts or Intranet servers that must have a fixed IP address for access purposes.
- Page 40 Insert the PC’s IP and its LAN card’s MAC address. Click “Save”. Click “Save”. Click “Apply”. The procedure is now completed.
- Page 41 Show Current IP Ranges: This option allows you to change the DHCP IP range.
-
Page 42: Dmz Software
DMZ Software The DMZ Software can be accessed from the public Internet via the IP address associated with the DSL/Cable service. The current WAN IP address is displayed in the Status page as, for example, WAN: [203.69.107.186]. Please follow these steps to set up the DMZ Software: Click Advanced Setup in the left-column. - Page 43 type the LAN IP of the computer you wish to make visible to the public Internet. Click Save button. Click Apply button. The DMZ Software setup is now completed.
- Page 44 Microsoft VPN Setup To set up this device to support Microsoft VPN (Pass-Through), please follow the instructions below: Please ensure that the VPN server is running. Have the IP address of this computer ready. Connect to the Firewall Router by using your browser.
-
Page 45: Static Routing
Static Routing This device allows users to define the internal routing table to best integrate this router into the current IP (sub) network. Note: Defining a new routing requires more advanced TCP/IP knowledge. Any wrong routing information may make the whole IP network unreachable, until it is corrected again. - Page 46 Click ”View or Add Static Routing Table” Click “Add a Static Route”. Type the destination’s IP address, the net mask, the Gateway IP, and Metric.
- Page 47 Select “Yes” in the Private option, if you do not want the device to broadcast the routing information (RIP). Select “No”, if you do want the device to broadcast the routing information to other routers on the network. Click the Save button. Click Apply in the left-hand column.
-
Page 48: Local Server
Local Server The Broadband DSL/Cable Firewall Router offers support for hosting servers on your private network that can be accessed from the public Internet. While the addresses on the Broadband DSL/Cable Firewall Router are not directly accessible by a computer on the Internet, the Broadband DSL/Cable Firewall Router allows for selective access by mapping incoming access requests for a particular service to a designated host that can process requests for a specific... - Page 49 Fill in the Internal Port number. Click “Save” and then click “Apply”. The procedure is now completed.
-
Page 50: Ddns (Dynamic Dns)
DDNS (Dynamic DNS) The Broadband DSL/Cable Firewall Router has a special function to provide one user who only has a dynamic IP to setup a personal domain name. The function is DDNS (Dynamic Domain Name Service). Please follow these steps to setup DDNS. Click Advanced Setup in the left-column. -
Page 51: Dmz Phy (Dmz Physical)
Host name: It is your domain name. Mx Name: It is your Mail server name. Wildcard: You want to use “wildcard”, or not. Click “Save”. 10. Click “Apply”. Note : The Broadband DSL/Cable Firewall Router only provides to apply for DDNS to www.dyndns.org. DMZ PHY (DMZ Physical) This function enables the separation of local area (LAN) and public area. - Page 52 2. Enable/Disable the Physical DMZ Port. When it enabled, the LAN port #1 will be set to Physical DMZ port. (Default setting is Disable) 3. Set the DMZ IP range, ensuring the DMZ IP is within this range. 4. Click “Save”, and then “Reply”. 5.
-
Page 53: Firewall Configuration
5.Firewall Configuration Firewall Function An Internet firewall allows approved traffic in and out according to a predetermined plan. A firewall is a safeguard security mechanism that provides protection between LAN and WAN. It protects the intranet from intrusion by outsides and hackers, thus providing a secure environment for users. -
Page 54: Basic Settings
Basic Settings Follow the procedure below to setup the Broadband DSL/Cable Firewall Router’s Basic Setting. Click Firewall Setup in the left-column. The sub-menus then appear. Click “Basic Settings”, and the following box will appear. If you want to start up the firewall, you must choose “Yes”... - Page 55 “Default Action for WAN-to-LAN and DMZ-to-LAN Access Rules” allow you to protect your ‘LAN service’. The default is “Discard”. “Number of Incomplete TCP Connections Allowed A Minute” judges how many packets of incomplete TCP connection constitute an attack. The default is “20” packets. “Self-Protection Time When A DoS Attack Is Detected”...
- Page 56 13. The Broadband DSL/Cable Firewall Router’s Basic Setting is now in place.
-
Page 57: Access Rules
Access Rules Broadband ADSL/Cable Firewall Router could be according to administrator’s request to create Access Rules to protect your network. You could follow the procedure to setup it. LAN to WAN Access Rules: Click Firewall Setup in the left-column. Then click the Access Rules in the top-column. - Page 58 HTTP Inspection must operate in coordination with URL Blocking rules. 10. Click “Save”, and then click “Apply”. 11. The setup is now completed. LAN to DMZ Access Rules: 1. Click Firewall Setup in the left-column. Then click the Access Rules in the top-column. It then appears the sub-menus.
- Page 59 WAN to DMZ Access Rules: 1. Click Firewall Setup in the left-column. Then click the Access Rules in the top-column. It then appears the sub-menus. 2. Click “WAN DMZ”, and then it will appear a picture as below. 3. Protocol: Select “TCP” or “UDP” or “ICMP” or “ANY”.
- Page 60 2. Click “WAN LAN”, and then it will appear a picture as below. 3. Protocol: Select “TCP” or “UDP” or “ICMP” or “ANY”. 4. Type into the Source IP’s range (WAN IP). 5. Type into the destination IP’s range (LAN IP). 6.
- Page 61 3. Protocol: Select “TCP” or “UDP” or “ICMP” or “ANY”. 4. Type into the Source IP’s range (DMZ IP). 5. Type into the destination IP’s range (WAN IP). 6. Type into the range of the port number. 7. Select “Forward” or “Discard”. 8.
- Page 62 3. Protocol: Select “TCP” or “UDP” or “ICMP” or “ANY”. 4. Type into the Source IP’s range (DMZ IP). 5. Type into the destination IP’s range (LAN IP). 6. Type into the range of the port number. 7. Select “Forward” or “Discard”. 8.
-
Page 63: Content Filter
Content Filter The Broadband DSL/Cable Firewall Router can be used to restrict users browsing the Home Page. You can fill in the URL or key word. To setup this restriction, please use the following procedure: Click Firewall Setup in the left-column. The sub-menus then appear. - Page 64 Fill in the URL or Key Word that you want to restrict access to. Web Page Content Filtering: Active X: Allows or disallows the Active X packet pass-through. Java Applet: Allows or disallows the Java packet pass-through. Cookies: Allows or disallows the Cookie packet pass-through.
-
Page 65: E-Mail Alerts
E-mail Alerts The Broadband DSL/Cable Firewall Router can setup the administrator’s e-mail address and the Mail server’s IP. If a hacker attacks your network, the Firewall Router can automatically send an e-mail to the administrator. Use the following procedure to setup this facility: Click Firewall Setup in the left-column. -
Page 66: Event Log
Event Log The Broadband DSL/Cable Firewall Router can record all information that you want, including “Hacker attack”, “Connection from LAN to WAN”, and “Connection from WAN to LAN”. Use the following procedure to setup this facility: Click Firewall Setup in the left-column. The sub-menus then appear. -
Page 67: Upgrading The Broadband Dsl/Cable
6. Upgrading the Broadband DSL/Cable Firewall Router Upgrading the Router in Windows NT/2000/XP (using TCP/IP) Ensure that igate25.bin is located in your current working directory. At the NT/2000/XP’s DOS prompt, type “tftp <the Firewall Router’s IP address > get upgrade”. Type “tftp –i <the Firewall Router’s IP address>... -
Page 68: Upgrading The Router In Windows 95/98/Me (Using Tcp/Ip)
Upgrading the Router in Windows 95/98/Me (using TCP/IP) 1. Type the default IP address (192.168.1.1) in the Location box and press Enter. 2. The authentication dialog for the Broadband DSL/Cable Firewall Router then appears. Type the default administration user name, admin, and type the default configuration password 0000 and click the OK button as shown in following figure. -
Page 69: Upgrading The Router On Unix (Using Tcp/Ip)
6. Click the “Upgrade” button. 7. The upgrade is now completed. Upgrading the Router on UNIX (using TCP/IP) Log in as root. Ensure igate25.bin is located in your current working directory. Type “tftp <the Firewall Router’s IP address>”. At the tftp prompt, type “get upgrade”. Change to binary transfer mode. -
Page 70: Troubleshooting
7. Troubleshooting IP Address Conflicts If you start up your Windows 95/98/Me or Windows NT/2000/XP computer and the following message dialog box shows — indicating an IP address conflict — please follow the directions given below. Solution Windows 95/98/Me Click Start, point to Run, and type winipcfg. When done, click the Run button. - Page 71 Figure A Click the Release All button. The Winipcfg will then release your current TCP/IP configuration as shown in Figure B. Figure B Click OK. Done.
- Page 72 Windows NT/2000/XP At your DOS prompt, type ipconfig /release and press [Enter]. Next, type ipconfig /renew and press [Enter]. The conflict should now be resolved.
-
Page 73: Appendix
Appendix Loading the Default Values Once you have configured the Broadband DSL/Cable Firewall Router (see Chapters 3 and 4), the configuration settings are saved in the Broadband DSL/Cable Firewall Router’s internal memory. However, you can manually reset them to factory defaults by using the web browser or by following the steps given below: Power off/on the Broadband DSL/Cable Firewall Router.
Need help?
Do you have a question about the LCS-883R-DSL-4FN and is the answer not in the manual?
Questions and answers