Table of Contents
Advertisement
Quick Links
Advertisement
Table of Contents

Related Manuals for Spectrum Technologies WatchDog 3305ADD


Summary of Contents for Spectrum Technologies WatchDog 3305ADD
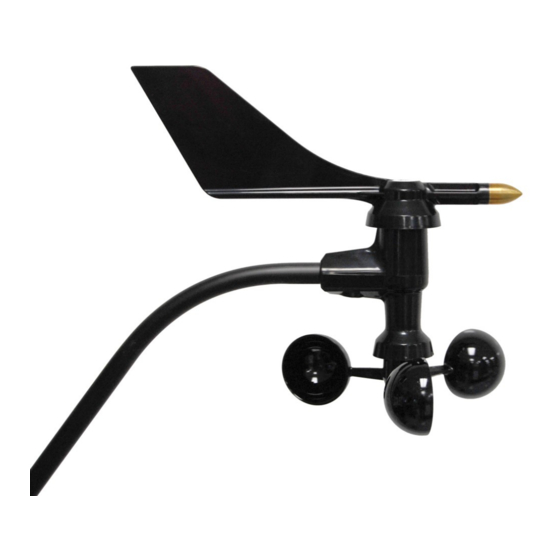
- Page 1 Digital Anemometer PRODUCT MANUAL Item # 3305ADD...
-
Page 2: Table Of Contents
CONTENTS Specifications Components/Hardware Tools and Materials Needed Attaching the Wind Cups Choosing the Best Anemometer Location Orienting the Anemometer Arm Installing the Anemometer Installing the Wind Vane Configuring the Pups to Use the Digital Anemometer Direction Calibration Troubleshooting Warranty Back This manual will familiarize you with the features and operation of your new Digital Anemometer. -
Page 3: Components/Hardware
Components The anemometer includes the components listed below. Be sure you have all listed components before continuing. Assess your installation and make sure you have all necessary parts, tools, and materials pic- tured below before you begin. Hardware The hardware kit contains the items most commonly needed for the installation of the anemometer. -
Page 4: Tools And Materials Needed
Tools and Materials Needed In order to confirm the anemometer is reading accurately, you will need access to the SpecConnect Web Portal or a computer on which the Retriever and Pup Launch Utility (RPLU) has been installed. You will also need the following tools and materials to install your anemometer: •... -
Page 5: Choosing The Best Anemometer Location
Choosing the Best Anemometer Location Use the following guidelines to determine the best location for your anemometer. • Install the anemometer in a location where wind flow is unob- structed by trees and nearby buildings. • For the most accurate readings, the anemometer should be mount- ed at least 4 feet (1.2 m) above the roof line. -
Page 6: Installing The Anemometer
Installing the Anemometer Note: Only 3 digital anemometers can be connected to a WatchDog Sensor Pup. Check the Anemometer Base Orientation Decide which way to orient the base before installing it. 1. Insert the anemometer arm into the base. 2. Attempt to push the #4-40 x 1 1/4" pan head screw through the holes in the arm and the base. - Page 7 Installing on Antenna Mast or Metal Pipe Use the supplied U-bolts to mount on an antenna mast or pipe with an outside diameter between 1 1/4" and 1 3/4" (32 to 33 mm). To mount on a smaller pole, obtain a U-bolt that fits the base open- ings but that has a shorter threaded section.
-
Page 8: Installing The Wind Vane
Installing the wind vane 1. Slide the wind vane down onto the shaft as far as it will go. (Because of the shape of the shaft, the vane will only go on one way.) 2. Use the allen wrench provided to tighten the set screw on the side of the wind vane. -
Page 9: Configuring The Pups To Use The Digital
Configuring the Pup to Use the Digital Anemometer The Sensor Pup must have one of its available ports configured for wind to use the Digital Anemometer. Both the Retriever and Pup must be running firmware version 01.04.XX or higher to use the Digital Anemometer. -
Page 10: Direction Calibration
Direction Calibration If it is not possible to point the anemometer arm toward true north, the following procedure allows you to reprogram the sensor so wind direction will be accurate. 1. Ensure the unit is plugged into the Sensor Pup and the Pup has been already configured for the anemometer in the port being used. -
Page 11: Troubleshooting
Troubleshooting While your anemometer is designed to provide years of trouble-free operation, occasionally problems may arise. If you are having a prob- lem with your unit, please check the following troubleshooting proce- dures before sending the unit in for repair. You will be able to solve many of the problems yourself. - Page 12 Warranty This product is warranted to be free from defects in material or work- manship for one year from the date of purchase. During the warranty period Spectrum will, at its option, either repair or replace products that prove to be defective. This warranty does not cover damage due to improper installation or use, lightning, negligence, accident, or unau- thorized modifications, or to incidental or consequential damages be- yond the Spectrum product.
Need help?
Do you have a question about the WatchDog 3305ADD and is the answer not in the manual?
Questions and answers