
Related Manuals for Big Dutchman AirMaster EM50


Summary of Contents for Big Dutchman AirMaster EM50
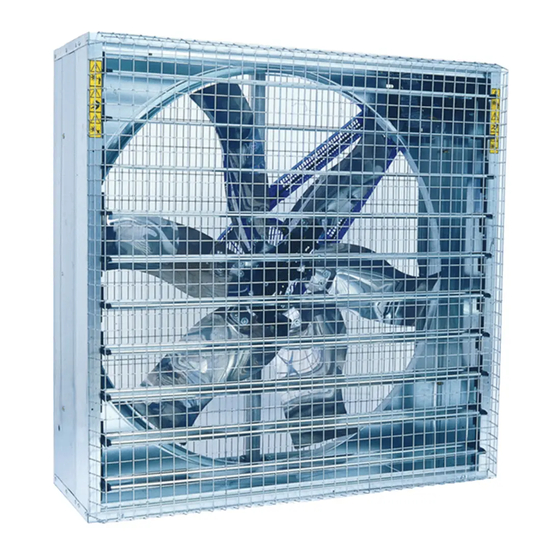
- Page 1 Operation Manual AirMaster EM50 Code No. 99-97-2341 Edition: 03/2015 GB These instructions are the original instructions!
-
Page 5: Table Of Contents
Storage and transportation ........18 AirMaster EM50... - Page 6 Pyramidal Shape Mesh Assembling ....... .44 AirMaster EM50 Edition: 03/2015...
-
Page 7: Basic Instructions
1.2 Designated use The Big Dutchman fans must only be used according to their designated use. The Big Dutchman fan EM50 serves the purpose of moving or circulating exhaust air in livestock facilities. -
Page 8: Prevention Of Reasonably Predictable Incorrect Uses
Page 2 Basic instructions 1.3 Prevention of reasonably predictable incorrect uses The following uses of this Big Dutchman system are not permitted and are therefore deemed a misuse: Utilising the system with aggressive and/or corrosive materials in quantities that do •... -
Page 9: Safety Symbols In The Manual And On The Installation
RISK OF INJURY due to operating auger, chain or cable discs! Never reach into or climb into a feed container or trough while the motor is running. AirMaster EM50 Edition: 03/2015 M 2341 GB... -
Page 10: Scope Of Deliverables
1.5 Scope of deliverables After removing the packaging, check for completeness and integrity of the product. Contact the supplier immediately in case of missing or damaged components. Caution: Never install a damaged or incomplete device. AirMaster EM50 Edition: 03/2015 M 2341 GB... -
Page 11: Ordering Spare Parts
1.6 Ordering spare parts Operational safety is the prime necessity! For your own safety only use original Big Dutchman spare parts. For foreign products that have not been released or recommended or for modifications carried out (e.g. software, control units) we cannot judge whether there is a safety risk in connection with the Big Dutchman systems. -
Page 12: Warranty And Liability
If you need help, describe the accident as follows: where it happened • what happened • the number of persons injured • what type of injury • who is reporting the accident! • AirMaster EM50 Edition: 03/2015 M 2341 GB... -
Page 13: Pollution Abatement Regulations
Apart from the safety-relevant instructions in this manual and the safety precautions valid in the country of use, also observe the generally acknowledged technical regulations (safe and appropriate working according to UVV, VBG, VDE etc.). AirMaster EM50 Edition: 03/2015 M 2341 GB... -
Page 14: Copyright
© Copyright 2015 by Big Dutchman For further information please contact: Big Dutchman International GmbH · P.O. Box 11 · D-49360 Vechta · Germany Phone +49 (0) 4447-801-0 Fax +49 (0) 4447-801-237 E-Mail: big@bigdutchman.de, Internet: www.bigdutchman.de... -
Page 15: Safety Instructions
Check the proper functioning of the system after any kind of repair works. You may only take the device into operation when all protective systems have been put into place again. Follow the directions of the electric and water supply company. AirMaster EM50 Edition: 03/2015 M 2341 GB... -
Page 16: Safety Instructions When Operating Electrical Appliances
Let damaged or broken plugs be replaced by an electrician. Do not pull the plug from the socket at the flexible cable. For the respective connections please see the enclosed connecting plan of the system parts delivered. AirMaster EM50 Edition: 03/2015 M 2341 GB... -
Page 17: System Safety Instructions
Assure yourself beforehand that the main switch is in the OFF position and can not be put in the ON position without your knowledge. The different areas of the Big Dutchman installations are characterised by different types of construction. There are several system parts that run out, rotate or slide that can increase the risk of an accident when you are unaware of the type of construction. -
Page 18: Individual Components
Touching live parts might lead to severe injuries caused by electric shock! During repair or maintenance work, live parts may be bare! Never touch bare electrical components. Equipment with bare electrical components must not be used by the farm staff. AirMaster EM50 Edition: 03/2015 M 2341 GB... -
Page 19: Personal Safety Instructions
During all mounting, maintenance and cleaning work at the installation, wear protective clothes and shoes as well as safety glasses and gloves if required. AirMaster EM50 Edition: 03/2015 M 2341 GB... -
Page 20: Jewellery
Long hair increases the risk of an accident. • Long hair can get caught in moving or rotating system parts. • Secure long hair by tying it back or wearing a bandanna or cap! AirMaster EM50 Edition: 03/2015 M 2341 GB... -
Page 21: Safety Contrivances
To be precise, the non-observance of these instructions can lead to: Failure of vital functions of the installation • Failure of prescribed maintenance methods • Dangers for people owing to electrical and mechanical influences. • AirMaster EM50 Edition: 03/2015 M 2341 GB... -
Page 22: Safety Component Parts
If safety component parts are missing or defective, the original part must be ordered from Big Dutchman and replaced immediately! Description Code no. Wire mesh guard half EM48/50... -
Page 23: Mounting Instructions
D depth refers to the fan with supple-mentary CE shutter safety mesh. 3.2 Scope of delivery Please check the delivery for completeness and intactness after opening. Contact the supplier in case components are missing or damaged. Caution! Do not install damaged or incomplete fans! AirMaster EM50 Edition: 03/2015 M 2341 GB... -
Page 24: Assembly / Mounting / Installation
Storage temperature: -40 °C to +60 °C • Avoid impacts to and unnecessary loads on the packaging and/or the fan. • Check the fan for damage in case the packaging is damaged. • AirMaster EM50 Edition: 03/2015 M 2341 GB... -
Page 25: General Cleaning
3.6 Complaints / questions Our products are manufactured in accordance with valid international standards. Please contact your dealer or installer regarding questions on the use of our products and specific areas of use. AirMaster EM50 Edition: 03/2015 M 2341 GB... -
Page 26: Maintenance Schedule
In case of doubt, check the dust layer on the motor. It should not be thicker than 1-2 mm anywhere. AirMaster EM50 Edition: 03/2015 M 2341 GB... - Page 27 Replace the V-belt when it can no longer be tensioned or has been damaged. • For replacing the V-belt detach the motor bracket first. Tension the V-belt as • described above. Only use original parts. • AirMaster EM50 Edition: 03/2015 M 2341 GB...
-
Page 28: Spare Parts List For Em50
Shutter blade 6/10 for EM50/EMC50 60-20-1136 Shutter blade central 12/10 for EM50/ 81-02-7340 EMC50 Wire mesh guard half EM48/50 60-20-1108 Centrifugal multispeed motor 81-30-9758 system (available EM50 as assembled part singlespeed motor 60-20-1099 only) EM50 AirMaster EM50 Edition: 03/2015 M 2341 GB... - Page 29 V-belt pulley cpl. for impeller EM50 60-25-3049 Central pulley for EMC50/EM50/EM36 60-20-1114 10/A Hub cpl for EM36/EM50 60-20-1141 10/B V-belt 13x8-2240 DIN 2215 A88 for 60-20-1249 10/C EM48/50 Tie rod PVC 10 holes for EM50 81-04-5523 AirMaster EM50 Edition: 03/2015 M 2341 GB...
- Page 30 Bearing right with spring for shutter 60-20-1140 14/C blade EM36/50 Bearing left with spring for shutter 60-20-1139 14/D blade EM36/50 Short warning sticker 2262600 15/A Long warning stickers 2262500 15/B Warning on the shutter 2262095 15/C AirMaster EM50 Edition: 03/2015 M 2341 GB...
-
Page 31: Complete Central Pulley - Exploded View
Central pulley for EMC50/EM50/EM36 60-20-1141 Hub cpl for EM36/EM50 60-20-1142 Hexagon nut M6 w/geared collar galv f/V-belt pulley 60-20-1111 Nut M25x10mm EM 81-03-3949 Calott cover nut EM50 81-01-7960 Waterproof distance piece EMC50, EM50, EM36 AirMaster EM50 Edition: 03/2015 M 2341 GB... -
Page 32: Spare Parts List For Protection (Option)
60-20-1092 contains 17/A + 17/B EM50 Wire mesh guard f/ shutter EM 50 60-20-1093 17/A A - Spacer for mesh fixing 60-20-1107 17/B B - Drilling screw 6.3x 19 DIN 7504-K- 99-10-3998 galv AirMaster EM50 Edition: 03/2015 M 2341 GB... -
Page 33: Assembled Motors
Single 1400 81-03-3113 1100 Single 220-240 1700 2203705 1100 Single 50/60 230/240 5,2/3 1400/ 60-20-3075 1700 1100 Multi 230/400 5,2/3 1380/ 60-20-3071 1670 Capacitor for electric motor 1,50HP 1PH for EM50 (40MF) 81-21-1152 AirMaster EM50 Edition: 03/2015 M 2341 GB... -
Page 34: Pulley Codes Table
DP100 M51 F24 C8 60-20-3073 1100 Multi DP95 M51 F24 C8 81-22-7102 1100 Single or DP95 M51 F24 C8 2249050 Multi 1100 3 or 1 Single or DP80 M51 F24 C8 81-04-3933 Multi AirMaster EM50 Edition: 03/2015 M 2341 GB... -
Page 35: Bolts And Nuts Description
(Purpose: to fix the central pulley to the hub) A: Bolts M8x25mm 2280600 B: Washer ø 8mm 2275100 C: Nuts M8 2273700 (Purpose: to fix the propeller to the hub) AirMaster EM50 Edition: 03/2015 M 2341 GB... - Page 36 (Purpose: to fix the tie-rod to the central shutter blade fork) Stop collar 7x17mm (2268400) 81-02-5180 (Purpose: to fix the two pvc tie-rod with ten holes to left and right shutter blade fork) AirMaster EM50 Edition: 03/2015 M 2341 GB...
-
Page 37: Assembling Tools
Central clips for meshes 2449100 (Purpose: to fix the safety meshes guard to the housing) 5.8 Assembling tools Ref. Q.ty Pic. Description Code-Nr. Riveting machine RAC 171 81-30-7730 Inserting machine KJ 45 81-21-8870 AirMaster EM50 Edition: 03/2015 M 2341 GB... -
Page 38: Assembling Guideline
Join bottom panel to side panels and fix qty. 4 pop rivets (ref. 18) for each edge by using riveting machine (ref. 34). AirMaster EM50 Edition: 03/2015 M 2341 GB... - Page 39 Place the top panel (ref. 3) with motor support in correspondence with motor slot on the Venturi. Then fix it to side panels with qty. 4 pop rivet for side and to Venturi with qty. 1 pop rivet. AirMaster EM50 Edition: 03/2015 M 2341 GB...
- Page 40 Make sure that Venturi and each panel are joined by the long threaded bushes. Place the rubber grommet (ref. 22) for electric cable protection on the side panel in correspondence with the motor slot. AirMaster EM50 Edition: 03/2015 M 2341 GB...
- Page 41 (ref.21/c) and qty. 2 oval plates (ref. 21/d). Place the oval plates between pro- peller central support and panels. Place the oval plate over support frame and then start to screw the nuts. AirMaster EM50 Edition: 03/2015 M 2341 GB...
- Page 42 Fix motor slide to top panel by means qty. 2 bolts (ref. 20)and qty. 2 washers (ref. 20). Tighten bolts by using 13 mm spanner (ref. 37). AirMaster EM50 Edition: 03/2015 M 2341 GB...
-
Page 43: Centrifugal System And Pulley To Propeller Assembling
(ref. 10/c) on the cen- tral pulley. Place the propeller (ref. 5) on the central pulley assembly. Fix the bolts (ref.24/a), the washers (ref. 24/b) and nuts (ref. 24/c) in order to fix the propeller. AirMaster EM50 Edition: 03/2015 M 2341 GB... - Page 44 CHECK TENSIONING : right tensioning is obtained when maximum deflexion on one side only (half-way from motor and central pulley) is about 15 mm. AirMaster EM50 Edition: 03/2015 M 2341 GB...
- Page 45 Insert knurled axle (ref. 30) by the smooth side on the plastic fork, then take plastic shutter rod on the centrifugal system and fix them together by using a small hammer (ref. 38). AirMaster EM50 Edition: 03/2015 M 2341 GB...
- Page 46 (ref. 29/b). Tighten the nuts by using two 10 mm spanners (ref. 39). Repeat this operation for the other side. In certain versions two hooks are used instead of the screws. AirMaster EM50 Edition: 03/2015 M 2341 GB...
-
Page 47: Shutter Blades Assembling
By means of a screw-driver (ref. 40) insert cover plate over the fan housing. Fix the cover plate on each side by using the screws (ref. 32/a) with pneumatic screw-driver (ref. 36/ AirMaster EM50 Edition: 03/2015 M 2341 GB... -
Page 48: Safety Meshes Guard Assembling
Fix the screw (ref. 32/a) with the washer (ref. 32/b) into the central pulley axle. Fix all the components by using the pneumatic screw-driver (ref. 36/f). AirMaster EM50 Edition: 03/2015 M 2341 GB... -
Page 49: Safety-Kit Assembling
Follow the safety mesh guard assembling procedures and then fix the complete assembled you have obtained by mean of qty.1 screw (ref. 32/a). AirMaster EM50 Edition: 03/2015 M 2341 GB... -
Page 50: Pyramidal Shape Mesh Assembling
6 metal clips (ref. 17/b) and qty. 6 screw (ref. 17/b). The metal clips must be fixed in the position as in the picture. Fix it by using a pneumatic screw- driver (ref. 41). AirMaster EM50 Edition: 03/2015 M 2341 GB...
Need help?
Do you have a question about the AirMaster EM50 and is the answer not in the manual?
Questions and answers