
Related Manuals for TVILUM Circo Kids 242-17-9388


Summary of Contents for TVILUM Circo Kids 242-17-9388
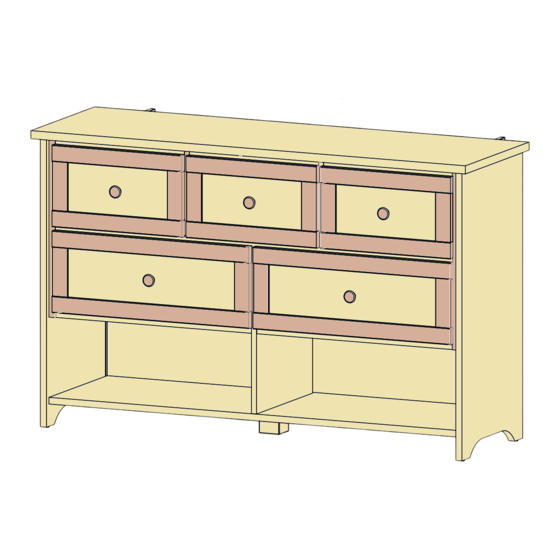
- Page 1 Circo Kids 5 Drawer Dresser DPCI # 242 - 17 - 9388 (White) DPCI # 242 - 17 - 9389 (Chocolate) >> assembly instructions 92270...
-
Page 2: Customer Service Information
All orders normally ship within 24 hours. All Parts and Shipping are FREE! Toll Free Customer Support 1-800-932-2006 Monday – Friday from 8 am to 5 pm EST. E-mail: helpline-us@tvilum.com Order parts anytime or download assembly instructions through our website at www.tvilum.com... -
Page 3: Introduction
Congratulations on your latest Target purchase Don't start sweating over this box of parts. This will be easy. We did the hard work for you. All you need to do is follow our simple instructions and you'll be on your way to transforming your room in no time. -
Page 4: Table Of Contents
table of contents customer service information introduction parts list hardware 6 - 7 how to use the cam lock system assembly 9 - 32 specification sheet questionnaire information sheet products available QUESTIONS? Just call 1-855-MYTGTHOME (855-698-4846) for parts and service. For faster service, have the style number and DPCI number ready when calling. -
Page 5: Parts List
ITEM DESCRIPTION QUANTITY 00594 right drawer side 00595 left drawer side 02843 drawer back small 02847 drawer back large 06037 drawer bottom small 06044 drawer bottom large 09405 09405 back panel drawer front small drawer front large left side spacer divider top divider bottom right side... -
Page 6: Hardware
hardware 10401 20203 20212 20228 21839 small dowel pin large dowel pin drawer fastener drawer glide spacer panel clip 26085 25259 25483 25610 26020 leg screw drawer knob screw connector bolt short system screw long system screw 26214 31570 31418 31685 31686 small cam... - Page 7 hardware 41407 65806 81039 88060 97642 94009 drawer knob warning label allen wrench wall attachment strap 63001 floor glide drawer glide...
-
Page 8: How To Use The Cam Lock System
how to use the cam lock system CORRECT CORRECT 180°... -
Page 9: Assembly
step 1 drawer assembly - insert cams CORRECT CORRECT 00594 00595 31570 31685 small cam cam bolt Screw cam bolts into the drawer fronts E + EA, cam bolts must be screwed down flush. Place the small cams into the large holes on the drawer sides 00594 + 00595, so that the arrow is facing the edge of the drawer side. - Page 10 step 2 drawer assembly - attach drawer bottom to back 02843 06037 finished side up 02847 06044 finished side up paper Press the drawer bottom 06037 and 06044 (with the finished side up) into the grooves on the drawer back 02843 and 02847. Paper overlays the slot, but it has a slit so drawer bottom inserts well.
- Page 11 step 3 drawer assembly - attach drawer sides 00594 02843 06037 finished side up 00594 00595 02847 20228 finished side up 06044 drawer fastener 00595 Align holes at back of the drawer sides, 00582 and 00583 with the holes on the drawer back 02843 and 02847.
- Page 12 step 4 drawer assembly - attach drawer front 06037 06044 00594 00595 00594 06037 00595 06044 Place the cam bolts that are attached to the drawer fronts into the holes on the drawer sides. Make sure the drawer bottom is completely inserted into the grooves in the drawer front and drawer back, then tighten cams.
- Page 13 step 5 drawer assembly - attach drawer knob and warning label 02843 00594 00595 00594 02847 25483 81039 88060 00595 drawer knob screw drawer knob warning label Attach warning label to the inside of the drawer side. Only in one drawer. Use the drawer knob screws to attach the drawer knob to the drawer front E and EA.
- Page 14 step 6 case assembly - insert large dowel pins and cams CORRECT CORRECT 20212 31686 large cam large dowel pin Insert large dowel pins into holes on the ends of the center rail KA, left bottom rail IA and right bottom rail IB. Insert large cams into the large holes near the ends of the center rail KA, left bottom rail IA and right bottom rail IB, so that the arrow is facing the end of the rail.
- Page 15 step 7 case assembly - insert small dowel pins and cams CORRECT CORRECT 20203 31686 large cam small dowel pin G x 2 Insert small dowel pins into small holes on the end of the G, GA, IC and UA. Insert large cams into the large holes near the ends of the G, GA, IC and UA so that the arrow is facing the end of the rail.
- Page 16 step 8 case assembly - insert cams and small dowel pins CORRECT CORRECT 20203 31570 31686 large cam small dowel pin cam bolt Insert small dowel pins into small holes on the end of the FB and HB. Insert large cams into the large holes near the ends of the FB and HB so that the arrow is facing the end of the rail.
- Page 17 step 9 case assembly - attach side spacers to side panels front (finished edge) 26085 front (finished edge) long system screw Place spacer FC on FB and FC. Make sure that the finished edge is toward the front. Use 2 of the long system screws to attach each of the side spacers to the side panel.
- Page 18 step 10 case assembly - drawer glide detail front of glide back screw location 26085 41407 21839 drawer glide long system spacer screw drawer glide Slide the drawer glide to the open position, then place a long system screw into the back hole as shown on the drawing. Note: Oil is on slide for lubrication.
- Page 19 step 11 case assembly - attach drawer glides front of glide front screw location 26020 front (finished edge) short system screw front (finished edge) Place drawer glide with back screw and spacer (from step 10) so that the screw is over the back hole of the side panel, then tighten screw. Move the front of the glide until you can see a drilled hole through the slot on the glide, then use a short system screw to attach the front of the glide.
- Page 20 step 12 case assembly - attach drawer glides on divider top and bottom front of glide back screw location front screw location front (finished edge) 41407 26020 short system screw front (finished edge) drawer glide Place drawer glide so that the back hole is over the back hole of the side panel, then use a short system screw to attach the back of the glide.
- Page 21 step 13 case assembly - attach left, right and back bottom rail IMPORTANT. Make sure the parts are placed exactly as shown on the drawing. The cam holes and grooves should be located like the bottom drawing below. 31418 front double cam bolt (finished edge) front...
- Page 22 step 14 case assembly - attach center rail bottom front (finished edge) 25610 97642 front (finished edge) connector bolt allen wrench Use the connector bolt to fasten the center rail KA at the top of divider bottom GA. Tighten with the Allen wrench.
- Page 23 step 15 case assembly - attach shelf bottom 25610 97642 connector bolt front (finished edge) front allen wrench (finished edge) Use the connector bolts to fasten the shelf UA at the bottom of divider bottom GA. Tighten with the Allen wrench.
- Page 24 step 16 case assembly - attach left and right side bottom front (finished edge) front (finished edge) front (finished edge) Assemble the right side HB and left side FB with IA, IB, IC, KA and UA. Then tighten the cams.
- Page 25 step 17 case assembly - insert back panel 09405 Slide the back panel into the grooves on the side panels. Line up the bottom of the back panel so that it slides into the groove on the back bottom rail IC. Note: the panel will be slightly above the top of the side panels, even when inserted completely.
- Page 26 step 18 case assembly - insert cams and attach dividers to top panel 31570 front (finished edge) cam bolt front (finished edge) Screw cam bolts into the top panel LA, cam bolts must be screwed down flush. Assemble the dividers G to the top panel LA. Tighten the cams.
- Page 27 step 19 case assembly - attach top rail 26085 long system screw Assemble the top rails, K with the top panel, LA using top rail screws.
- Page 28 step 20 case assembly - top panel assembly 09405 25610 97642 connector bolt allen wrench Place the holes on top panel LA over the dowels on to the sides FB and HB. Tighten the cams. Use the connector bolts to fasten the center rail KA to the dividers G. Tighten with the allen wrench.
- Page 29 step 21 case assembly - install panel clips 2" IMPORTANT. The panel clips stabilize the dresser. 09405 10401 panel clip Place the thin edge of the panel clips into the groove between the back panel 09405 and the top LA, back bottom rail IC and side panels HB and FB. Tighten the screws on the support clips but do not over tighten.
- Page 30 step 22 case assembly - attach floor glide and leg 09405 65806 25259 63001 leg screw floor glide Use a hammer to attach floor glides to the bottom of the side panels FB and HB as shown. Place the dowel pins on the leg in holes on the shelf UA, secure the leg with leg screw.
- Page 31 step 23 case assembly - mount wall attachment strips IMPORTANT. The screw supplied together with the wall attachment strip is to be used only for fixing the wall attachment strip to the furniture. In addition to this, you vill need to choose a screw or fitting which is suitable for securing the bracket to the kind of walls you have.
- Page 32 step 24 case assembly - attach drawer assembly Screw attaches from inside of drawer. 26214 drawer glide screw Slide groove on drawer sides over the drawer glide. Pull the slide forward until the threaded hole on the glide aligns with the hole in the drawer side. Attach glide screw from inside the drawer box into the drawer glide.
-
Page 33: Specification Sheet
Tvilum liability is expressly limited to the costs of material for repair or replacement of defective goods and in no event will Tvilum be liable for incidental or consequential damages resulting from use of the product. Some states... -
Page 34: Questionnaire
6. Did you consider the product easy to assemble? Other 7. Are you satisfied with the finished product? Mail To: Tvilum 8. Would you recommend this product to a friend? 12. For what room did you purchase this product? Attn: Customer Service 9. -
Page 35: Information Sheet
Read more at www.tvilum.com THIS�PRODUCT NOUS�VOUS�GA que ce produit: will ensure you A product tested for harmful substances A été évalué pour toute substance da pour garder un environnement sain à Helps to maintain healthy indoor climate de votre maison Wood from sustainable forestry Est fabriqué... -
Page 36: Products Available
Full Circo Kids collection available for purchase 3 Drawer Dresser Night Stand / Side Table 5 Drawer Dresser In stores In stores On Target.com DPCI # 249 - 20 - 0201 DPCI # 249 - 20 - 0200 (White) DPCI # 242 - 17 - 9388 (White) (White) DPCI # 249 - 20 - 0211...
Need help?
Do you have a question about the Circo Kids 242-17-9388 and is the answer not in the manual?
Questions and answers