Table of Contents
Advertisement
Quick Links
Advertisement
Table of Contents

Subscribe to Our Youtube Channel
Related Manuals for Boss Audio Systems BCAMW80


Summary of Contents for Boss Audio Systems BCAMW80
-
Page 3: Introduction Of Using A Dash Cam
Thank you for purchasing BCAMW80 Dual FHD 1920x1080 @30fps Digital Vehicle Dash Cam. Our series of Dash Cams have been designed specifically with ease of use in mind, it is recommended NOT to change the default settings, which have been carefully selected to give the best performance for day to day use. -
Page 4: Cautions Of Using A Dash Cam
PRECAUTIONS Please read this manual carefully before operation and keep it for future reference. It will be helpful should you encounter any operational problem. WARNING: Do not expose this product to rain, moisture or water under any circumstances, doing so may result in the risk of electric shock or fire. CAUTION: To reduce the risk of electric shock, do not perform any servicing other than that contained in the instruction manual unless you are qualified to do so. -
Page 5: Table Of Contents
TABLE OF CONTENTS ..............03 INTRODUCTION OF USING A DASH CAM ................04 CAUTIONS OF USING A DASH CAM ....................05 TABLE OF CONTENTS ................... 06 PRODUCT SPECIFICATION ....................07 PACKAGE CONTENTS ....................07 PRODUCT FEATURES ................... 08 CAMERA - PARTS & CONTROLS ................... -
Page 6: Product Specification
PRODUCT SPECIFICATION Model Number BCAMW80 2.0MP Sony Exmor IMX323 CMOS Sensor (front) Image Sensor 2.0MP Sony Exmor IMX323 CMOS Sensor (inside) Lens Type / Angle / Aperture 6G / 150° / F1.8 Video Resolution 1920x1080 @30fps (front) + 1920x1080 @30fps (inside) -
Page 7: Package Contents
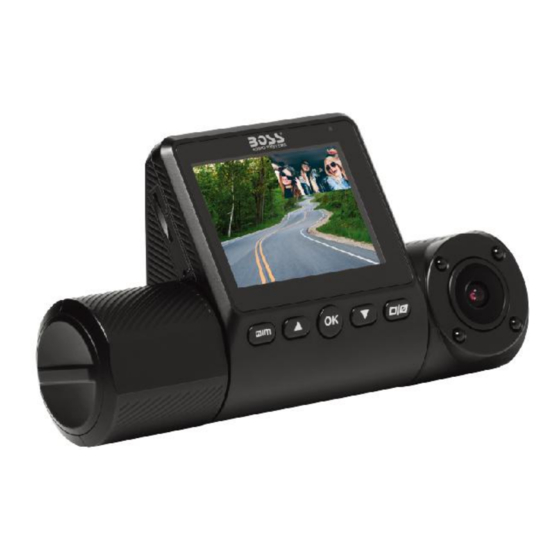
PACKAGE CONTENTS Please check the contents of your BCAMW80 product package.The actual products might appear slightly different from pictures shown below. BCAMW80 DashCam Windshield Mount Car Charger Adhesive Sticker x2 Instruction Manual GPS Module 16G Micro SD card PRODUCT FEATURES 2.0"... - Page 8 CAMERA- PARTS & CONTROLS(CONTD.) Please see below to identify the parts and controls of your Dash Cam. 1. Indicator Lights Standby status: Red light (On), Blue light (On). Recording status: Red light (On), Blue light (Flash). 2. Screen 2.0' LCD colour screen for the viewing of recorded files on the Dash Cam. - 8 -...
-
Page 9: Camera - Parts & Controls
CAMERA - PARTS & CONTROLS(CONTD.) Continued from previous page. 3. Infrared Lights 4pcs IR LED lights for low light conditions and ensures flawless video footage even when the passenger cabin is dark. 4. Inside Camera lens Wide Angle 150°, F/1.8 aperture and 6 Element glass lens with Sony IMX323 sensor for optimum picture quality inside of your vehicle. - Page 10 CAMERA - PARTS & CONTROLS(CONTD.) Continued from previous page. 12. Reset In the unlikely event the Dash Cam becomes unresponsive, press the RESET button to restart the Dash Cam. 13. Microphone Integral microphone for audio recording. 14. Power On / Off Press and hold for 3 seconds to turn on / off the Dash Cam.
-
Page 11: In Vehicle Installation
IN VEHICLE INSTALLATION Please follow the instructions below for first-time installation of the Dash Cam. For day to day use simply remove the camera from the mount as required. 1. Insert MicroSD Card Making sure that the gold contacts are facing towards the Mount side of the Dashcam. Push the memory card until it clicks into place. -
Page 12: Video Mode
VIDEO MODE The key below explains the various information displayed on the screen when your Dash Cam is in Video mode, some icons will only be displayed once the relevant function has been selected within the Video menu, as described below. 1. - Page 13 VIDEO MODE (CONTD.) Video Menu The Video Menu is accessed by pressing the MENU button whilst in video mode. Use the up and down buttons to highlight the function that you'd like to change and press the OK button to enter the settings sub-menu. Once in the sub-menu, use the up and down buttons to highlight the required setting and then press OK to confirm your selection and return to the Video Menu.
- Page 14 VIDEO MODE (CONTD.) Continued from previous page. 5. Set IR light Select for increasing brightness and improving the quality of video/photo in dark environment. Options: Auto, On, Off Default Setting: Auto 6. Time- lapse Record Time Lapse recording is a technique whereby the frequency at which file frames are captured (frame rate) is lower than that used when playing back the recording.
- Page 15 VIDEO MODE (CONTD.) Continued from previous page. 10. G-Sensor Turn Off or adjust the sensitivity of the built in G Sensor. The G Sensor detects forces which will automatically protect the current recording in event of a collision. Options: High, Medium, Low and Off Default Setting: Medium 11.
-
Page 16: Photo Mode
PHOTO MODE Press and hold the MODE button in order for the unit to switch over to Photo Mode. The key below explains the information displayed on the screen when your Dash Cam is in Photo mode. 1. Mode: indicates the Dash Cam is in Photo mode. 2. - Page 17 PHOTO MODE (CONTD.) Photo Menu The Photo Menu is accessed by pressing the MENU button whilst in photo mode. The default settings have been carefully selected to allow you to use the Dash Cam without need to change any settings.However,should you wish to change a setting please see below. Use the up and down buttons to highlight the function that you'd like to change and press the OK button to enter the settings sub-menu.
- Page 18 PHOTO MODE (CONTD.) Continued from previous page. 4. Capture Mode Select the timer, the camera will take a photo the selected period of time after the OK button has been pressed.. Options: Single, 2S Timer, 5S Timer and 10S Timer Default Setting: Single 5.
-
Page 19: Playback Mode
PLAYBACK MODE Press and hold the MODE button in order for the unit to switch over to Playback Mode, the Dash Cam will display the last recorded file. Video Files: 1. File type: indicates a video file is being viewed. 2. - Page 20 PLAYBACK MODE Photo Files: 1. File type: indicates a photo file is being viewed. 2. White Balance: displays current color of photos. 3. File number: displays current file number. 4. Photo resolution: shows photo quality resolution. 5. Quality: displays current Quality level setting. 6.
-
Page 21: Setup Menu
SETUP MENU (CONTD.) Setup Menu The Setup Menu is accessed by pressing the MENU button twice. The default settings have been carefully selected to allow you to use the Dash Cam without the need to change any settings. However, should you wish to change a setting then please see below. - Page 22 SETUP MENU (CONTD.) Continued from previous page. 4. Date / Time Adjust the date / time as required using the OK button to toggle through the fields and use the up & down buttons to set variables. Press MENU to exit and return to the Setup Menu.
-
Page 23: Bcam Player
BCAM PLAYER The BCAM Player Software is available to download in below links. MAC version: https://www.bossaudio.com/software/BCAMW80_PLAYER_MAC.zip Windows version: https://www.bossaudio.com/software/BCAMW80_PLAYER_Windows.zip It is designed to enable the viewing of recorded files as well as checking journey route / GPS data (location and speed) and G-Sensor information. The key below explains the various information displayed within the BCAM Player. -
Page 24: B/Cam App For Ios & Android (Installation)
B/CAM APP FOR IOS & ANDROID (INSTALLATION) The Wi-Fi function allows you to use your smartphone to view videos during recording, adjust the device settings, control the basic functions (record, play, pause,etc.) and playback videos directly to your smartphone. The B/CAM APP is available for free download from App Store of iPhone and Google Play Store of Android smartphones. -
Page 25: B/Cam App For Ios & Android (Operation)
Using the App Open the App by tapping on the B/CAM button on your phone and click the camera button to connect BCAMW80 camera. After camera connected, the live video screen will appear. NOTE: When connecting for the first time, the live video screen will appear in about 10-20 seconds. -
Page 26: Troubleshooting
TROUBLESHOOTING PROBLEM SOLUTION The sticker will not stay in Ensure that the protective cover (plastic film) has been removed place upon my windscreen. from the adhesive sticker. I cannot insert the MicroSD MicroSD card are very small and require delicate use. Align the card. - Page 27 TROUBLESHOOTING PROBLEM SOLUTION I get the message “SD Card The SD card has been formatted in another device and the Error. Please format SD Cluster Size is not compatible or the SD card is formatted in card” on screen. ExFAT/NTFS. There may also be an error on the card. Use the Setup option to re-format the SD card from within the Dash Cam.
- Page 29 - 29 -...
Need help?
Do you have a question about the BCAMW80 and is the answer not in the manual?
Questions and answers