Table of Contents
Advertisement
INSTALLATION MANUAL
AIR
CONDITIONER
Please read this installation manual completely before installing the product.
Installation work must be performed in accordance with the national wiring
standards by authorized personnel only.
Please retain this installation manual for future reference after reading it
thoroughly.
Ceiling Concealed Duct - High Static
Original instruction
P/NO : MFL68320319
www.lg.com
Advertisement
Table of Contents

Subscribe to Our Youtube Channel
Related Manuals for LG MULTI V ARNU07GBHA4


Summary of Contents for LG MULTI V ARNU07GBHA4
- Page 1 Installation work must be performed in accordance with the national wiring standards by authorized personnel only. Please retain this installation manual for future reference after reading it thoroughly. Ceiling Concealed Duct - High Static Original instruction www.lg.com P/NO : MFL68320319...
-
Page 2: Table Of Contents
Ceiling Concealed Duct - High Static Type Indoor Unit Installation Manual TABLE OF CONTENTS Installation Requirements Required Parts Required Tools Features ........3 Safety Precautions....4 Installation .......7 ❏ Level gauge ❏ Four type "A" screws ❏ Screw driver ❏ Connecting cable ❏... -
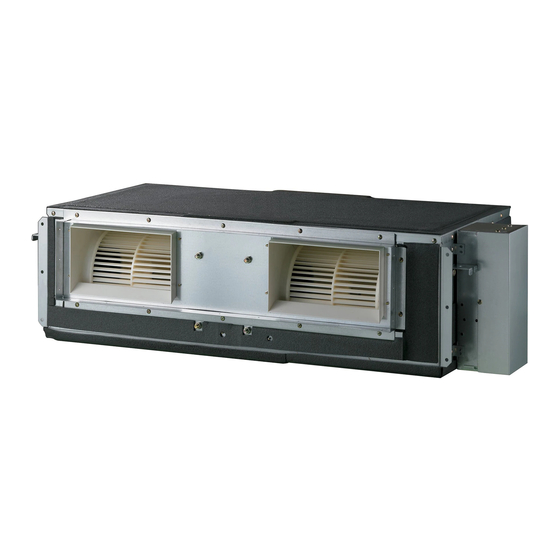
Page 3: Features
Feature Features Air outlet vents Air filters Air intake vents Wired Remote Controller TE MP ote Cont roller (Accessory) Washer for Clamp Insulation for (Other) Name Clamp metal Drain hose hanging backet (Tie Wrap) fitting Quantity 1 EA 2 EA 8 EA 4 EA 1 SET... -
Page 4: Safety Precautions
Safety Precautions Safety Precautions To prevent injury to the user or other people and property damage, the following instructions must be followed. ■ Incorrect operation due to ignoring instruction will cause harm or damage. The seriousness is classified by the following indications. - Page 5 Safety Precautions Do not turn on the breaker or power under condi- Use a vacuum pump or Inert (nitrogen) gas when tion that front panel, cabinet, top cover, control doing leakage test or air purge. Do not compress box cover are removed or opened. air or Oxygen and Do not use Flammable gases.
- Page 6 Safety Precautions ■ Installation Always check for gas (refrig- Install the drain hose to Keep level even when erant) leakage after installa- ensure that water is drained installing the product. tion or repair of product. away properly. • Low refrigerant levels may •...
-
Page 7: Installation
Installation Installation Read completely, then follow step by step. Selection of the best location Install the air conditioner in the location that satisfies the following conditions. • The place shall easily bear a load exceeding four times the indoor unit’s weight. •... -
Page 8: Ceiling Opening Dimension And Hanging Bolt Location
Installation Ceiling dimension and hanging bolt location ■ Installation of Unit BH/BG/BR Chassis Install the unit above the ceiling correctly. CASE 1 POSITION OF SUSPENSION BOLT • Apply a joint-canvas between the unit and duct to absorb unnecessary vibration. (Unit:mm) Dimension Chassis 1232 1182... -
Page 9: Indoor Unit Installation
Installation Indoor Unit Installation • Select and mark the position for fixing bolts. • Insert the set anchor and washer onto the suspen- • Drill the hole for set anchor on the face of ceiling. sion bolts for locking the suspension bolts on the ceiling. -
Page 10: Checking The Drainage
Installation INSULATION, OTHERS Insulate the joint and tubes completely. THERMAL INSULATION All thermal insulation must comply with local requirement. INDOOR UNIT Union for liquid pipe Thermal insulator for refrigerant pipe (Local supply) Thermal insulator for Refrigerant pipe and thermal piping(Local supply) insulator(Local supply) Hose crip for thermal insulator (Local supply) -
Page 11: Indoor Unit Drain Piping
Installation CAUTION 1. Install declination of the indoor unit is very important for the drain of the duct type air conditioner. 2. Minimum thickness of the insulation for the connecting pipe shall be 5mm. Front of view • The unit must be horizontal or declined to the drain hose connected when finished installation. - Page 12 Installation Drain test The air conditioner uses a drain pump to drain water. Use the following procedure to test the drain pump operation: Flexible drain hose Feed water • Connect the main drain pipe to the exterior and leave it (accessory) provisionally until the test comes to an end.
-
Page 13: Dip Switch Setting
Installation Dip Switch Setting Function Description Setting Off Setting On Default Communication N/A (Default) Cycle N/A (Default) Group Control Selection of Master or Slave Master Slave Dry Contact Mode Selection of Dry Contact Wired/Wireless remote Mode controller Auto Selection of Manual or Auto operation Mode Installation Fan continuous operation... -
Page 14: Group Control Setting
Installation Group Control Setting 1. Group Control 1 Wired remote controller 1 + Standard Indoor Units LGAP Network System Slave Master Slave Signal Slave 12 V Display Error Message Only connect serial signal and GND lines between slave indoor unit Master Dip Switch in PCB (Cassette and Duct Type indoor units) - No. - Page 15 Installation 5. In case of any error occurs at indoor unit, display on the wired remote controller. It is possible to control the other indoor units except the error units. ❈ It is possible to connect indoor units since Feb. 2009. ❈...
- Page 16 Installation 3. Group Control 3 Mixture connection with indoor units and Fresh Air Intake Unit LGAP Network System Signal Master Slave Master Slave 12 V Display Error Message Master Master In case of connecting with standard indoor unit and Fresh Intake Unit, separate Fresh Air Intake Unit with standard units.
- Page 17 Installation 4. 2 Remote Control Wired remote controller 2 + Indoor unit 1 LGAP Network System Master Display Error Message Master Slave 1. It is possible to connect two wired remote controllers (Max.) with one indoor unit. Set only one indoor unit to Master, set the others to Slave. Set only one wired remote controller to Master, set the others to Slave.
-
Page 18: Model Designation
Installation Model Designation Serial Number Combinations of functions A:Basic function L: Neo Plasma(Wall Mounted) C: Plasma(Ceiling Cassette) G: Low Static K: High Sensible Heat U: Floor Standing without Case SE/S8 - R: Mirror V: Silver B:Blue(ART COOL Type Panel Clolr) - E: Red V: Silver G:Gold 1: Kiss (Photo changeable) -
Page 19: How To Set E.s.p
How to Set E.S.P? How to Set E.S.P? ARNU07GBHA4, ARNU09GBHA4, ARNU12GBHA4 ARNU15GBHA4, ARNU18GBHA4, ARNU24GBHA4 (Unit: CMM) Static Pressure(mmAq(Pa)) Setting Value 3(30) 4(40) 5(50) 6(60) 7(70) 8(80) 9(90) 10(100) 12(120) 10.2 12.6 11.6 15.7 14.2 11.9 10.1 17.9 16.5 15.5 13.2 11.8 20.5 19.0... - Page 20 How to Set E.S.P? ARNU28GBRA4, ARNU36GBRA4, ARNU42GBRA4, ARNU48GBRA4, ARNU54GBRA4 (Unit: CMM) Static Pressure(mmAq(Pa)) Setting Value 5(50) 6(60) 8(80) 10(100) 12(120) 14(140) 15(150) 16(160) 17(170) 18(180) 20(200) 46.5 43.7 38.2 31.3 23.2 14.0 49.9 46.1 43.0 33.5 31.1 18.4 13.7 52.1 50.2 47.9 39.5...
- Page 21 ARNU28GBRA4, ARNU36GBRA4, ARNU42GBRA4, ARNU48GBRA4, ARNU54GBRA4 ARNU60GB7A4 ARNU76GB8A4, ARNU96GB8A4 . P . ™...
Need help?
Do you have a question about the MULTI V ARNU07GBHA4 and is the answer not in the manual?
Questions and answers