Table of Contents
Advertisement
Quick Links
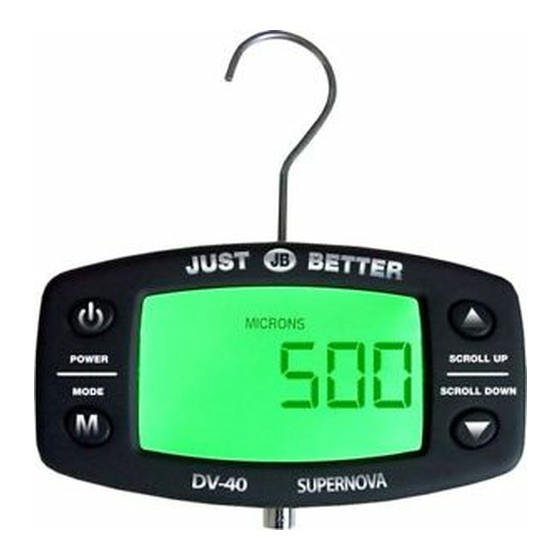
DV-40 DIGITAL VACUUM GAUGE
OPERATING MANUAL
Press Once to turn unit on
Press and Hold to turn unit off
When alarm is sounding,
press any key to turn it off
To enter the user settings
menu, Press Mode and
hold for three seconds.
CONNECT WITH US
JB INDUSTRIES
WWW.JBIND.COM
800.323.0811
Press Mode and Scroll Up Buttons
to enable High Limit Alarm
To disable alarm,
press Power Once
Press Mode and Scroll Down
Buttons to enable Low Limit Alarm
To disable alarm, press Power Once
SALES@JBIND.COM
TM
Advertisement
Table of Contents

Related Manuals for JB INDUSTRIES Supernova


Summary of Contents for JB INDUSTRIES Supernova
- Page 1 Power Once To enter the user settings Press Mode and Scroll Down menu, Press Mode and Buttons to enable Low Limit Alarm hold for three seconds. To disable alarm, press Power Once JB INDUSTRIES CONNECT WITH US WWW.JBIND.COM 800.323.0811 SALES@JBIND.COM...
- Page 2 GENERAL OPERATION KEY OPERATION OVERVIEW: • To turn power on, press the POWER key once. • To turn power off, press the POWER key and hold for three seconds. • To enable the HIGH Limit Alarm, hold the MODE key and press UP. • To enable the LOW Limit Alarm, hold the MODE key and press DOWN. • To disable the Alarm, press POWER key once. • When alarm is sounding, press any key to turn it off (automatically disabled). • To enter the user settings menu, press the MODE key and hold it for four seconds. BASIC USER SETUPS AVAILABLE IMPORTANT Each time the DV-40 powers up, previously stored user settings are retrieved. IMPORTANT Settings include the following items: CLEANING VACUUM SENSOR • International Standard Units selection, factory default value is “MICRONS”. Fill brass sensor fitting with a few drops of rub- • High Limit Alarm setting “Hi—AL” , factory default value is “2000” Microns. bing alcohol (Isopropyl). Cover the opening with • Low Limit Alarm setting “Lo—AL” , factory default value it “500” Microns. your finger and gently shake the fitting allowing •...
- Page 3 • When High Limit alarm is enabled and the pressure is greater than or equal to the preset High Alarm limit value, Alarm will go off: Beeper will sound every second, and the “ALARM”, “HIGH” icon will flash. • The Beeping and flashing will continue even if the pressure goes drops below the High Alarm limit. Press any key to stop the beeping/flashing and disable the alarm. USER SETTINGS MENU This menu uses a standard set of key assignments: UP and DN keys scroll the selection. At the top layer of the menu UP and DN scroll the item to be set. In the sub menus, UP and DN scroll the setting selection. The MODE key always acts as the select key. At the top layer of the menu, MODE key selects a sub menu to access. In the sub menus, the MODE key causes the current selection to be stored. The POWER key is always the cancel/exit key. Pressing POWER will cancel the current operation and return you to the previous level. UNITS SELECTION UNIT- When the alarm menu is active, a constant pressure value equivalent to 1000 microns is displayed using the currently selected units (EG: 133.31 for Pascals). The current selection is shown at the top of the screen. Available Unit selections are Microns, Pascals, Bar, InHg, mBar,m Torr, Torr. To scroll the selection, use the UP and DOWN keys. To cancel, press the POWER key. To select the units shown (and store it as your new setting), press the MODE key. When a setting is stored, you will be returned to menu selections. If you’re done, press POWER again to return to normal operation. HIGH ALARM SETTING HI--AL The (HIGH) alarm selection sets the pressure level where an alert will be sounded. Selecting a specific alarm level does NOT make the alarm active; it simply specifies the pressure level ABOVE which the alarm will sound when the user enables the High Limit Alarm (MODE + UP). Available alarm settings are 50, 100, 250, 500, 1000, 1250, 1500, 2000 microns. The factory default value is “2000” Microns. The values shown here are listed in microns, but as you scroll through the settings, you will see the values displayed in the current units (see units menu above). For example, if your current units setting is Pascals, you would see: 7, 14, 33, 66, 133, 166, 200, and 266 (The Pascal equivalents of the 50 – 2000 micron values). The “ALARM”, “HIGH” icon will be displayed to indicate you are setting up the High Limit Alarm. To scroll the selection, use the UP and DOWN keys. To cancel, press the POWER key. To select (and store) the displayed setting, press the MODE key. When a setting is stored, you will be returned to menu selections. If you’re done, press POWER again to return to normal operation. LOW ALARM SETTING LO--AL The (LOW) alarm selection sets the pressure level where an alert will be sounded. Selecting a specific alarm level does NOT make the alarm active; it simply specifies the pressure level BELOW which the alarm will sound when the user enables the Low Limit Alarm (MODE + DN).
- Page 4 AU-0FF In order to conserve battery life, the DV-40 will shut itself off after a period of inactivity (no key-press). The number of minutes before auto-shut- down occurs can be set by the user as follows: OFF, 10, 15, 30, 45, 60, or 90 minutes. When auto-shutdown is set to ‘OFF’, the DV-40 will not shut itself off . This is useful in test environments where an AC power adapter is available. To change the selection, use the UP or DOWN key. To cancel, press the POWER key. To select (and store) the setting shown, press the MENU key. When a setting is stored, you will be returned to menu selections. If you’re done, press POWER again to return to normal operation. Note: Even when auto-shutdown has been deactivated, a low battery condition (less than 2.1 VDC) will still cause the DV-40 to turn itself off. VERSION ID INFORMATION USER ID This menu selection is simply provided for information purposes. Firmware release versions for the primary CPU and the sensor CPU are both available. The Main CPU firmware release (EG: “Fr-1.77”) is displayed initially and whenever the UP key is pressed. Pressing DN will display the Sensor CPU Firmware release (EG: “Sr-6.42”). Press either the POWER key or the MODE key to return to returned to menu selection. Note: When ordering parts or getting technical assistance, the person that you talk to may ask for this information. CALIBRATION MENU Calibration menu should only be accessed in the factory, no field calibration is recommended. The sensor and the main unit serial number have to match each other in order to have the correct measurement. JB INDUSTRIES INC. Form DV-41-308 Printed in the USA Aurora IL 60505 USA ©2015 JB Industries, Inc.
Need help?
Do you have a question about the Supernova and is the answer not in the manual?
Questions and answers