Table of Contents
Advertisement
Available languages
Available languages
Advertisement
Table of Contents

Related Manuals for Evolights 36x15 RGBW WALL WASHER

Summary of Contents for Evolights 36x15 RGBW WALL WASHER
- Page 1 36x15 RGBW WALL WASHER User Manual Instrukcja obsługi...
-
Page 2: Table Of Contents
English Menu Dimensions ....................2 Before Using ....................3 What’s inside ................... 3 Open box instruction ................3 A C power supply ..................3 Safety Instruction ..................3 Introduction ....................4 Specification .................... 4 Product features ..................5 Product Introduction ................... 6 Installation .................... -
Page 3: Dimensions
Dimensions All dimensions are in millimeters... -
Page 4: Before Using
Before Using What’s inside ⚫ Equipment x 1 ⚫ Power cable with Plug x 1 ⚫ User manual x 1 ⚫ Iron holder x 2 Open Instruction Please open the equipment carefully ,and check all the spare parts are included or not. If any part of the cause of the failure due to improper transportation or carton, please keep the packing materials and immediately inform the shipper to check. -
Page 5: Introduction
⚫ Confirm the power cord is not a sword cut or damaged. ⚫ Must be cut off the power supply in the condition of no using or cleaning. ⚫ Only allowed with the power cord plug connection. Please do not force when unplug the power cord to pull the plug.。... -
Page 6: Product Features
⚫ Packing Size:585x220x425 ⚫ Net weight: 13.2Kg ⚫ Gross weight:15.5Kg Product features ⚫ Dmx input:3 pin electronic J3F2C-W . ⚫ Dmx output:3 pin electronic K3F2C-W. ⚫ Power connection: electronic powerCON in(SAC3MPX)/ powerCON out(SAC3FPX) ⚫ 3 kinds of control model: DMX512,WDMX,Master/slave. ⚫... -
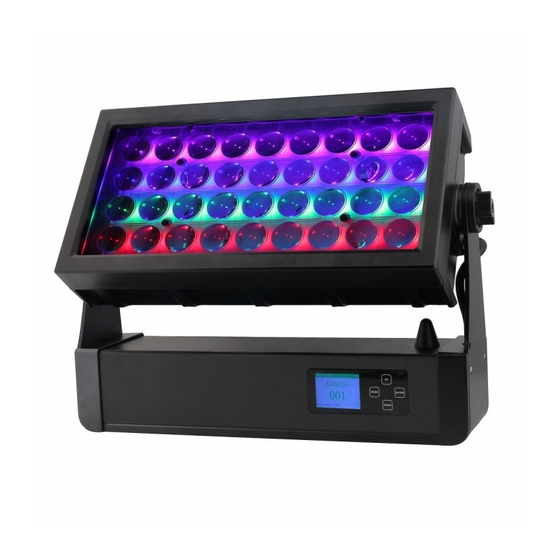
Page 7: Product Introduction
Product Introduction... -
Page 8: Installation
Installation Installation Requirements ⚫ This equipment can be used in many places, it can hang and put on the ground。 ⚫ Choosing a suitable place to put or hang the equipment when installation. Must be use the special screws and hook to make sure the lamp’s weight is in the weight range。... -
Page 9: Power Supply Connection
voltage is the scale of rated voltage when connecting the power. The equipment can adapt to 100V to 240 V AC voltage and 50-60 Hz. Connection Brown AC Live Blue AC Neutral Green/Yellow AC Ground DMX Signal Connection 1. Use DMX512 controller, use the DMX signal(male )to plug into the first light(female)3 pin。... -
Page 10: Dmx Address Setting
4:Wireless to DMX 5:Wireless Control 6:Master/Slave DMX Address setting... -
Page 11: Operating Instruction
Operating Instruction Control board function Button Function Mode Choose mode or function exit ENTER Current show menu or enter into the current selected function Increase the value DOWN Decrease the value • When the spotlight is properly connected to the mains, “Software Update ,Please Wait” (only for internal purposes), “Welcome to LED Wash”, the model name and software version appear successively on the display during the start-up process. -
Page 12: Menu Instruction
Menu Instruction:... - Page 13 MAIN DISPLAY DMX MODE In the upper line of the display, the DMX (DMX 2Ch,3Ch1,3Ch2,4Ch,13Ch,16Ch,29Ch)is display and the DMX start address is prominently shown in the center (for example DMX13Ch and ADDRESS 001).As soon as the DMX signal is interrupted, the display starts flashing; if the DMX signal is present again, the display stops flashing.
- Page 14 SETTING THE DMX SIGNAL SELECT(DMX SIGNAL SELECT) Pressing MODE will take you to the selection menu for system settings. Using UP and DOWN, select the menu item “MODE” (colored background) and confirm with ENTER. Now use the UP and DOWN buttons once more to select the “DMX SIGNAL SELECT”sub-menu item and confirm button pressing ENTER.
- Page 15 SETTING THE SLAVE MODE(Slave) Pressing MODE will take you to the selection menu for system settings. Using UP and DOWN, select the menu item“MODE” (colored background) and confirm with ENTER. Now use the UP and DOWN buttons once more to select the “DMX MODE”sub-menu item and confirm button pressing ENTER and press MODE twice to return to the main display.
- Page 16 Wash that you wish to edit and confirm button pressing ENTER. The value (dimmer, Red, Green, Blue, White, etc.)of the corresponding function can now be set from 000-255 and press ENTER to confirm the input. Once all of the parameters have been set as desired, press MODE three to the main display. The main display is automatically activated if no input made within 30 seconds.
- Page 17 Rainbow8 Rainbow9 Rainbow10 Rainbow11 Rainbow12 Rainbow13 Rainbow114 Rainbow15 Auto Program No function Auto Program1 Auto Program2 Auto Program3 Auto Program4 Auto Program5 Auto Program6 Auto Program7 Auto Program8 Auto Program9 Auto Program10 Auto speed Auto speed SETTING THE COLOR MACRO MODE(Color Macro) Pressing MODE will take you to the selection menu for system settings.
- Page 18 DEVICE SETTINGS(Setting) Pressing MODE will take you to the selection menu for system settings. Using UP and DOWN, select the menu item“Setting” (colored background) and confirm with ENTER. You will then be taken to the sub-menu to set the sub-menu items(set list).The main display is automatically activated if no input is made within about 30 seconds.
- Page 19 value range S Curve =Adjustment of the light intensity is finer in the lower and upper DMX value ranges and coaster in the middle DMX value range Dimmer Response Dimmer response =The spotlight responds abruptly to changes in the DMX value Halogen =The spot behaves in a manner similar to that of a halogen lamp...
- Page 20 DIMMER CURVES DEVICE INFORMATION(System Info) Pressing MODE will take you to the selection menu for system settings. Using UP and DOWN, select the menu item“System Info” (colored background)and confirm with ENTER. You will then be taken to the sub-menu to display the device information. Use the UP and DOWN panels again to select the desired sub-menu item and then press ENTER to retrieve the information.
-
Page 21: Dmx Channel Table
System Info Software Ver Display device VR.xx software version Temp info Temperature display of LED Temp XxC/xxF the LED unit Temp Unit Celsius(=display in degrees Celsius) Fahrenheit(=display degrees Fahrenhet) Time info Operating time display Power on Displays the total operating time in hours Last run hrs Displays the operating time since... - Page 22 Pink Warm White White Cold White Color jumping stop Color jumping Speed slow->fast/Colour1->12 Color fading Speed slow->fast/Colour1->12 3Ch mode1 Function Values Sub-group Dimmer 0%-100% Dimmer Strobe Open Strobe Close Strobe Strobe Strobe slow->fast<1Hz-20Hz Strobe Open Color OFF Amber Yellow Amber Yellow Green Color Macro...
- Page 23 White Cold White Color jumping stop Color jumping Speed slow->fast/Colour1->12 Color fading Speed slow->fast/Colour1->12 3Ch mode2 Function Values Sub-group Red 0%-100% Green Green 0%-100% Green Blue Blue 0%-100% Blue 4Ch mode Function Values Sub-group - 255 Red 0%-100% Green - 255 Green 0%-100% Green Blue...
- Page 24 burst with break) Strobe slow -> fast <1Hz - 20Hz Strobe open Red 0%-100% Green Green 0%-100% Green Blue Blue 0%-100% Blue White White 0%-100% White Color OFF Amber Yellow Amber Yellow Green Turquoise Cyan Blue Color Macro Lavender Color Macro (override Mauve RGBW)
- Page 25 Rainbow3 Rainbow4 Rainbow5 Rainbow6 Rainbow7 Rainbow8 Rainbow9 Rainbow10 Rainbow11 Rainbow12 Rainbow13 Rainbow14 Rainbow15 No function Auto Program1 Auto Program2 Auto Program3 Auto Program4 AUTO Auto Auto Program5 Program Auto Program6 Auto Program7 Auto Program8 Auto Program9 Auto Program10 Speed Auto program speed slow->fast Speed Fade Auto Fade...
- Page 26 No function Dimmer Response LED (Hold 3s) Device Device Dimmer Response Halogen (Hold 5s) settings settings Setting Fan High (Hold 3s) Setting Fan Auto (Hold 3s) 16Ch mode Function Values Sub-group Red1 Red1 0%-100% Red1 Green1 Green1 0%-100% Green1 Blue1 Blue1 0%-100% Blue1 White1...
- Page 27 Dimmer Red 0%-100% Dimmer Strobe open Green Strobe closed Plus Random, slow->fast Ramp up Random, slow -> fast Strobe Ramp down Random, slow -> fast Multifunction functions Random Strobe Effect, slow -> fast al-strobe Strobe Break Effect, 5s…..1s (Short burst with break) Strobe slow ->...
- Page 28 Color jumping stop Color jumping Speed slow->fast/Colour1->12 Color fading Speed slow->fast/Colour1->12 Rainbow off Rainbow1 Rainbow2 Rainbow3 Rainbow4 Rainbow5 Rainbow6 Rainbow Rainbow7 Rainbow effect Rainbow8 Rainbow9 Rainbow10 Rainbow11 Rainbow12 Rainbow13 Rainbow114 Rainbow15 No function Auto Program1 Auto Program2 Auto Program3 Auto Program4 AUTO Auto Auto Program5...
- Page 29 Speed Auto program speed slow->fast Speed Fade Auto Fade Fade No function Linear Dimmer Curve Dimmer Set dimmer Exponential Dimmer Curve Curve curve Logarithmic Dimmer Curve S-Curve Dimmer Curve No function Dimmer Response LED (Hold 3s) Device Device Dimmer Response Halogen (Hold 5s) settings settings Setting Fan High (Hold 3s)
- Page 30 Polski Wymiary Wszystkie wymiary podane w milimetrach...
- Page 31 Przed użyciem Wewnątrz opakowania ⚫ Urządzenie x 1 ⚫ Przewód zasilający x 1 ⚫ Instrukcja obsługi x 1 ⚫ Uchwyt montażowy x 2 Odpakowywanie W trosce o środowisko naturalne upewnij się, że urządzenie zostanie skierowane do odpowiedniej placówki recyklingowej po zakończeniu jego cyklu życiowego.
- Page 32 ⚫ Bądź ostrożny podczas instalacji, czy podłączania zasilania. Jeśli z kabla zasilającego wystają gołe przewody nie należy ich dotykać ⚫ Nigdy nie patrz bezpośrednio w źródło światła podczas pracy ⚫ Urządzenie musi być zainstalowane w odległości minimum 0,5m od ścian ⚫...
- Page 33 ⚫ Tryby sterowania: DMX512, WDMX, Master/Slave ⚫ Kontrola bezprzewodowa DMX: 2,4 G ⚫ Ustawienie i adresowanie: RDM ⚫ Funkcje DMX: dimmer, stroboskop, sterowanie kolorami RGBW, kolor makr, skokowa zmiana kolorów, zanik kolorów, efekt tęczy, wybór programu automatycznego, automatyczna prędkość, wybór krzywej dimmera ⚫...
- Page 34 ⚫ system chłodzenia: chłodzenie wentylatorowe (wodoodporny wentylator z inteligentnym doborem prędkości; ⚫ inteligentna ochrona przed zmianą temperatury, aby zapewnić trwałość diod LED Budowa 1. Soczewki 2. Pokrętło uchwytu 3. Uchwyt główny 4. Wyświetlacz 5. MENU 6. ENTER 7. DOWN 8. UP 9.
- Page 35 Instalacja Wymagania instalacji ⚫ Urządzenie może pracować na dwa sposoby, postawione na powierzchni lub podwieszone. ⚫ Wybierz odpowiednie miejsce instalacji. Używaj odpowiednich haków do montażu i upewnij się, że udźwig montażu jest odpowiedni. ⚫ Podczas instalacji upewnij się, że urządzenie nie znajduje się w bliskim otoczeniu urządzeń...
- Page 36 Połączenie sygnałowe DMX 1. Ze sterownika DMX wyjdź przewodem sygnałowym, do wtyczki DMX w pierwszym urządzeniu, użyj do tego gniazda DMX In 3-pin. 2. Z wyjścia DMX Out połącz kolejne urządzenie za pomocą przewodu DMX. Kontynuuj podłączanie urządzeń aż łańcuch będzie gotowy. 3.DMX do DMX: 4:Wireless do DMX 5: Sterowanie bezprzewodowe...
- Page 37 Adresowanie Instrukcje użytkowania Panel kontrolny Przycisk Funkcja Mode Zmienia funkcje lub powraca do menu ENTER Zatwierdza wybór lub przechodzi do wybranej funkcji Zwiększa wartość DOWN Zmniejsza wartość • Jeśli urządzenie ma aktywowany tryb DMX, a nie otrzymuje sygnału, wyświetlacz zacznie migać. •...
- Page 38 Struktura menu...
- Page 39 Instrukcja menu: Główny wyświetlacz w trybie DMX (DMX 2Ch,3Ch1,3Ch2,4Ch,13Ch,16Ch,29Ch) W górnej części wyświetlacza pojawia się tryb DMX w środkowej części jest widoczny adres. W momencie gdy sygnał jest zakłócony lub przerwany wyświetlacz zaczyna migotać. Główny wyświetlacz w trybie Slave W górnej części wyświetlacza pojawia się tryb DMX, a w środkowej części jest widoczny napis SLAVE. W momencie gdy sygnał...
- Page 40 Wybór sygnału DMX Po wciśnięciu przycisku MODE przejdziesz to menu wyboru, za pomocą przycisków UP/DOWN wybierz “MODE” (podkreślone tło) i potwierdź przyciskiem ENTER. Przyciskami UP i DOWN wybierz “DMX SIGNAL SELECT” i potwierdź przyciskiem ENTER. Przyciskami UP/DOWN wybierz odpowiedni tryb (DMX, Wireless DMX) i potwierdź...
- Page 41 urządzenia sterującego i uruchom je w trybie autonomicznym (auto, static, color macro), w tym trybie urządzenie Slave będzie wykonywać te same czynności co Master. Wybór trybu automatycznego Po wciśnięciu przycisku MODE przejdziesz to menu wyboru, za pomocą przycisków UP/DOWN wybierz “MODE”...
- Page 42 STATIC Dimmer 0% - 100% Stroboskop otwarty Stroboskop zamknięty Plus Random, wolno-szybko Ramp up Random, wolno-szybko Strobe Ramp down Random, wolno-szybko Losowy stroboskop, wolno-szybko Strobe Break Effect, 5s…..1s (wystrzał i przerwa) Stroboskop wolno-szybko Stroboskop otwarty Główny czerwony 0% - 100% Green Główny zielony 0% - 100% Blue...
- Page 43 Brak funkcji Auto Program1 Auto Program2 Auto Program3 Auto Program4 Auto Program Auto Program5 Auto Program6 Auto Program7 Auto Program8 Auto Program9 Auto Program10 Auto speed Szybkość programów auto Wybór trybu Color Macro Po wciśnięciu przycisku MODE przejdziesz to menu wyboru, za pomocą przycisków UP/DOWN wybierz “MODE”...
- Page 44 Setting Display Rev Odwrócenie =odwrócenie orientacji wyświetlacza wyświetlacza o 180° =brak odwrócenia Display Podświetlenie =zapalone wciąż wyświetlacza = deaktywuje się po około 60 sekundach bezczynności DMX Fail Tryb pracy w momencie Hold =ostatnia komenda jest utraty sygnału DMX podtrzymana Blackout =aktywuje się...
- Page 45 zachowanie lampy halogenowej White Balance Balans bieli Red, =indywidualne dopasowanie Green, balansu pomiędzy kolorami RGBW Blue, aby uzyskać odpowiedni balans White Fan Set Prędkość wentylatora Regular = normalna praca wentylatora i maksymalna jasność Silent = zredukowana jasność i cichsza praca wentylatora Wireless DMX Reset pamięci =brak resetu...
- Page 46 Krzywe dimmera Informacje systemowe Po wciśnięciu przycisku MODE przejdziesz to menu wyboru, za pomocą przycisków UP/DOWN wybierz “System Info” (podkreślone tło) i potwierdź przyciskiem ENTER. Zostaniesz przeniesiony do menu, w którym możesz sprawdzić informacje systemowe. Urządzenie powróci automatycznie do menu głównego jeśli żadne działanie nie jest podjęte przez 30 sekund.
- Page 47 System Info Software Ver Wyświetla informacje na Vxxx temat oprogramowania Temp info Wyświetla temperaturę LED Temp XxC/xxF urządzenia Temp Unit Celsius(=wyświetla temperaturę w Celsjuszach) Fahrenheit(=wyświetla temperaturę w Fahrenheitach) Time info Wyświetla aktualny czas Power on Kompletny czas pracy pracy Last run hrs Czas pracy przy ostatnim użyciu STRUKTURA DMX Tryb 2CH...
- Page 48 Stop Color jump wolno-szybko Color fade wolno-szybko Tryb 3CH mode1 Funkcja Wartość Grupa Dimmer 0%-100% Open Close Stroboskop Wolno-szybko Open Wyłączony Czerwony Bursztynowy Ciemny Żółty Żółty Zielony Turkusowy Cyjan Niebieski Color Macro Lawendowy Fiołkowy Magenta Różowy Ciepły biały Biały Zimny biały Stop Color jump wolno-szybko Color fade wolno-szybko...
- Page 49 Funkcja Wartość Grupa Czewony 0%-100% Zielony 0%-100% Niebieski 0%-100% Tryb 4CH Funkcja Wartość Grupa Czewony - 255 0%-100% Zielony - 255 0%-100% Niebieski - 255 0%-100% Biały - 255 0%-100% Tryb 13CH Funkcja Wartość Grupa Dimmer 0%-100% Open Close Plus Random, wolno-szybko Ramp up Random, wolno-szybko Funkcje Ramp down Random, wolno-szybko...
- Page 50 Czerwony Bursztynowy Ciemny Żółty Żółty Zielony Turkusowy Cyjan Niebieski Lawendowy Fiołkowy Magenta Różowy Ciepły biały Biały Zimny biały Stop Color jump wolno-szybko Color fade wolno-szybko Wyłączony efekt tęczy Tęcza 1 Tęcza 2 Tęcza 3 Tęcza 4 Tęcza 5 Efekt tęczy Tęcza 6 Tęcza 7 Tęcza 8...
- Page 51 Tęcza 13 Tęcza 14 Tęcza 15 Brak funkcji Auto Program1 Auto Program2 Auto Program3 Auto Program4 Auto Auto Program5 Auto Program6 Auto Program7 Auto Program8 Auto Program9 Auto Program10 Szybkość programów auto Szybkość wolno-szybko Fade Fade programów auto Brak funkcji Linear Krzywe Exponential...
- Page 52 Tryb 16CH Funkcja Wartość Grupa Czerwony 1 0%-100% Zielony 1 0%-100% Niebieski 1 0%-100% Biały 1 0%-100% Czerwony 2 0%-100% Zielony 2 0%-100% Niebieski 2 0%-100% Biały 2 0%-100% Czerwony 3 0%-100% Zielony 3 0%-100% Niebieski 3 0%-100% Biały 3 0%-100% Czerwony 4 0%-100%...
- Page 53 przerwa) Stroboskop wolno-szybko Stroboskop otwarty Czerwony 0%-100% Zielony 0%-100% Niebieski 0%-100% Biały 0%-100% Wyłączony Czerwony Bursztynowy Ciemny Żółty Żółty Zielony Turkusowy Cyjan Niebieski Color Macro Lawendowy Fiołkowy Magenta Różowy Ciepły biały Biały Zimny biały Stop Color jump wolno-szybko Color fade wolno-szybko Wyłączony efekt tęczy Tęcza 1 Efekt tęczy...
- Page 54 Tęcza 5 Tęcza 6 Tęcza 7 Tęcza 8 Tęcza 9 Tęcza 10 Tęcza 11 Tęcza 12 Tęcza 13 Tęcza 14 Tęcza 15 Brak funkcji Auto Program1 Auto Program2 Auto Program3 Auto Program4 Auto Auto Program5 Auto Program6 Auto Program7 Auto Program8 Auto Program9 Auto Program10 Szybkość...
- Page 55 Tryb dimmera Halogen (przytrzymaj 5s) Ustawienie wentylatora Regular (przytrzymaj 3s) Ustawienie wentylatora Silent (przytrzymaj 3s) Czerwony 1 0%-100% Zielony 1 0%-100% Niebieski 1 0%-100% Biały 1 0%-100% Czerwony 2 0%-100% Zielony 2 0%-100% Niebieski 2 0%-100% Biały 2 0%-100% Czerwony 3 0%-100% Zielony 3 0%-100%...
Need help?
Do you have a question about the 36x15 RGBW WALL WASHER and is the answer not in the manual?
Questions and answers