Bolens BL150 Operator's Manual
2-cycle gas trimmer
Hide thumbs
Also See for BL150:
- Operator's manual (64 pages) ,
- Operator's manual (64 pages) ,
- Operator's manual (23 pages)

Related Manuals for Bolens BL150


Summary of Contents for Bolens BL150
- Page 1 BL100 BL150 2-Cycle Gas Trimmers iMPORTANT: READ SAFETY RULES AND iNSTRUCTiONS CAREFULLY PiN 769-01464 (11/04) PRINTED IN USA...
- Page 2 THANK Thank you for buying this quality product. outdoor power tool will provide many hours of useful service. You will find it to be a great labor-saving device. This operator's manual provides understand operating instructions. manual and follow all the instructions outdoor power tool in top operating condition.
-
Page 3: Important Safety
The purpose of safety symbols is to attract your attention to possible dangers, The safety symbols, and their explanations, deserve your careful attention and understanding. The safety warnings do not by themselves eliminate any danger, The instructions or warnings they give are not substitutes for proper accident prevention measures, SYMBOL MEANING... - Page 4 • Add fuel in a clean, welPventilated there are no sparks or flames. Remove the fuel cap slowly, and only after the engine stops. Do not smoke while fueling or mixing fuel. Wipe up any spilled fuel from the unit immediately. •...
- Page 5 AND _NTERNAT_ONAL SAFETY This operator's manual describes safety and international symbols and pictographs that may appear on this product. Read the operator's manual for compHete safety, assemMy, operating and maintenance and repair information. SYMBOL MEANING SAFETY ALERT SYMBOL Indicates danger, warning, or caution.
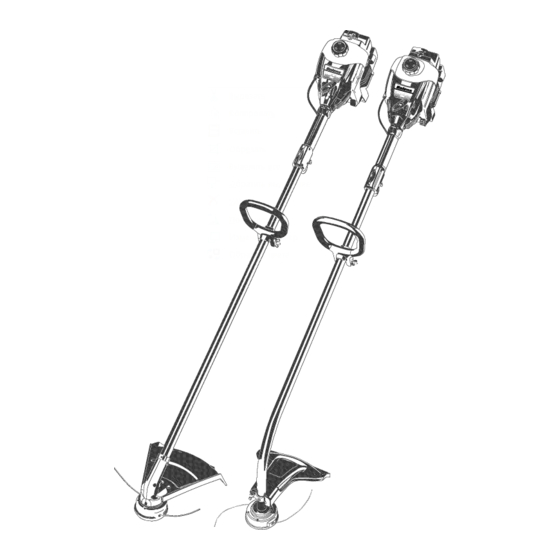
- Page 6 APPUCAT_ONS As a trimmer: • Cutting grass and Hight weeds Decorative trimming around trees, fences, Muffler Spark Plug Air Filter/Muffler Cover Shaft Line Cutting Tube Blade Cutting Attachment FuemCap etc. Blue Choke Lever Shaft Grip "_ Primer Bumb D-Handle Cutting Attachment Starter Rope Grip Throttme...
- Page 7 WARNING: never operate the trimmer without the cutting attachment shield in place. [nstammon a Straight Shaft (BL150) 1. SHidethe cutting attachment shieHd into the shieHd mount on the cutting attachment, holes in the shield with the holes in the cutting attachment shieHd mount (Fig.
-
Page 8: Oil And Fuel Mixing
OraLAND FUEL MmXH_G H_STRUCTmONS ON and/or improperly mixed fuel are the main reasons for the unit not running properly. Be sure to use fresh, cban unleaded fuel. Follow the instructions the proper fue%il mixture. Definition of Bmended Fuels Today's fueis are often a bbnd of gasoiine and oxygenates such as ethanol, methanol, or MTBE (ether). -
Page 9: Starting/Stopping
_AIAD!_| |_,|_, • well-ventilated o utdoor area. C arbon monoxide e xhaust fumes canbelethal i n a confined a rea. WARNING" • Make sure you are in the starting position when pulling the starter rope (Fig. 8). To avoid serious injury, the operator and unit must be in a stable position while starting. -
Page 10: Holding Trimmer
The operator's Heftarm is straight, the Hefthand hoHding the D-handHe • The unit is at waist HeveH The cutting attachment is paraHeH to the ground and easiHycontacts the grass without the need to bend over BL150 BL100 Fig. 9 ADJUSTING TRiMMiNG... -
Page 11: Maintenance Schedule
MAmNTENANCE SCHEDULE Perform these required maintenance procedures at the frequency stated in the tame, These procedures shouHd also be a part of any seasonaHtune-up, NOTE: Some maintenance procedures may require spedd tooHsor skills, If you are unsure about these procedures take your unit to any non-road engine repair estaMishment, authorized service dealer. - Page 12 ForUsewithSingme For Use with SplitLine Line ONLY FWg. 1 5 NOTE: SpHitLine can onHy be used with the unner tee[ with the shotted hones. SingHe[ine can be used on either type of inner reel Use Figure 15 to identify the inner tee[ you have. NOTE: AHways use the correct [ine [ength when installing trimming [ine on the unit.
-
Page 13: Installing Prewound Reel
mNSTALUNG A PREWOUND 1. Hold the outer spool with one hand and unscrew the bump knob counterclockwise (Fig. 12). Inspect the boHt inside the bump knob to make sure it moves freeHy. RepHacethe bump knob if damaged. Remove the oHdinner reeHfrom the outer spooH (Fig. -
Page 14: Carburetor Adjustment
SPARK ARRESTOR MAINTENANCE NOTE: The exhaust can onHyflow in one direction: AWAY from the engine. Pay chose attention when disassemMing the muffHer so you can put it back together correctHy. FaiHureto do so will damage the unit and may cause serious personaH injury. 1. -
Page 15: Replacing Spark Plug
Cmean Air Fimter The condition of the air fiiter is important to the operation of the unit, A dirty air fiiter will restrict air flow and change the air/fuei mixture, This is often mistaken for an out of adjustment carburetor, Check the condition of the air fiiter before adjusting the idb speed screw, Refer to Air Filter Maintenance, Adjust... -
Page 16: Long Term Storage
CLEANING WARNING: personal injury, always turn your trimmer off and allow it to cool before you clean or service it, Use a small brush to clean off the outside of the unit. Do not use strong detergents. Household cleaners that contain aromatic oils such as pine and lemon, and solvents such as kerosene, can damage plastic housing or handle. -
Page 17: Troubleshooting
CAUSE Empty fueHtank Primer buHbwasn't pressed enough Engine is flooded OHdor impropeHy mixed fueH FouHed spark pHug Mugged spark arrestor CAUSE Air fiHteris pHugged OHdor impropeHy mixed fueH Improper carburetor adjustment CAUSE OHd or improperly mixed fueH Improper carburetor adjustment Cutting attachment bound with grass Mugged spark arrestor... - Page 18 EngineType ... Stroke ... Displacement ... Operating RPM ... Idle Speed RPM ... Ignition Type ... Ignition Switch ... Spark Hug Gap ... Lubrication ... FueHiOiHRatio ... Carburetor ... Starter ... Muffler ... ThrottHe ... FueHTank Capacity ... Drive Shaft Housing ... ThrottHe ControH ...
- Page 19 California The California Air Resources Board, the Envkonmentd the emission controH system warranty on your 2000 and Hatersmall off-road engine, New small off-road engines must be designed, buiHtand equipped to meet stringent anti-smog standards, MTD must warrant the emission controH system on your small off-road engine for the periods of time Histed bellow provided there has been no abuse, negHect or improper maintenance of your small off-road engine, Your emission controH system may include parts such as the carburetor or fueNnjected...
- Page 20 MANUFACTURER'S The limited warranty set forth below is given by Troy-Bilt LLC with respect to new merchandise purchased and used in the United States, its possessions and territories. Troy-Bilt LLC warrants this product material and workmanship for a period of two (2) years commencing on the date of original purchase and will, at its option, repair or replace, free of charge, any part found to be defective...
Need help?
Do you have a question about the BL150 and is the answer not in the manual?
Questions and answers