Advertisement
Quick Links
Advertisement

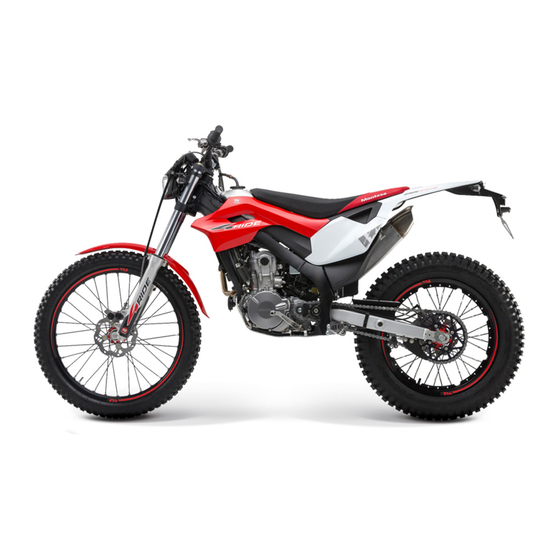
Summary of Contents for Montesa 4Ride 2017
- Page 1 Set-up instructions 2017...
- Page 2 Before Starting Essential General Precautions for Unpacking the Motorcycle • Place the wood and cardboard packaging on a flat surface where there is no risk of it slipping. • Work in a place protected from wind and rain. • To avoid injuries, wear gloves to unpack the motorcycle. • Work carefully and wear suitable clothing to avoid scratching the paintwork and metal surfaces. • Take special care not to hurt your hands on protruding parts or sharp edges of the packaging. • The engine must not be started under any circumstances. After unpacking: • Proceed properly to recycle packaging materials such as wood, cardboard, plastics, etc. • All information in this publication is based on the latest product information available at the time of approval for printing. MONTESA HONDA, S.A.U. reserves the right to make changes at any time without notice and without incurring any obligation. • No part of this manual may be reproduced without written permission.
- Page 3 Description Qty. Reference Model Type Owner’s Manual 32NN4M10 Owner’s Manual 35NN4M10 Owner’s Manual 34NN4M10 Owner’s Manual 3LNN4M10 Owner’s Manual 33NN4M10 Owner’s Manual 3PNN4M10 Handlebar protector (S3) 53121-NN4-J10 Rear view mirror 88100-NN4-H11 Tie-wrap 90602-NN4-600 Owner’s Manual bag 83642-MBT-D20 * Accessory bag ---------- * The accessory bag and owner’s manual are located inside the box seat.
- Page 4 WARNING • The removal, unpacking and assembly of the motorcycle must be done by two people. • Work with precaution when handling the motorcycle to avoid damage. • Place the motorcycle box on a level surface. • Cut the straps and remove the staples from the top cover. Open the box upwards. • Remove the staples from the lower sides that attach the box to the wooden base. • Lift and remove the cardboard box from the wooden base.
- Page 5 • Remove the five silica gel bags from wheel and side of the motorcycle (depending on the final destination of the motorcycle). • Remove the handlebar locking tie-wraps by loosening the four screws and removing the protective tube. • Assemble the handlebars. Cut the adhesive tape that holds the handlebars to the motorbike. Remove the protective plastic from handlebar. • Remove the front brake pump from the bag attached to the right fork bar.
- Page 6 • Fix the handlebar in place by tightening the two handlebar holder mounting screws to the specified torque. Torque: 22 N•m (2.2 Kgf•m, 16 lbf•ft) • Attach the front brake pump to the handlebars. Remove the bracket, install the assembly in the handlebar tube. Mount and tighten the bolts to the specified torque. Torque: 3.2 N•m (0.33 Kgf•m, 2.4 lbf•ft) • Remove the plastic pin that holds the footsteps vertically. Grip the footstep and remove the plastic pin from inside each one.
- Page 7 • Remove the protective plastic from winkers and rear headlight. • Remove the rear attachment straps. Remove the support straps for the right and left front parts of the steering fork from the wooden base. • Remove the rear attachment straps. Remove the support straps for the right and left rear parts of the swingarm from the wooden base. • Lift the motorcycle from the wooden base. Roll the motorcycle forward gently. WARNING • Before taking the motorcycle off the base, check that there are no objects on the floor that might obstruct the operation. • Make sure the bike is not in gear.
- Page 8 • Fit the breather pipe to the fuel tank cap pivot. • Extract the parts supplied in the accessory bag (mirrors, handlebar protector, owner’s manual bag and tie-wraps) located inside the box seat. • Fit the rear view mirrors. • Attach the front brake stop switch cable to the handlebars with two tie-wraps supplied in the accessory bag.
- Page 9 • Attach the light switch cable to the handlebars with two tie-wraps supplied in the accessory bag. • Attach the handlebar protector. • Clean the front and rear discs with brake cleaner and a clean towel. NOTE: Check all the points stated in the following service list prior to delivery. Consult the user’s/workshop manual to see the detailed specifications and procedures. Always carry out a dynamic test to make sure that it works properly.
- Page 10 CHECK LIST PRIOR TO DELIVERY Check the free play for the throttle grip, the TEST RUN: cable installation and the operation in all the Check the working, handling and operation. steering positions. • Transmission and clutch: ease of changing Check the air pressure in the tyres. gear, working of the clutch, etc. • Acceleration: smoothness, etc. Check the electrical components to make sure • Running: smoothness, etc. they work properly and properly adjusted. • Handling: stability and ease of changes in direction.
- Page 11 COLD ENgINE STaRTINg aTTENTION - VERY IMPORTaNT Shift the transmission into neutral. WITH THE THROTTLE COMPLETELY CLOSED, operate the kick-starter pedal. Starting with the kick-starter pedal in the upright position, kick it all the way down using a fast, continuous motion. After the engine starts, let it warm up for a few minutes.


Need help?
Do you have a question about the 4Ride 2017 and is the answer not in the manual?
Questions and answers