Table of Contents
Advertisement
Advertisement
Chapters
Table of Contents

Related Manuals for Montesa 4ride


Summary of Contents for Montesa 4ride
- Page 2 This publication includes the latest production information available at the time of printing. Montesa-Honda, S.A.U. reserves the right to make changes at any time, with no advance notice or accepting any sort of responsibility.
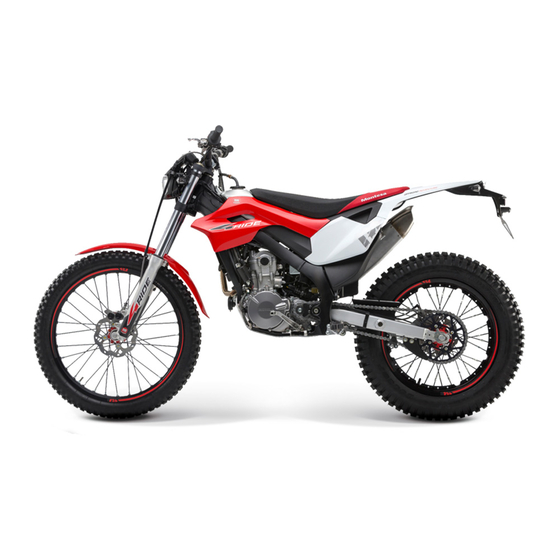
- Page 4 Montesa motorcycle! By having chosen Montesa, country. The illustrations included in this publication you now form part of a family of satisfi ed customers around the world who value Montesa's correspond to the ED model. reputation as the creator of quality products. Country codes To ensure your safety and enjoyment: ...
- Page 5 A few words about safety Your safety and the safety of others is very 2 DANGER important. Operating this motorcycle safely is an important responsibility. You WILL be KILLED or SERIOUSLY To help you make informed decisions about safety, HURT if you don’t follow instructions. we have provided operating procedures and other information on safety labels and in this manual.
-
Page 6: Table Of Contents
Index Motorcycle safety P. 2 Operating guide P. 19 Maintenance P. 35 Locating malfunctions P. 79 Information P. 91 Specifi cations P. 102 INDEX P. 106... -
Page 7: Motorcycle Safety
Motorcycle safety This section includes important information for the safe operation of your motorcycle. Read this section to ensure your safety. Safety guidelines ......... P. 3 Pictograms ............ P. 6 Safety precautions ........P. 10 Precautions while riding ......P. 11 Accessories &... -
Page 8: Safety Guidelines
Safety guidelines Safety guidelines Before riding Make sure that you are physically and mentally To ensure your safety, follow these guidelines: capable, and that you have not consumed alcohol Carry out all the normal, customary inspections or drugs. Check that you are using a duly approved specifi... - Page 9 Therefore, if you drink, don't ride and don't let your friends drink and ride. Be aware of the hazards of off-road Maintain your Montesa in proper safety riding conditions The terrain can pose a variety of challenges for off-road riding.
- Page 10 Safety guidelines If you are involved in an accident Hazard of carbon monoxide poisoning Personal safety is your priority. If you or anyone else The exhaust contains carbon monoxide, a has been injured, take time to assess the severity of poisonous gas that is both colourless and odourless.
-
Page 11: Pictograms
Pictograms Pictograms Read the instructions in the Owner's manual carefully. The meanings of the labels are explained on the following pages. Some labels warn you about Read the instructions in the Shop manual potential hazards that can cause serious injury. carefully. - Page 12 Pictograms RADIATOR CAP LABEL DANGER Do not ever open it when it is hot. The hot coolant will burn you. The pressure relief valve is activated at 1,1 kgf/cm LOADING AND ACCESSORIES WARNING LABEL WARNING LOADING AND ACCESSORIES The stability and handling of this motorcycle can be affected by the addition of accessories and luggage.
- Page 13 Pictograms REAR DAMPER LABEL PETROL REFUELING Do not open. made in C.E. Nº XXXXXX Do not heat. WARNING! don’t touch Gas at high pressure. TYRE INFORMATION LABEL Cold tyre pressure (only for road use): [Rider only] Front 100 kPa (1,02 kgf/cm Rear 100 kPa (1,02 kgf/cm Tyre size (Dunlop):...
- Page 14 Pictograms SAFETY REMINDER LABEL For your own protection, always wear a helmet and protective gear. FUEL LABEL Only unleaded petrol. ONLY ONE RIDER LABEL This motorcycle is not designed to transport a passenger. DRIVE CHAIN LABEL Keep the chain well-adjusted and lubricated. 25 to 35 mm of free play.
-
Page 15: Safety Precautions
Safety precautions Safety precautions 2 WARNING Ride carefully and keep your hands on the Not wearing a helmet increases the handlebars and your feet on the footrests. chance of suffering serious injuries or Always keep the safety of other riders in mind. even death in the case of a collision. -
Page 16: Precautions While Riding
Safety precautions Jacket and pants Precautions while riding Highly-visible, long-sleeved protective jacket and sturdy pants (or a protective racing suit). Running-in For the fi rst 500 km, follow these guidelines to Additional accessories for off-road riding ensure the reliability and future performance of Road gear may also be appropriate for occasional your motorcycle. - Page 17 Safety precautions Engine brake Braking The engine brake helps reduce the speed of the Follow the guidelines below: motorcycle when the throttle is released. Downshift Avoid excessively sudden braking and for more pronounced speed reduction. Use the downshifting. engine brake and intermittently apply the brakes to Sudden braking can reduce the stability of reduce speed when descending long, steep slopes.
- Page 18 Safety precautions Parking with the side stand Parking 1. Turn off the engine. Park on fi rm, level surfaces. 2. Lower the side stand. If you must park on a slightly sloped or less- 3. Lean the motorcycle slowly to the right, until its than-fi...
- Page 19 Safety precautions Refueling and suggestions on fuel Follow these instructions to protect the engine and the catalytic converter: Only use unleaded petrol. It must be 91 octane (RON) or higher. If you use lower octane petrol, engine performance will be reduced. ...
-
Page 20: Accessories & Modifi Cations
Montesa, or making any modifi cation which you could be seriously injured or that would affect its original design. Doing so may killed. -
Page 21: Off-Road Safety
Off-road safety Off-road safety Before venturing out on unfamiliar terrain, learn to ride on a clear, obstacle-free off-road terrain. Obey all local laws and regulations pertaining to off-road riding at all times. Obtain permission to ride on private property. Do not ride in private areas and obey "Do not enter"... -
Page 22: Loads
Loads It is totally prohibited to transport cargo on Loads the rear fender. The motorcycle has not been designed for this purpose. Transporting extra weight affects the handling, braking and stability of the motorcycle. 2 WARNING Always ride at a safe speed in terms of the load you are transporting. - Page 24 Operating guide Location of the parts ........P. 20 Instruments ........... P. 22 Indicators ............P. 25 Switches ............P. 26 Steering lock ..........P. 27 Starting the engine ........P. 28 Gear shift ............P. 29 Refuelling ............P. 30 Suspensions ..........
-
Page 25: Location Of The Parts
Location of the parts Right side cover ( P53) Throttle grip ( P75) Front brake fl uid reservoir ( P64) Front brake lever Coolant level and expansion cap ( P62) Right front cover ( P52) Kickstarter pedal ( P28) Rear brake pedal ( P64) Side stand ( P66) - Page 26 Fuel fi ller cap ( P30) Clutch lever ( P73) Left front cover ( P52) Left side cover ( P53) Drive chain ( P67) Gearshift pedal ( P29) Engine oil fi lter ( P57)
-
Page 27: Instruments
Instruments M (Mode) S (Set) button button Checking the display screen When the motorcycle is started, the display screen, odometer (total distance travelled) and either km/h or mp/h segments light up, depending on the prior confi guration. - Page 28 Instruments (continued) Total odometer [Odo] and tripmeter [Trip 1/2] The M (Mode) button toggles between the total odometer and tripmeter in normal view. Total odometer (Odo): Speedometer Total distance travelled. Tripmeter (Trip 1, Trip 2): Distance travelled since the tripmeter was reset to zero (by pressing and holding the S (Set) button to reset the value on the tripmeter screen to...
- Page 29 Instruments (continued) Setting mode The main screen is used to adjust the following settings: 1. Changing the speed units: Press the S (Set) button. Start the motorcycle. Keep it pressed for several seconds and Press the M (Mode) button. "Trip 1" will change to 0.0 km/h / mph. Keep it pressed for several seconds and the speed units will change from km/h to mph 3.
-
Page 30: Indicators
Indicators High beam indicator Right/left turn signal indicator Malfunction indicator lamp (MIL) ( P81) -
Page 31: Switches
Switches Headlight dimmer switch • : High beam • : Low beam Engine stop button Keep pressed to stop the engine. Horn button Right / left turn indicator switch... -
Page 32: Steering Lock
Steering lock Locks the steering when parked to prevent The steering lock is on the lower bridge of the front possible theft of the motorcycle. suspension. The use of a "U"-type anti-theft device for the Locking wheel or other similar device Turn the handlebars all the way to the left. -
Page 33: Starting The Engine
Do not run the engine with the garage door closed. Even with the door open, run the engine only long enough to move your 4Ride out of the garage. Cold engine starting Shift the transmission into neutral. -
Page 34: Gear Shift
Gear shift The transmission of your motorcycle has fi ve gears, arranged so that fi rst gear is below and the other four are above. -
Page 35: Refuelling
Refuelling Fuel Fuel fi lling opening Filler neck Do not fi ll with fuel above the fi ller neck. Type of fuel: Only unleaded petrol Octane number: Your motorcycle has been designed to use fuel with an octane number (RON) of at least 91. - Page 36 Refuelling (continued) Refuelling and tips on fuel ( P14) 2 WARNING Fuel fi ller cap opening Petrol is highly fl ammable and is Disconnect the breather hose from the fuel fi ller cap. explosive. Turn the fuel fi ller cap counterclockwise, then You can be burned or seriously injured remove the cap.
-
Page 37: Suspensions
Suspensions Front suspension settings Rebound damping (right fork) Turning the rebound damping adjuster adjusts how The motorcycle is shipped with a light NOTICE quickly the fork extends. coating of grease on the forks. This is not an indication of a leak. STD: 16 clicks from full hard. - Page 38 Suspensions (continued) When your Cota is new, your suspension will Rebound damping adjuster break-in as you ride. Rebound damping: After break-in is completed, test ride your Cota Turning the rebound damping screw adjusts how with the rear suspension at the standard setting quickly the shock absorber extends.
-
Page 39: Storage Equipment
Storage equipment Document bag The document bag is located in the storage box under the seat Remove the seat. ( P51) Document bag... -
Page 40: Maintenance
Maintenance Read the “Importance of maintenance” and “Basic maintenance” sections before carrying out any maintenance task. Consult "Specifi cations" to obtain service data. Importance of maintenance ....... P. 36 Throttle ............P. 75 Maintenance schedule ........ P. 37 Crankcase breather ........P. 77 Basic maintenance ........ -
Page 41: Importance Of Maintenance
Importance of maintenance Importance of maintenance Maintenance safety It is absolutely essential to carry out proper Always read all the maintenance instructions before maintenance on the motorcycle in order to beginning work and make sure that you have the ensure its safety, protect your investment, obtain proper tools and parts, as well as the necessary maximum performance, prevent malfunctions technical skills. -
Page 42: Maintenance Schedule
If you sell your motorcycle, these receipts must accordance with the standards and specifi cations be provided to the new owner, together with the of Montesa by properly trained and qualifi ed motorcycle. technicians. Your Montesa dealer meets all of these Montesa recommends that your dealer should requirements. - Page 43 Maintenance schedule FREQUENCY Remarks Page ITEM Make sure that you have enough fuel for Fuel level the trip planned. Throttle operation Engine oil Engine oil fi lter Transmission Oil Check the item after riding in adverse Drive Chain conditions and dusty areas. Brake Fluid Brake Pad Wear Clutch system...
- Page 44 Maintenance schedule FREQUENCY Remarks Page ITEM Spark Plug Valve clearance Crankcase breather Engine oil fi lter screen Engine idle speed Radiator coolant Cooling system Check the item after riding in adverse Drive chain slider / tensioner conditions and dusty areas. Drive / driven sprocket Drive chain slider Brake system...
- Page 45 The procedures *2 : Service more frequently when riding in wet or are included in an offi cial Montesa Shop dusty areas. Manual. *3 : Service more frequently when riding in rain or : Technical.
-
Page 46: Basic Maintenance
Basic maintenance Coolant level Pre-ride inspection Add coolant, if necessary. Check for leaks. To ensure your safety, it is your responsibility as 2 P. 62 the rider to inspect your motorcycle before riding Drive chain and make sure that any problem that you might Check the condition and the slack, adjusting fi... - Page 47 Before riding off-road, check all of the points above, Part replacement as well as the following: Always use original Montesa parts or their Make sure the spokes are tight. Check the rims equivalents to ensure the reliability and for damage. 2 P. 72 safety of the vehicle.
- Page 48 Basic maintenance *1. Standard JASO T 903 is a reference for 4-speed Engine oil motorcycle engine oils. There are two classes: Oil consumption varies and its quality deteriorates MA and MB. For example, the following label over time, according to riding conditions. Regularly indicates the classifi...
- Page 49 Basic maintenance If the chain does not move smoothly, makes strange Brake Fluid noises, has damaged rollers or loose pins, have it Do not add or replace brake fl uid, except for in the inspected by your dealer. case of an emergency. Only use new brake fl uid from a sealed container.
- Page 50 Basic maintenance Cleaning and lubrication Avoid contact between the lubricant and brakes or tyres. After inspecting the assembly, clean the chain and Avoid applying an excessive amount of chain sprockets while turning the rear wheel. Use a dry lubricant to prevent it from splashing it on your cloth with chain cleaner or a neutral detergent.
- Page 51 Basic maintenance A concentration of up to 60% will provide greater Inspecting damage protection in cold climates. Check for cuts, slits or cracks that expose the cords or fabric, NOTICE as well as for nails or other The use of coolants not specifi ed for aluminium foreign objects embedded in engines or tap water can cause corrosion.
- Page 52 Basic maintenance Inspecting the depth of the tread 2 WARNING Inspect the tread wear. For safe riding, the tyres should be replaced when the tread reaches a Riding with tyres that are excessively minimum depth of 3.0 mm. worn or incorrectly infl ated may cause an accident in which you could suffer serious injuries or even be killed.
- Page 53 Basic maintenance Replace the tyres at your dealer. 2 WARNING To fi nd out the recommended tyres, their pressure and the minimum tread depth, consult the The installation of unsuitable tyres "Specifi cations" section. 2 P. 104 on your motorcycle can affect riding Always follow these instructions when changing and stability, which could result in an tyres.
- Page 54 Basic maintenance Air cleaner Disassembly Remove the seat box-rear fender assy. 2 P. 54 Remove the four bolts and air cleaner housing cover. Remove the air cleaner element assembly from the air cleaner housing. Remove the mesh device from the air cleaner element.
- Page 55 Basic maintenance 2 WARNING Never use petrol or low fl ash point solvents to clean the air cleaner element. A fi re or explosion could result. Soak the element in a special air cleaner or engine oil and drain out the excess.
-
Page 56: Component Removal / Installation
Component removal / installation Seat Seat lock ring Removal Pull on the ring on the seat lock located on the right side, at the rear of the seat. Pull the seat back until it is no longer anchored to the guide pin located on the fuel tank. Lift the seat. - Page 57 Component removal / installation Front right / left cover Removal Remove the seat. 2 P. 51 Remove the bolt from the inside of the top front part (fuel tank). Remove the bolt from the inside of the lower front part (frame support). Remove the bolt from the top.
- Page 58 Component removal / installation Right / left side cover Bolt Removal 1. Remove the seat. 2 P. 51 2. Remove the bolt located inside the housing. 3. Remove the lower centre pivot bolt on the fastening ring. 4. Remove the side cover, detaching the front and rear tabs.
- Page 59 Component removal / installation Seat box- rear fender assy Remove the screw on the right lower side cover. Take off the front covers and gently lift out the seat box- rear fender assy. Remove the seat. 2 P. 51 Disconnect the electrical installation. Remove the right / left side covers.
-
Page 60: Engine Oil
Engine oil Checking the engine oil Dipstick / fi ller cap 1. Start the engine and let it idle for around 3 minutes. 2. Stop the engine and wait 3 minutes. 3. Support the motorcycle in an upright position on level surface. 4. -
Page 61: Adding Engine Oil
Engine oil Adding engine oil NOTICE Excessive or insuffi cient amounts of oil can If the engine oil is below or near the lower level damage the engine. Do not mix different brands 2 P. 55, add the recommended engine oil. or weights of oil. - Page 62 8. Dispose of the oil and oil fi lter at an approved recycling centre. Use a Montesa genuine oil fi lter or equivalent 9. Remove the bolt, the mounting plate and the specifi ed for your model.
- Page 63 Engine oil 13. Install the new oil fi lter inside the crankcase, with its “OUT SIDE” mark facing out. 2 WARNING Installing the oil fi lter backwards can result in severe engine damage. 14. Install new O-rings in the oil fi lter cover grooves. 15.
- Page 64 Engine oil 17. Remove the sieve fi lter, clean it and reinstall it. 20. Install a new sealing washer on the drain bolt. Tighten the drain bolt. Torque: 22 N•m (2,2 kgf•m). 21. Fill the engine crankcase with the recommended oil (2 P. 43) and replace the oil fi...
-
Page 65: Transmission Oil
Transmission Oil Changing the oil 1. Warm up the engine before draining the oil. This will ensure complete and rapid draining. Remove the bolts and crankcase skid plate. 2. Support the motorcycle in an upright position on level surface. 3. Remove the oil fi ller cap from the clutch cover. 4. - Page 66 Transmission Oil 5. After the oil has drained completely, install the Filler cap drain bolt with a new sealing washer. Tighten the drain bolt to the specifi ed torque. O-ring Torque: 22 N•m (2,2 kgf•m). 6. Pour specifi ed transmission oil. Specifi...
-
Page 67: Coolant
Coolant Checking the coolant Filling level Always make sure that the engine and the radiator have cooled before checking the coolant level. 1. Position the motorcycle on a fi rm, level surface. 2. Remove the upper radiator mounting bolt. 3. Move the upper part of the radiator forward and remove the radiator cap. -
Page 68: Adding Coolant
Coolant Adding coolant 2 WARNING 1. If the coolant level drops below the neck of the Removing the radiator cap while the fi ller hole, add the recommended coolant engine is hot will allow the coolant to (2 P. 45) until the level reaches the neck of spray out, seriously scalding you. -
Page 69: Brakes
Brakes Checking the brake fluid If the brake fl uid level in the brake fl uid reservoirs is below the MIN level mark or there is too much free play of the brake lever or pedal, inspect the brake 1. Place the motorcycle in an upright position on a pads for wear. - Page 70 Brakes Inspecting the brake pads Front Inspect the brake pads from the top of the brake caliper. Check the brake pads for wear. Rear The pads must be replaced if one of the pads is Inspect the brake pads from the rear right side of worn.
-
Page 71: Side Stand
Side stand When the motorcycle is lifted, the stand will no longer touch the ground and will spring back up. 1. Check the stand springs for damage or loss of tension. 2. Make sure that the stand assembly moves freely. If the stand is stiff or squeaks, clean the area around the pivot and lubricate the pivot bolt with grease or oil lubricant. -
Page 72: Drive Chain
Drive chain Drive chain tension inspection Check the drive chain tension at various points on the chain. If it is not consistent at all points, some links may be kinked or have seized. Have your dealer inspect the chain. 1. Place the motorcycle on its side stand on level ground. -
Page 73: Drive Chain Slack Adjustment
Drive chain Drive chain slack adjustment Loosen Adjustment of the drive chain requires the use Eccentric of special tools. If you do not have the necessary chain means, have your dealer adjust your drive chain adjuster tension. 1. Place the motorcycle on its side stand on level ground. - Page 74 Drive chain 5. Turn the eccentric chain adjuster to a position with a larger number to reduce the free play of the chain or towards a smaller number to increase it. Adjust the chain with the eccentric chain adjusters so that it is parallel with the centre line of the frame.
- Page 75 Drive chain Checking the drive chain for wear The chain is tightened using the eccentric chain adjusters. These have two different positions on the swingarm. When it is necessary to set the eccentric chain adjuster to the maximum adjustment point (position 15) of the second position of the swingarm in order to tighten the chain, this means that the chain is excessively worn and must be replaced.
-
Page 76: Checking The Drive Chain
Drive chain Checking the drive chain Chain slider slider 1. Check the drive chain slider for wear or damage. If the wear is 2.0 mm (0.08 in) or more, replace the slider. 2. Check the drive chain tensioner slider for wear or damage. -
Page 77: Wheels
Wheels Rims and spokes Front wheel For the safe operation of the motorcycle, it is Wheel rim essential to maintain the circular shape of the wheels, as well as the proper tension of the spokes. During the fi rst 500 km (600 miles), the spokes will loosen more rapidly due to the initial setting of Spoke nipple parts. -
Page 78: Clutch
Clutch Checking the clutch Check the clutch cable for kinks or signs of wear. If necessary, have your dealer replace it. Checking the free play of the clutch lever Check the free play of the clutch lever Free play of the clutch lever: 10 to 15 mm Clutch lever Free play... - Page 79 Clutch To increase free play, turn the adjuster Adjusting the free play of the counterclockwise, then tighten the lock nut clutch lever securely. The clutch lever free play can be adjusted by turning NOTICE the adjuster. Do not adjust the free play of the lever to less ...
-
Page 80: Throttle
Throttle Checking the throttle Free play With the engine turned off, check that the throttle grip turns smoothly from a completely closed position to a completely open position in all steering positions and that the throttle free play is correct. If the throttle does not move smoothly, does not automatically close or if the cable is damaged, have your dealer inspect the motorcycle. - Page 81 Throttle Adjusting the throttle free Lock nut Dust protector play Adjustment is made with the throttle cable adjuster. 1. Slide the rubber dust cover off from the cable adjuster. 2. Loosen the lock nut. 3. Turn the adjuster. Turn the adjuster towards “A” to reduce the Adjuster free play.
-
Page 82: Crankcase Breather
Crankcase breather Cleaning the crankcase breather Service more frequently when riding in rain or at full throttle. Service if the accumulated deposits can be seen in the transparent section of the breather. 1. Remove the breather tube from the crankcase. 2. -
Page 83: Headlight
Headlight Adjusting the headlight aim Bolt The vertical aim of the front headlight can be Bolt adjusted to obtain the proper alignment. Bear in mind local laws and regulations. 1. Remove the three bolts fastening the headlight housing. 2. Adjust the alignment by moving the lower support of the headlight housing back and forth. -
Page 84: Locating Malfunctions
Locating malfunctions Engine does not start ........P. 80 Warning indicators on ......... P. 81 Flat tyres ............P. 82 Electrical problems ........P. 87... -
Page 85: Engine Does Not Start
Engine does not start Check the following points: Check the correct engine starting sequence. 2 P. 28 Check that there is petrol in the fuel tank. Make sure engine stop button is not pushed. Keep the throttle completely closed. -
Page 86: Warning Indicators On
Warning indicators on PGM-FI (Programmed Fuel Injection) Malfunction indicator lamp (MIL) If the indicator comes on while riding, you may have a serious problem with the PGM-FI system. Reduce speed and have your motorcycle inspected by your dealer as soon as possible. Malfunction indicator lamp (MIL) -
Page 87: Flat Tyres
Flat tyres Repairing a fl at tyre or changing a tyre requires 2 WARNING special tools and technical experience. We recommend that this type of service be performed It can be hazardous to ride the by your dealer. motorcycle with a temporary repair of After an emergency repair, have your tyre / wheel the tyre or inner tube. - Page 88 Flat tyres Removing the wheels Front axle Follow these procedures if you need to remove a wheel to repair a fl at. Front wheel Removal 1. Park on a fi rm, level surface. 2. Loosen the axle pinch bolt. 3.
- Page 89 Flat tyres Installation 6. Lift the front wheel off the ground again and 1. Position the wheel between the fork arms and check that it turns without diffi culty once the insert the front axle through the right arm of the brake is released.
- Page 90 Flat tyres Rear wheel Eccentric chain adjuster Removal 1. While fi rmly supporting the motorcycle, lift the rear wheel off the ground using a safety stand or lifting device. 2. Remove the two protective covers from the axle. 3. Loosen the nut on the rear axle and turn the eccentric chain adjusters to the "0"...
- Page 91 Flat tyres Installation 3. Adjust the drive chain. 2 P. 68 1. To install the rear wheel, reverse the removal 4. Insert and tighten the rear axle nut. procedure. Torque: 70 N•m (7.0 kgf•m). Prevent the brake caliper from scratching the wheel during installation.
-
Page 92: Electrical Problems
Electrical problems Burnt out bulb Headlight bulb 1. Remove the 3 bolts. 2. Remove the front headlight assembly. Follow the procedure described below to replace a 3. Disconnect the terminals from the bulb. burnt out bulb. Be sure to let the bulb cool down before replacing Use only the specifi... - Page 93 Electrical problems 4. Remove the dust cover. 5. Press down on the pin and pull out the bulb without turning it. 6. Install a new bulb and the rest of the parts in the reverse order of removal. Do not touch the glass surface with your fi ngers. If you touch the bulb with your bare hands, clean it with a cloth moistened with alcohol.
- Page 94 Electrical problems Position light bulb Front / rear turn signal bulb 1. Remove the socket without turning. 1. Remove the bolt. 2. Pull out the bulb without turning. 2. Remove the turn signal lens. 3. Install a new bulb and the socket in the reverse 3.
- Page 95 Electrical problems Registration plate light bulb 1. Remove the socket without turning. 2. Pull out the bulb without turning. 3. Install a new bulb and the socket in the reverse order of removal. Bulb Sockets...
-
Page 96: Information
Information Instruments, controls and other features . P. 92 Fuels containing alcohol ......P. 93 Catalytic converter ........P. 94 Caring for your motorcycle ......P. 95 Storing your motorcycle ......P. 98 Transporting your motorcycle ....P. 99 You and the Environment ......P. 100 Serial numbers .......... -
Page 97: Instruments, Controls And Other Features
Instruments, controls and other features Instruments, controls and Ignition cut-off system other features An angle sensor (bank angle) stops the engine and fuel pump after a few seconds in the event that the motorcycle tips over. Total odometer The screen is reset to 0.0 once the reading exceeds 999.999. -
Page 98: Fuels Containing Alcohol
Fuels containing alcohol Fuels containing alcohol In some countries, conventional fuels mixed with alcohol are available. This motorcycle is designed only to be used with "unleaded" petrol, with a RON of 91 or higher. continued 93... -
Page 99: Catalytic Converter
(NOx) in the engine exhaust into turn off the engine and have the motorcycle safe compounds. inspected. A defective catalytic converter contributes to air pollution, and can impair your engine's performance. A replacement unit must be an original Montesa part or its equivalent. -
Page 100: Caring For Your Motorcycle
Clean the front headlight lenses, panels Frequent cleaning and polishing are important to and other plastic parts carefully to avoid ensure the long life of your Montesa motorcycle. A scratching them. Avoid applying water clean motorcycle makes it easier to detect potential directly to the air cleaner, the silencer or problems. - Page 101 Caring for your motorcycle Dry the brakes: 6. Apply a coat of wax to prevent corrosion. Avoid products that contain harsh detergents Water impairs braking effectiveness. After or chemical solvents. These products can washing, intermittently apply the brakes at a damage metal parts, as well as the paint and slow speed to help dry them.
- Page 102 Caring for your motorcycle Aluminium components Aluminium components Aluminium corrodes when it comes in contact with Exhaust pipe and silencer dirt, mud or road salt. Do not use abrasive commercial cooktop cleaners Clean aluminium parts regularly, and follow these to clean the exhaust pipe or silencer. Use a neutral indications to prevent scratches: detergent to clean the painted surface on the ...
-
Page 103: Storing Your Motorcycle
Storing your motorcycle Storing your motorcycle If you store your motorcycle outdoors, you might want to consider using a full motorcycle cover. If you are not going to use your motorcycle for a long period of time, follow these instructions: ... -
Page 104: Transporting Your Motorcycle
Transporting your motorcycle Transporting your motorcycle If you need to transport your motorcycle, do so on a motorcycle trailer or in a lorry or on a fl atbed trailer with a loading ramp or platform lift and use appropriate fastening straps. Never attempt to tow a motorcycle with one or both wheels on the ground. -
Page 105: You And The Environment
You and the Environment You and the Environment Recycle waste Put oil and other toxic waste in approved containers Owning and riding a motorcycle can be a and take them to a recycling centre. marvellous experience, but it has its share of Call your town council or environmental service responsibility in protecting the environment. -
Page 106: Serial Numbers
Serial numbers Serial numbers The serial numbers of the frame and engine uniquely identify your motorcycle and are required to register it. They may also be necessary to order replacement parts. The frame number is stamped on the right side of the steering column. -
Page 107: Specifi Cations
Specifi cations Major components ........P. 103 Service Data ..........P. 104 Bulbs .............. P. 105 Torque specifi cations ........P. 105... -
Page 108: Major Components
Specifi cations ■ Major components Displacement 259 cm Model MT04 (4RIDE) Bore and stroke 78.0 x 54.2 mm (3.07 x 2.13 in) Overall length 2035 mm (80.1 in) Compression ratio 10.5/1 Overall width 835 mm (32.8 in) Unleaded petrol Fuel... -
Page 109: Service Data
Specifi cations ■ Service Data Spark plug gap (not adjustable) 0,80 a 0,90 mm Front 80/100-21 M/C 51 M 1800 ± 100 r.p.m. Idle Speed: Tyre size (Dunlop) Rear 120/100 R18 M/C 68 M Motorcycle oil - Recommended 4-stroke Repsol 4T SAE 10W30 or Front 2,75-21 M/C 45 L engine oil... -
Page 110: Bulbs
Specifi cations ■ Torque specifi cations Recommended drive Drive chain lubricant chain lubricant Engine oil drain bolt 22 N·m (2,2 kgf·m) Drive chain slack 25 to 35 mm Transmission oil drain bolt 22 N·m (2,2 kgf·m) Regina #520 Air cleaner cover bolts 10 N·m (1,0 kgf·m) Standard drive chain No. -
Page 111: Index
INDEX Seat box- rear fender assy ....... 54 Coolant ............45, 62 Accessories ............15 Covers Adjusting the headlight ........78 Front cover ............52 Side cover ............53 Crankcase breather .......... 77 Brakes Brake pads wear ..........65 Fluid ..............64 Drive chain ............ - Page 112 Frame number ..........101 Labels ..............6 Front wheel Load guidlines ..........17 Removal ............. 83 Load limit ..........17, 103 Fuel ..............14 Locating malfunctions ........79 Tank capacity........... 30 Location of the parts ........20 Tips ..............30 Fuels containing alcohol ........
- Page 113 Pictograms............6 Precautions while riding ........11 Throttle.............. 75 Tips Coolant ............45 Refuelling ............30 Engine oil ............43 Fuel ..............30 Transmission oil ..........60 Safety guidelines ..........3 Total odometer ........... 23, 92 Safety precautions ..........10 Transporting your motorcycle ......
Need help?
Do you have a question about the 4ride and is the answer not in the manual?
Questions and answers