
Subscribe to Our Youtube Channel
Related Manuals for Frigomat KISS 3 POWER Series


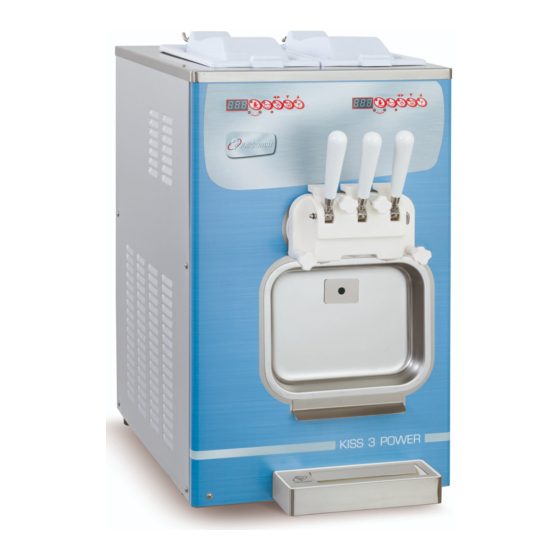
Summary of Contents for Frigomat KISS 3 POWER Series
- Page 1 MANUALE D’USO E MANUTENZIONE OPERATING INSTRUCTIONS AND MAINTENANCE MANUEL D’UTILISATION ET D’ENTRETIEN Serie KISS 3 POWER KISS 3 POWER EMU...
- Page 2 IMPORTANT We recommend that you read this manual fully and carefully before using your appliance. It is in your interest to pay special attention to the warnings marked as follows: Failure to comply with this signal causes very serious risks for health, death, and medium and long term permanent damage.
- Page 3 The following pages carry all of the indications required to perform installation, operation, adjustments and routine maintenance correctly. FRIGOMAT S.r.l. reserves the right to carry out the modifications it deems necessary to improve its product or the technical manual without prior warning, inserting the variations in the subsequent editions.
-
Page 4: Table Of Contents
1. TRANSPORTATION, HANDLING AND STORAGE ……… Preliminary inspection and storage………………………… Dimensions and weights of packaged machines …………… 4 Indications for decommissioning ……………… 2. MARKING AND GRAPHIC SIGNS ………………………………………… 3. GENERAL SAFETY STANDARDS …………………………………… 7 4. INSTALLATION ………………………………………… 4.1 Use ………………………………………… 4.2 Working limits …………………………………………... -
Page 5: Transportation, Handling And Storage
1 TRANSPORTATION, HANDLING AND STORAGE. 1.1 PRELIMINARY INSPECTION AND STORAGE The machine is transported at the risk and peril of the customer. If you notice any damage to the packaging, immediately inform the carrier. Inform the carrier immediately after opening the package if the machine is damaged even if a few days after delivery. -
Page 6: Marking And Graphic Signs
2. MARKING AND GRAPHIC SIGNS The machine is provided with an identification plate and several pictograms. They must be known along with the manual to guarantee safe use. Machine data plate The adhesive plate applied on the rear enables to identify the model. - Page 7 Attention! High voltage inside; electrocution hazard. This plate is applied on the electrical box and warns operator that maintenance electrical/electronic components reserved qualified personnel. ENGLISH - 6...
-
Page 8: General Safety Standards
Use only original FRIGOMAT spare parts when performing maintenance. The manufacturer will not be held liable for damage caused by use of non-original spare parts. Use of non-original spare parts entails automatic termination of the warranty. -
Page 9: Installation
(A-weighted equivalent continuous sound pressure level) MODEL LEVEL (A) < = 70 dB (A) KISS 3 Power 4.4 SUPPLIED WITH MACHINE Scrapers FRIGOMAT lubricant Brushes Use and maintenance manual Gasket extractor Declaration of conformity O-ring kit Warranty certificate Rubber seal... -
Page 10: Activation
4.5 ACTIVATION (FOR THE TECHNICIAN) FRIGOMAT declines all and any liability for damage caused by failure to comply with the following indications. This lack of compliance causes the warranty to terminate. Connection of the machine to the water mains must be performed in compliance with national regulations of the Country where the machine is installed. - Page 11 If needed, carry out an equipotential bonding, using the screw placed on the rear of the machine below the frame and marked with the symbol shown to the left. Make sure that the cold water supply line intended for condensation has pressure values between 1 and 3 BAR (between 100 kPa and 300 kPa) and temperature between 13°...
- Page 12 Three-phase machines are powered with three-phase + neutral lines: be careful never to connect the phase lines with neutral. FRIGOMAT will not be held liable for damage to the machine deriving from non-compliance with this rule.
-
Page 13: Safety Devices
5. SAFETY DEVICES Shearing-prevention safety device: Implemented by means of a micro and a safety circuit compliant with European standards; it intervenes by blocking the beater motor when the dispenser door is removed. Motor overheating safety device: Implemented by means of automatic reset thermal- current sensors or thermal relays;... -
Page 14: Operation
6. OPERATION 6.1 MACHINE 1. Tank lid It prevents the product in the tank from coming into contact with dust or other impurities. 2. Control panel Enables to select the work programs. 3. Door Closes the cylinder hermetically during the processing phases. -
Page 15: Control Panel
6.2 CONTROL PANEL 1. STOP In whatever operating phase the machine is in, pressing the STOP key stops the machine and cancels the function in progress. 2. MIX / SET Regardless of the operating phase the machine is in, pressing the MIX button will only start the beater motor. The "MIX safety Timer", which automatically stops the beater motor after 30', is active for this function. - Page 16 4. PRESERVATION / DOWN ( ) This button has 2 functions: 1. In whatever operating phase the machine is in, pressing the PRESERVATION key turns on the key's LED and starts preserving the product in the tank according to the texture value set for this function and relative to the latest working programme selected.
- Page 17 TANK MIXING CONTROL (OPTIONAL) 1. MANUAL TANK MIXING CONTROL WITH MACHINE IN STOP and/or MIX MODE. With the machine in STOP and/or MIX mode, by pressing the STOP and MIX keys a few seconds, the display shows the AGT lettering and enables continuous mixing in the tank.
-
Page 18: Production Of Soft Ice Cream
6.3 PRODUCTION OF SOFT ICE CREAM 6.3.1 PRELIMINARY CHECKS After having installed the machine in compliance with the instructions of chapter 3 and having accurately washed and sanitised it, according to the instructions contained in chapter 7, proceed to conduct the preliminary checks listed below before starting to make any ice cream: Make sure that the gate valve of cold water for condensation is open (water models... -
Page 19: Operation Of Gravity Models
6.3.2 OPERATION OF GRAVITY MODELS Lift the lid and remove the power supply needle from the bottom of the tank. Pour the mixture into the tank, strictly observing minimum maximum amounts listed in the table below: MODEL MIN. (litres) MAX. (litres) KISS 3 Power G 12 x 2 Press the MIX key and leave the beater to... - Page 20 Changes to the increase in volume after each change on the control will be visible only the complete replacement of the ice cream in the batch freezing cylinder. After filling of the batch freezing cylinder, discharge excess air by placing a container under the tap and slowly lowering the dispenser lever.
- Page 21 Lower the dispenser lever to extract the ice cream. If the consistency of the product is not satisfactory, it is possible to change the value directly from the push button control panel by following instructions contained chap.6.5. If no ice cream has been extracted, the machine automatically checks...
-
Page 22: Operation Of Pump Models
6.3.3 OPERATION OF PUMP MODELS Lift the lift and pour the mixture into the tank, strictly observing the minimum and maximum amounts listed in the table below: MODEL MIN. (litres) MAX. (litres) KISS 3 Power P 8 x 2 The pressurising pump must always remain above the level of the mix in the tank. - Page 23 After filling of the batch freezing cylinder, discharge excess air under pressure in the cylinder by placing a container under the tap slowly carefully lowering dispensing lever. This operation facilitates proper filling of the batch freezing cylinder, preventing formation of ice, which might block the beater during the subsequent batch freezing stage and trigger the machine's alarm.
- Page 24 recommended minimum quantity (reserve 1 and 2 lights off). When, however, the level becomes low, the light of reserves (1) lights up to indicate that you need to add liquid mixture in the tank before further dispensing. If the level in the tank is lowered further, thus reaching the minimum allowable value to ensure the safety of the machine, the indicator lamp of reserve 2 lights on and it...
-
Page 25: Preservation
6.4 PRESERVATION The KISS Series models are fitted with the handy "preservation" function that allows the operator to switch the machine from the production phase to that of stand-by when delivery of the product is interrupted, i.e. at night, when the premises are closed, etc. -
Page 26: Adjusting The Texture
6.5 ADJUSTING THE TEXTURE 6.5.1 ADJUSTING THE TEXTURE DURING ICE CREAM PRODUCTION If the consistency of the product is not satisfactory, it is possible to change the value directly from the push button control panel by following the instructions below: Make sure the machine is turned on, it contains enough... -
Page 27: Adjusting The Texture During Creative Production
6.5.2 ADJUSTING THE TEXTURE DURING CREATIVE PRODUCTION If the consistency of the product is not satisfactory, it is possible to change the value directly from the push button control panel by following the instructions below: Make sure the machine is turned on, it contains enough product and is set for the CREATIVE FUNCTION. -
Page 28: Adjusting The Preservation Temperature In The Tank
6.5.3 ADJUSTING THE PRESERVATION TEMPERATURE IN THE TUB If the preservation temperature of the product in the tub is not satisfactory or if on the contrary is so low that it created ice along the walls of the tub, it is possible to change the value directly from the push button control panel by following the instructions below: Make sure the machine is turned on, it... -
Page 29: Maintenance
However this is not enough to prevent the formation of mould and bacteria caused by insufficient or incorrect cleaning. FRIGOMAT recommends thoroughly washing and sanitizing the parts in direct contact with the product after each work shift and in compliance with hygienic standards in force in the Country where the machine is installed. - Page 30 Press the MIXING button in order to start the beater motor and let it run for about 3'. Pull the dispenser lever down to drain all the washing water. Repeat the procedure until the water coming out is clear and clean.
- Page 31 We suggest using the following sanitising solution: Ecolab P3 Topax-san (4% dilution = 200 ml every 5 litres of water). Prepare the supplied brush and the OR disassembly device and immerse them in the solution. REMOVING AND CLEANING THE STANDARD DOOR Remove the 2 knobs that block the door to the front of the machine and place it on a clean work surface to disassemble its parts:...
- Page 32 REMOVING AND CLEANING THE PUMP (PUMP models only). Take the pressurising pump previously removed from the machine and place it on a clean work surface to disassemble its parts: 1. Turn the liquid control to release it and remove it from its seat.
- Page 33 SANITIZING REMOVABLE PARTS OPTIONAL REMOVING CLEANING DOOR OPTIONAL Remove the 2 knobs that block the door to the front of the machine and place it on a clean work surface to disassemble its parts: 1. Pull the dispenser lever down and remove the locking pin of the distribution lever.
- Page 34 SANITIZING FIXED PARTS While the removable parts soak in the sanitizer inside the tub, proceed sanitizing the fixed parts of the machine: SANITISING THE CYLINDER Immerse a disposable paper cloth in the sanitising liquid. Pass the cloth over all the cylinder surfaces. Also pass the cloth over the outer edge of the cylinder until reaching the surfaces of the front panel.
- Page 35 RINSING AND DRYING Wash your hands well and/or wear disposable latex gloves. Remove from the sanitising tank all the components which were previously disassembled, brushed and immersed. Rinse them with plenty of cold drinking water, making sure to remove all possible leftover sanitising solution. Place the rinsed components on a clean table and let them dry in the air.
- Page 36 ASSEMBLY AFTER CLEANING INSTALLING AND CLEANING THE MONOBLOC RESIN BEATER Lubricate the seal gasket and push it into the drive shaft located on the end of the beater until fully home. Push the beater into the batch freezing cylinder until fully home.
- Page 37 INSTALLING THE PUMP Place gaskets of the body of the pump in their seats. Carefully lubricate. Spread a generous film of oil on the seats of the gears in the body of the pump and in the drive duct. Lubricate all the surfaces of the gears and install them in the relative seats in the body of the pump.
- Page 38 INSTALLING THE DELIVERY PIPE Place the gaskets of the delivery pipe and the relative fitting in their seats. Carefully lubricate. Insert the rubber check valve in the seat located at the lower end of the delivery pipe. Insert the fitting on the upper end of the delivery pipe.
- Page 39 FRIGOMAT declines all and any liability for damage caused by failure to comply with these instructions. Place the terminal auger on the beater making sure that the drive part is placed in its designated seat.
-
Page 40: Extraordinary Maintenance
7.2 EXTRAORDINARY MAINTENANCE (INTENDED FOR QUALIFIED PERSONNEL) These operations are reserved exclusively for authorised qualified personnel. FRIGOMAT S.r.l. will not be held liable for damage to objects or harm to persons which occur due to failure to comply with the above. - Page 41 “MEB²” BOARD PROGRAMMING TABLE (**) DESCRIPTION KISS STEP Selection of the size of the beater motor Select amplification of the CREATIVE function Consistency hysteresis in 1% of setting PRODUZIONE (PRODUCTION) 0= 115-230/50-60/1 1= 400-440/50-60/3 Voltage and frequency selection 2= 220/230/50-60/3 (without neutral) Selection of CREATIVA 1= CREATIVA...
- Page 42 These parameters may vary for each unit and variant. (**) The parameters may vary depending on the software version or customisation. It is always possible to refer to the test inspection board supplied with the machine. (***) Contact Frigomat's support service. 41 - ENGLISH...
- Page 43 60 to 250, directly proportional to the hardness of ice cream. Each machine is tested and calibrated by FRIGOMAT with a mixture with standard features at an absorption value of the beater motor referred to 240 numbers of hardness. This value is shown on the test sheet that accompanies the machine (see test sheet at the following entry: BEATER AMPERE @SET240);...
- Page 44 )” keys to enter the password related to the RESET procedure and then confirm it. If you do not know the password, contact the Frigomat assistance service. 3. Once the password has been recognised, to conduct the RESET, simultaneously press and hold for at least 5"...
-
Page 45: Instructions For Identifying Faults
8. TROUBLESHOOTING INSTRUCTIONS 8.1 MANAGEMENT OF ALARMS MESSAGE DESCRIPTION REMEDIES Wait a few minutes and then A motor circuit breaker has intervened or press STOP to restore machine the transformer fuse breakdown. operation. The led flashes and the buzzer emits an If the alarm continues, contact intermittent acoustic signal. -
Page 46: Troubleshooting
8.2 TROUBLESHOOTING PROBLEM PROBABLE CAUSES REMEDIES Master switch open. Close the switch. The machine does not start Electrical anomaly. Contact the technician. (STOP button off). Fuses blown. Contact the technician. The machine does not start Door assembled incorrectly. Check door. (STOP button on). - Page 47 ENGLISH - 46...
Need help?
Do you have a question about the KISS 3 POWER Series and is the answer not in the manual?
Questions and answers
Frigomat KISS 3 POWER Series Operating Instructions And Maintenance , price