Ricoh DDP 92 User Manual
Hide thumbs
Also See for DDP 92:
- Maintenance manual (182 pages) ,
- Installation manual (118 pages) ,
- User manual (166 pages)
Table of Contents
Advertisement
Quick Links
Advertisement
Table of Contents

Related Manuals for Ricoh DDP 92


Summary of Contents for Ricoh DDP 92
- Page 1 Finisher User’s Guide © 2005 Ricoh Printing Systems, Ltd. May, 2005 N905360...
- Page 2 Revision Table for manual Rev. for Machine Page No. (Contents) Date manual Rev. First Edition May, 2005...
- Page 3 DDP92/184 Finisher User’s Guide...
- Page 4 © Copyright 2005 Ricoh Printing Systems, Ltd. All rights reserved. No part of this document may be reproduced without the express permission of Ricoh Printing Systems, Ltd. The material in this document is for informational purposes and is subject to change without notice.
-
Page 5: Table Of Contents
Contents Chapter 1. Introduction ..........1-1 1.1. -
Page 6: Chapter 1. Introduction
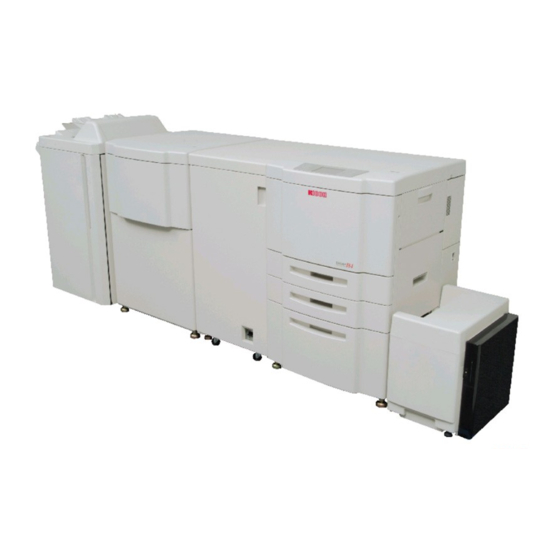
Chapter 1. Introduction 1.1. Finisher Configuration 1.1.1. External View of the Finisher The figure below shows an external view of the finisher and descriptions of the main parts. f f f f f f f Finisher F i n i s h e r l l l l 5. -
Page 7: Opening The Finisher
1.1.2. Opening the Finisher Front Cover Open the finisher front cover according to the following figure. F i n i s h e r Finisher Front Cover... -
Page 8: Internal View Of The Finisher
1.1.3. Internal View of the Finisher The following figure shows an internal view of the finisher with the front cover open. 4. Cover Sheet Feeder (Option) Sub Tray Main Tray 2. Stapler Unit Area within dotted 1. Stacker Unit lines: Booklet Finisher only Book let Tray 3. - Page 9 1. Stacker Unit Clear stacked paper when the Operator’s Panel of the printer indicates. 2. Stapler Unit (1) Staple F Replace the staple cartridge in the Staple F on the opera- tor’s side. (2) Staple F Replace the staple cartridge in the Staple R on the oppo- site side of the operator’s.
-
Page 10: Specifications
1.1.4. Specifications Finishing speed 92 pages /minute (Letter, A4/LEF) Dimensions 781 x 1151 x 656 mm: Include the main tray Weight 55 kg : Not include the cover sheet feeder 80 kg (Booklet model): Not include the cover sheet feeder 7 kg (cover sheet feeder) Paper Non-staple mode / Offset mode / Sub-tray exit mode... - Page 11 The allowable amount of paper curl with the following way is 10mm maximum 5 sheets of printed paper Amount of paper curl Amount of offset 30 mm Note: Non-staple mode only Stapling capability Maximum 50 sheets (75 g/m , 5.0 mm and below) Stapling position A = 8.5 mm C = 82.5 mm E = 14 mm B = 8.5 mm D = 8.5 mm Paper feed direction...
-
Page 12: Chapter 2. General Information
Chapter 2. General Information 2.1. Powering on the Finisher If your Finisher is connected to a DDP 92, turn the finisher on and off using the switch on the printer. The mark on the switch represents the binary characters “O” for off and “I”... -
Page 14: Chapter 3. Replacing Consumables
Chapter 3. Replacing Consumables 3.1. When to Replace Consumables The Operator’s Panel on the printer displays a message informing you when a supply needs to be replaced. However, the following item will help you anticipate when to replace consumables. Consumable Replace every... -
Page 15: Replacing The Staple Cartridge
3.2. Replacing the Staple Cartridge Replace the staple cartridge when LOW STAPLE (R) or LOW STAPLE (F) is dis- played on the Operator’s Panel. 1. Open the finisher front cover. 2. Pull out the stacker unit by holding the stacker unit handle. - Page 16 5. Insert the new cartridge into the housing. Note: Do not remove the remaining staples inside the housing; otherwise, the first sheet output after the replenishment will not be stapled. 6. Insert the cartridge housing while sliding it along the stapler rail, then push in and down to secure it in place.
-
Page 18: Chapter 4. Troubleshooting
Chapter 4. Troubleshooting 4.1. Clearing Paper Jams The finisher stops when a misfeed occurs and PAPER JAM is displayed on the Oper- ator’s Panel of the printer. Follow the steps below to clear paper from the finisher. Move the blue tab and remove paper. Turn the blue knob, move the blue tab, then remove paper. - Page 19 Move the blue knob and remove paper Turn the blue knob, then remove paper from the Booklet Tray (Booklet Finisher only). Remove paper from the Cover Sheet Feeder (Cover Sheet Feeder only).
-
Page 20: Clearing Wedged Staples
4.2. Clearing Wedged Staples Follow the steps below to clear wedged staples. Pull out the stacker unit by holding the stacker unit handle. Pull up the cartridge housing, then remove it while sliding it along the stapler rail. Pull the lever of cartridge, then open the cover. Remove the wedged staples. - Page 21 Return the Cover of cartridge to its original position. Insert the Cartridge housing while it along the stapler rail, then push in and down to secure it in place. Return the stacker Unit to its original position. After removing the wedged staples, staples do not come out from the stapler for several times, then execute the TEST PRINT of staple mode till staple appears on the paper.
-
Page 22: Chapter 5. Others
Chapter 5. Others 5.1. Load the Cover Sheet (Cover Sheet Feeder only) Load the cover sheet into the cover sheet feeder, and adjust the paper guides to the paper size. 5.2. Extend the Tray Extend the Main Tray and the Sub Tray, Main Tray Sub Tray when the length of the printed paper is 9... -
Page 23: Cancel Of Staple Job
5.3. Cancel of Staple Job (1) Except saddle stitching mode When the staple job is canceled, the paper of this job is delivered to the Main Tray without staple. (2) In case of saddle stitching mode When the staple job is canceled, the paper of this job is delivered to the Booklet Tray without staple.