Advertisement
Table of Contents
WARNING
WARNING
WARNING! Wear safety goggles when using this tool!
Wear Safety Goggles
Wear Safety Goggles
Avoid Contact with Refrigerant
Avoid Contact with Refrigerant
FLARING
FLARING
1. Make sure the flaring cone is securely attached to the yoke screw.
1. Make sure the flaring cone is securely attached to the yoke screw.
2. Insert an evenly cut piece of tubing into the corresponding sized
2. Insert an evenly cut piece of tubing into the corresponding sized die. Insert tubing so
die. Insert tubing so that it is slightly above the top of the die.
that it is slightly above the top of the die.
3. Tighten the wing nut closest to the tube first, then tighten the
3. Tighten the wing nut closest to the tube first, then tighten the other one. Nuts must be
other one. Nuts must be securely tightened so there is no chance
securely tightened so there is no chance of the tube slipping.
of the tube slipping.
4. Slide the yoke over the bar and line up flaring cone with tube. Slightly turn the yoke
4. Slide the yoke over the bar and line up flaring cone with tube.
clockwise to lock into place. Secure this locked position with thumb and forefinger
Slightly turn the yoke clockwise to lock into place. Secure this
and begin to tighten down the yoke screw until desired flare is achieved.
locked position with thumb and forefinger and begin to tighten
down the yoke screw until desired flare is achieved.
SWAGING
SWAGING
1. Remove yoke cone and install the proper size spreader on the yoke screw. Note that
the small spreader accommodates 3/16", 1/4" and 3/8" O.D. tubing.
1. Remove yoke cone and install the proper size spreader on the
yoke screw. Note that the small spreader accommodates 3/16",
2. Insert an evenly cut piece of tubing into the corresponding sized die. Insert tubing
1/4" and 3/8" O.D. tubing.
approximately 1/8" more than the size (O.D.) of the tube you are swagging. (i.e. on
1/2" O.D. tubing, the tubing should protrude 5/8" past the face of the bar).
2. Insert an evenly cut piece of tubing into the corresponding sized
die. Insert tubing approximately 1/8" more than the size (O.D.) of
3. Tighten the wing nut closest to the tube first, then tighten the other one. Nuts must be
the tube you are swagging. (i.e. on 1/2" O.D. tubing, the tubing
securely tightened so there is no chance of the tube slipping.
should protrude 5/8" past the face of the bar).
4. Slide the yoke over the bar and line up the swaging spreader with the tube. Slightly
turn the yoke clockwise to lock into place. Secure this locked position with thumb and
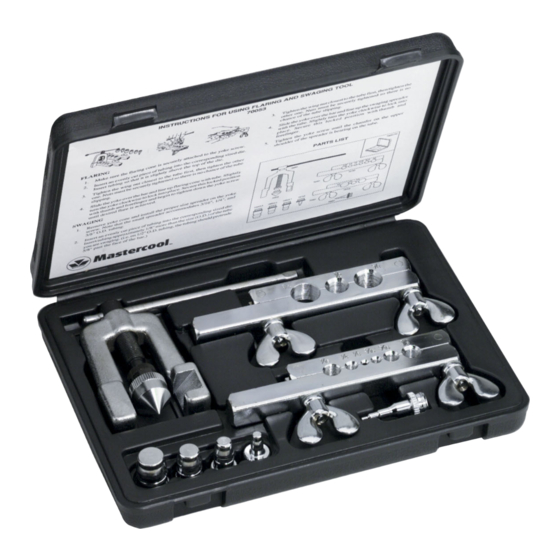
OPERATING INSTRUCTIONS
70053 FLARING AND SWAGING TOOL
INSTRUCTIONS FOR USING FLAR
"World Class Quality"
www.mastercool.com
R
70053
1
Advertisement
Table of Contents

Subscribe to Our Youtube Channel
Related Manuals for MasterCool 70053


Summary of Contents for MasterCool 70053
- Page 1 OPERATING INSTRUCTIONS WARNING 70053 FLARING AND SWAGING TOOL WARNING WARNING! Wear safety goggles when using this tool! Wear Safety Goggles INSTRUCTIONS FOR USING FLAR 70053 Wear Safety Goggles Avoid Contact with Refrigerant Avoid Contact with Refrigerant FLARING FLARING 1. Make sure the flaring cone is securely attached to the yoke screw.
- Page 2 5. Tighten the yoke screw until the chamber on the upper shoulder of the spreader is shoulder of the spreader is bearing on the tube. bearing on the tube. PARTS LIST PARTS LIST 70053-PB 70353 7/16 1/4 1/8 3/16 5/16 3/8 70153 70451...
Need help?
Do you have a question about the 70053 and is the answer not in the manual?
Questions and answers