Table of Contents
Advertisement
Quick Links
Advertisement
Table of Contents

Related Manuals for Shini SCAD-U Series


Summary of Contents for Shini SCAD-U Series
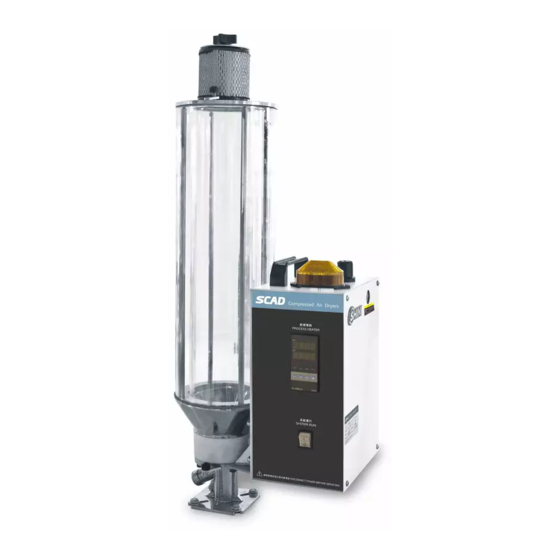
- Page 1 SCAD-U Series Compressed Air Dryer Date: Jul. 2014 Version: Ver.B (English)
-
Page 3: Table Of Contents
Contents General Description .................. 7 1.1 Coding Principle ................... 8 1.2 Feature....................8 1.3 Technical Specifications..............11 1.3.1 Specifications ................11 1.3.2 Outline Drawing ............... 11 1.4 Safety Regulations ................13 1.4.1 Safety Signs and Labels ............13 1.4.2 Transportation and Storage of the Machine......13 1.5 Exemption Clause ................ - Page 4 4.1 Temp. Setup (SCAD-6U and Models Below) ........29 4.1.1 The Instruction for the Key Operation ........29 4.2 Panel Instruction (SCAD-12U and Models Above)......31 4.2.1 Temp. Setup ................33 4.2.2 PID Auto-tuning Setting ............33 4.2.3 Intermittent Running Setup ............33 4.2.4 Weekly Time Start Setup ............
- Page 5 Picture Index Picture 1-1:Outline Drawing (SCAD-6U and Models Below) ......11 Picture 1-2:Outline Drawing (SCAD-12U and Models Above)......12 Picture 2-1:Working Principle Table (SCAD-6U and Models Below)....16 Picture 2-2:Working Principle Table (SCAD-12U and Models Above) ... 17 Picture 2-3:Electrical Diagram (SCAD-6U and Models Below) ...... 22 Picture 2-4:Components Layout (SCAD-6U and Models Below) ....
- Page 6 6(44)
-
Page 7: General Description
General Description Read this manual carefully before operation to prevent damage of the machine or personal injuries. Forbidden to process flammable or toxic material! Applicable for the small batch drying of commonly-used engineering plastics such as ABS and PS, also suitable for the pre-heating treatment before plastics molding. -
Page 8: Coding Principle
1.1 Coding Principle 1.2 Feature 1) Standard configuration ● P.I.D. temperature controller can reach the accuracy of ±1℃, The weekly timer is available with SCAD-12U~40U. ● Adopts compressed air to dry plastic materials with good and stable drying effect, and is not influenced by ambient temperature and humidity. ●... - Page 9 ● SCAD-1~6U can be optionally collocated with venturi loader VL-50 to achieve automatic material feeding; SCAD-12~40U can optionally be collocated with vacuum loader SAL-1U to achieve automatic material feeding. ● 24-hour auto start/stop timer is optional for SCAD-1~6U. Options Heatless Air Dryer HAD Function: The dew-point of compressed air can reach -40℃...
- Page 10 Chapter 6, which contains service instructions intended for service engineers. Other chapters contain instructions for the daily operator. Any modifications of the machine must be approved by SHINI in order to avoid personal injury and damage to machine. We shall not be liable for any damage caused by unauthorized change of the machine.
-
Page 11: Technical Specifications
1.3 Technical Specifications 1.3.1 Specifications Table 1-1:Specifications Pressure Air Drying Drying Heater Power Dimensions (mm) Weight Temp. max Hopper Model Pressure Flowrate H×W×D (kg) (℃) Capacity (L) (kgf/cm /hr) SCAD-1U 650×310×220 SCAD-3U 680×320×220 SCAD-6U 3.75 870×350×220 6~10 SCAD-12U 4.25 780×430×455 SCAD-20U 882×467×460 SCAD-40U... -
Page 12: Picture 1-2:Outline Drawing (Scad-12U And Models Above)
Picture 1-2:Outline Drawing (SCAD-12U and Models Above) 12(44) -
Page 13: Safety Regulations
1.4.2 Transportation and Storage of the Machine Transportation 1) SCAD-U series are packed in crates or plywood cases with wooden pallet at the bottom, suitable for quick positioning by fork lift. 2) After unpacked, castors equipped on the machine can be used for ease of movement. - Page 14 +55℃ for long distance transportation and for a short distance, it can be transported with temperature under +70℃. Storage 1) SCAD-U series should be stored indoors with temperature kept from 5℃to 40℃ and humidity below 80%. 2) Disconnect all power supply and turn off main switch and control switch.
-
Page 15: Exemption Clause
Shini (including employees and agents). Shini is exempted from liability for any costs, fees, claims and losses caused by reasons below: 1. Any careless or man-made installations, operation and maintenances upon machines without referring to the Manual prior to machine using. -
Page 16: Structure Characteristics And Working Principle
Structure Characteristics and Working Principle 2.1 Main Functions 2.1.1 Working Principle Table (SCAD-6U and Models Below) The working principle is that compressed air flows into heating case after through perssure regulating valve and solenoid valve, and finally exhaust into air. At the same time, the dew-point is reduced. The heated compressed air is blown into the heat-preservation hopper to dry materials, and it exhaust into air through filter to remove water in raw materials. -
Page 17: Working Principle Table (Scad-12U And Models Above)
2.1.2 Working Principle Table (SCAD-12U and Models Above) Drying principle: Under normal operation, hi-pressure air is blown into heating cabinet via solenoid valve and air diffusing equipment, then into drying hopper to dry up material. Air is discharged out through return air filter for recycle. Loading principle: Hi-pressure air was controlled by solenoid valve and blown into suction pipe, then accelerating flow of air generates negative pressure to drive material... -
Page 18: Drawing And Parts List
2.2 Drawing and Parts List 2.2.1 Assembly Drawing (SCAD-6U and Models Below) Remarks: Please refer to material list 2.2.2 for specific explanation of the Arabic numbers in parts drawing. Picture 2-3:Assembly Drawing (SCAD-6U and Models Below) 18(44) -
Page 19: Parts List (Scad-6U And Models Below)
2.2.2 Parts List (SCAD-6U and Models Below) Table 2-1:Parts List (SCAD-6U and Models Below) Part No. Name SCAD-1U SCAD-3U SCAD-6U Heating case Pipe heater** BH40108000050 BH40108000050 BH40108000050 Pressure regulating valve YE30200060000 YE30200060000 YE30200060000 GR-200-06* Solenoid valve * YE32331000000 YE32331000000 YE32331000000 Pressure switch YE15015000000 YE15015000000... -
Page 20: Assembly Drawing (Scad-12U And Models Above)
2.2.3 Assembly Drawing (SCAD-12U and Models Above) Remarks: Please refer to material list 2.2.4 for specific explanation of the Arabic numbers in parts drawing. Picture 2-3:Assembly Drawing (SCAD-12U and Models Above) 20(44) -
Page 21: Parts List (Scad-12U And Models Above)
2.2.4 Parts List (SCAD-12U and Models Above) Table 2-2:Parts List (SCAD-12U and Models Above) Part No. Name SCAD-12U SCAD-20U Connection- T thread joint YW80803800000 YW80803800000 Adjustable air pipe coupling YW80083800000 YW80083800000 Filter & pressure regulating valve* YE30200020000 YE30200020000 Control box Exhaust fan * YM60922500100 YM60922500100... -
Page 22: Electrical Diagram
2.3 Electrical Diagram 2.3.1 Electrical Diagram (SCAD-6U and Models Below) Picture 2-3:Electrical Diagram (SCAD-6U and Models Below) 22(44) -
Page 23: Components Layout (Scad-6U And Models Below)
2.3.2 Components Layout (SCAD-6U and Models Below) Picture 2-4:Components Layout (SCAD-6U and Models Below) 23(44) -
Page 24: Electrical Components List (Scad-6U And Models Below)
2.3.3 Electrical Components List (SCAD-6U and Models Below) Table 2-3:Electrical Components List (SCAD-6U and Models Below) Symbol Name Specification Part No. 24VDC YE03404000000 Temp. controller* 230V 50/60Hz YE81020024000 Middle relay 230V 50/60Hz YE03270700000 Time relay 230V 50/60Hz YE86322000000 Fuse** YE41032200000 Fuse core YE46004000100 Shift switch... -
Page 25: Electrical Diagram (Scad-12U And Models Above)
2.3.4 Electrical Diagram (SCAD-12U and Models Above) Picture 2-5:Electrical Diagram (SCAD-12U and Models Above) 25(44) -
Page 26: Components Layout (Scad-12U And Models Above)
2.3.5 Components Layout (SCAD-12U and Models Above) Picture 2-6:Components Layout (SCAD-12U and Models Above) 26(44) -
Page 27: Electrical Components List (Scad-12U And Models Above)
2.3.6 Electrical Components List (SCAD-12U and Models Above) Table 2-4:Electrical Components List (SCAD-12U and Models Above) Symbol Name Specification Part No. AC contactor 230V 50/60Hz YE00601521000 Middle relay 230V 50/60Hz YE03270700000 230V 50/60Hz YE80001100000 Fuse YE41032200000 Fuse core YE46006000100 S1 S2 Shift switch 4P WH YE10210400000... -
Page 28: Installation And Debugging
Installation and Debugging 3.1 Attentions during Installation 1) Make sure that voltage of electricity matches with the nameplate. 2) Connect the electricity wire and earth wire according to local regulations. 3) Use independent electricity wire and power switch .The diameter of the wire should not be less than that of electric cabinet’s wire. -
Page 29: Application And Operation
4. Application and Operation Picture 4-1:Operation Panel (SCAD-6U and Models Below) 4.1 Temp. Setup (SCAD-6U and Models Below) 4.1.1 The Instruction for the Key Operation 1) The Selection Key for the Parameter Interface 1. In usual status, press this key to enter the parameter interface selection mode and also you can select the parameter interface by pressing that key. - Page 30 1. Press that key in usual mode to set the "value" directly. 2. Press that key in parameter interface selection mode to enter into setup mode to set "value". 3. Press that key in parameter mode to enter into setup mode to set "value".
-
Page 31: Panel Instruction (Scad-12U And Models Above)
4.2 Panel Instruction (SCAD-12U and Models Above) Picture 4-2:Operation Panel (SCAD-12U and Models Above) There are three control switches, a temp. controller, a timer on the control panel. The three switches function as timing, loading, and drying respectively: The operation steps for operating the hot air drying combination: 1) Connect to the 230V single phase power supply, and connect to the air source (the air pressure must be 4-6kgf/cm ). - Page 32 immediately. After a period of heater's self-cooling, the solenoid valve for the air drying shut off and the temp. Controller displays "power cutoff". Table 4-1:Specification of Control Panel (SCAD-12U and Models Above) Name Functions Remarks Green light on indicates Respectively display the working Operation display area operation condition while condition of blower and heater.
-
Page 33: Temp. Setup
4.2.1 Temp. Setup 1) Press the “SET” key and the LED display begins to flash, press the key to set the temperature. 2) Press “ENTER” key to input the set value of the temperature. 4.2.2 PID Auto-tuning Setting 1) Press the “SET” key and the LED display begins to flash. Press the “SET” and “ENTER”... -
Page 34: Weekly Time Start Setup
value". Each press of can add or decrease 15 mins set time. 3) Press "ENTER" to confirm the input time value and enter into "0-OFF" time setup items, then repeat step 2。 Picture 4-4:Intermittent Running Setup 2 Note:If set 0-ON as 04:00, 0-OFF as 05:00, which means drying periods is 4 hours stop time is 5 hours,then working for 4 hours and being stopped for 5 hours and repeat this so long. -
Page 35: Picture 4-6:Weekly Time Start Setup 1
Picture 4-6:Weekly Time Start Setup 1 2) Press key to add or decrease the time value in "SV/setup value" of "1-OFF”. Press "ENTER" to confirm the input value and comes into the time setup items of "2-ON""TUE-ON". Picture 4-7:Weekly Time Start Setup 2 3) Do the same setup again and again to setup the ON/OFF time from Monday to Sunday. -
Page 36: Picture 4-9:Weekly Time Start Setup 4
5) Setup all the "ON" to 00:00 if it is not for time start/stop. Note: 1) F-20 functions as an password lock,hold on "SET" till the "PV" displays F-20. 2. Press key and only after input 0021 in the SV,can you press "ENTER"... -
Page 37: Present Time Modification
if actual temperature were equal to or higher than the addition of setting temperature value and setting value. This temperature range is between 0 and 50, and default value is 15. 4.2.5 Present Time Modification 1) Repeat the above steps until PV displays "TIME" to stand for present time. 2) Press key to add or decrease time. - Page 38 meanwhile for 3 seconds till F-06 displays in PV.. to set SV into 0003 and press “Enter”, at this time F-06 displays 2) Press in PV. can alter value, press “Enter” to input after confirming 3) Now pressing then jump to F-07. 4) If you want to leave the function setting, just press “SET”.
-
Page 39: Wrong Codes Remark
4.2.9 Wrong Codes Remark Table 4-2:Wrong Codes remark (SCAD-12U and Models Above) Wrong Remark Codes E-01 Thermocouple break E-02 Inverse phase E-03 Heater overload E-04 Overheat input for drying EGO E-05 Drying temperature is higher than the max. setting temperature of the system E-07 Overheat protection(when PV≥SV +set value, it alarms.)... -
Page 40: Trouble-Shooting
5. Trouble-shooting Fault Possible reasons Solution 1. Circuit fault. 1. Repair the circuit. Open the loading 2. The capacitance switch is not 2. Adjust or replace the capacitance switch and there adjusted well or broken. switch. is no loading work 3. -
Page 41: Repair And Maintenance
6. Repair and Maintenance SCAD-6U and Models Below 41(44) - Page 42 SCAD-12U and Models Above 42(44)
-
Page 43: Filter & Pressure Regulating Valve
6.1 Filter & Pressure Regulating Valve 6.1.1 Filter & Pressure Regulating Valve Drawing Parts list: 1. Pressure adjusting knob 2. Pressure gauge 3. Cup 4. Water outlet Picture 6-1:Filter & Pressure Regulating Valve Drawing 6.1.2 Filter & Pressure Regulating Valve Operation steps 1) Switch on the air source. -
Page 44: About The Machine
6.3.1 About the Machine Model Manufacture date Ф Voltage Frequency Power 6.3.2 Installation & Inspection Check if the pipe are connected correctly Check if the pipe has any leakage Check if the sealed joint has any crack Electrical Component Installation Voltage: Fuse melt current: 1 Phase 3 Phase...
Need help?
Do you have a question about the SCAD-U Series and is the answer not in the manual?
Questions and answers